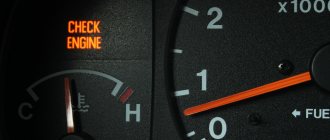
Many of us have encountered such a problem as turning on the engine icon (Check engine...), the appearance of which frightens car drivers. We offer you the 5 most common reasons why the check engine light comes on on the dashboard.
The engine warning light usually appears without warning. The reason for the appearance of the Check engine cannot be immediately understood. Even if the car has auto diagnostics (for example, in cars such as ,), which scans all car systems for errors and, if any, displays a decryption on the information panel, the reasons for the appearance of the check engine light will not be decrypted.
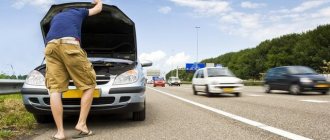
For most drivers, the appearance of this warning icon on the dashboard means the need to urgently go to an auto repair shop to diagnose and eliminate the reason why the “Check Engine” warning sign appeared. But in fact, in most cases, when the “Check” indication appears, it is possible, and in some cases, perhaps, to eliminate the cause yourself without a trip to a car service center, which will save you money.
Replace the oxygen sensor (lambda probe)
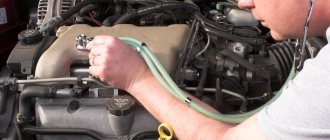
The oxygen sensor in your car is part of the exhaust system that monitors how much oxygen is not burned in the engine's combustion chamber. This sensor helps control the vehicle's fuel consumption. A malfunctioning oxygen sensor (lambda probe) means that the car computer is receiving incorrect data, which can significantly increase fuel consumption and reduce engine power. Most cars have 2 to 4 oxygen sensors. If you have a home car error scanner, then by connecting it to the car, you can easily find out which sensor needs to be replaced.
For what reason does the oxygen sensor in a car become unusable?
Over time, the sensor becomes covered with a layer of used engine oil (oil soot), which reduces the accuracy of reading sensor readings for regulating the gasoline mixture and distributing the optimum. A malfunction of the oxygen sensor in a car leads not only to, but also to an increased content of harmful CO2 substances in the exhaust.
What to do:
If you do not replace a faulty car oxygen sensor, this can lead to your car's catalyst failing (it may burst), which will result in expensive repairs.
The cost of new catalysts is very high due to the precious alloys they contain. On some cars, there are several catalysts, the cost of which can reach up to 90,000 rubles. So don't delay replacing the sensor. Although replacing the sensor and its cost is not very small, it is not commensurate with the cost of the exhaust gas catalyst system. You can also save on replacement costs by doing it yourself. Many car manuals have detailed instructions on how to replace the oxygen sensor yourself. If you know where the oxygen sensor is located, then it will not be difficult for you to disconnect the faulty lambda probe and replace it with a new one. Remember that you cannot delay replacing this important element!
High-quality diagnostics are the key to peace of mind
The client turned out to be a cheerful woman; she told the story of the car repair, which was more like a heartbreaking thriller. It started with CHECK ENGINE blinking while driving. During diagnostics in a neighboring garage, the would-be master “sentenced” the spark plugs. The counter is running - original candles, minus 2000 rubles. from the wallet.
After replacing the spark plugs, the alarm icon on the panel did not go out, and the engine continued to operate intermittently. The car was taken to a more advanced service center, where the “specialists” found a problem in the ignition module. The owner buys the original spare part again. Minus 5000 rub. But the problem does not go away.
Long research led the craftsmen to the idea that the engine needed to be rebuilt. Allegedly, the piston may burn out. This is not uncommon for Opel turbo engines. But before us is an ordinary aspirated engine with a volume of 1.8 liters. The mileage on the odometer is only 20,000 km. Piston burnout? Hard to believe. But the engine was still rebuilt - for 50,000 rubles.
The engine started running smoothly, but the ominous CHECK ENGINE icon did not go out.
As a result of in-depth diagnostics, it was concluded that it would be a good idea to change the knock sensor - they say, the error clearly indicates a malfunction in this circuit. The original knock sensor costs 3,000 rubles. Please note that all amounts are approximate and DO NOT take into account the cost of diagnostics.
From the fact that the car was brought to us, we can guess that replacing the knock sensor did not help. After such an exciting story, we could not remain indifferent and agreed on another standard hour for diagnostics.
Check the fuel filler cap
Many drivers, in most cases, when the “check engine” indication appears, will think about serious problems in the car’s engine, but will not even think to check the tightness of the fuel system, which may be compromised due to a defect or an insufficiently tightened fuel tank cap. This is a very common reason for the appearance of the “Check” engine icon.
Reason for the error:
Leakage of the fuel system due to the passage of air through the fuel tank filler cap will increase the vehicle's fuel consumption, to which the vehicle's diagnostic system will generate an engine error by turning on the "Check engine" indication on the vehicle's instrument panel.
What to do:
If, when the “Check” indication appears, your car has not lost power, and there are no audible signs of engine damage (engine knocking, humming, creaking, etc.), then first check the gas tank for leaks.
Your gas cap may be cracked or not tightened enough. If the cap was not tightened enough, then after tightening it all the way, continue driving the car for a while to see if the engine error disappears. To prevent a check engine light from appearing for this reason, check your fuel filler cap regularly. Remember that the cover must be replaced with a new one periodically!
How to reset errors
For cars with EasyTronic and manual gearboxes, this sequence of actions is relevant.
- Depress the brake and gas at the same time, keeping your feet on the pedals.
- Insert the key into the lock and turn on the ignition. There is no need to start the engine itself.
- Wait a few seconds for the special beep to sound while keeping your feet on the pedals.
If diagnostics have previously been carried out using this method and the fault is completely eliminated, the error will no longer appear.
For automatic transmission
In the case of automatic gearboxes, the sequence of actions looks slightly different:
- Insert the key into the ignition, turn it on, but do not start the engine.
- Squeeze the brake and hold the pedal in this position.
- Move the gearbox lever to “D” mode.
- Turn off the ignition and then remove your foot from the brake.
- Next, simultaneously press both pedals and hold them.
- Turn the ignition back on and do not start the power unit.
- Wait for the diagnostic procedure to complete while keeping your feet on the pedals.
In cars with automatic transmission, it is important to carry out the procedure so that the limit switches operate. Therefore, you need to press the gas pedal as deeply as possible so that a characteristic click appears. At the same time, apply moderate force to the brake.
Car exhaust catalyst
An automobile catalyst helps a car make engine exhaust gases more environmentally friendly. It converts carbon monoxide and other harmful substances into harmless compounds. If your exhaust catalyst has become unusable, you will notice it not only when the engine icon (check) appears, but also long before that, when the car’s power drops by half. For example, when you press the gas pedal, the car will not have good acceleration dynamics as before.
What can cause a car catalyst to fail:
If you regularly service your car in accordance with the car company's maintenance regulations, then the catalyst should not fail. The main reason for catalyst failure is untimely replacement of a faulty oxygen sensor, as well as non-regular replacement of spark plugs when their expiration date expires. When the oxygen sensor or spark plugs are faulty, the conversion of carbon monoxide in the catalyst into harmless chemical elements stops, which leads to overheating of the catalyst, which can therefore fail.
What to do:
If your catalyst has become unusable, then you cannot drive a car, since the engine will not work correctly, warning about this by an indication on the dashboard with an engine icon (check).
Also, your fuel consumption will be greatly increased, and there will be no engine thrust. Although replacing a catalyst is a very expensive repair, there is no escape from repairs. Although there is an alternative to replacing the catalyst with a flame arrester, this is not a 100 percent option. Unfortunately, if you are not an experienced auto mechanic, you will not be able to replace a faulty exhaust gas catalyst yourself. In any case, you will have to contact a car repair shop. Remember that timely replacement of oxygen sensors and spark plugs protects your catalyst from damage!
Determining the appearance of an error on the car dashboard
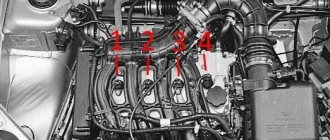
Following the manual, we checked the voltage at the knock sensor connector. Outputs 0 and 5 V on two wires. Far from normal values. It's time to print out the engine electrical circuit diagrams.
The connector should receive black-yellow and violet-gray wires. What do we have?
Although the chip is fully connected, the wires of the wrong colors are connected. To the right of the chip you can see another similar two-pin connector - for the generator. My first thought is, have they been confused?
Again we turn to the circuits - this time to the generator circuits. Everything is in order here: there is a chip with the correct gray and brown wires. Just for fun, we swapped the connectors - they snap into place! It's easy to confuse! Now it remains to understand: what happened to the wires to the knock sensor? After all, according to the scheme, they should be a different color. Maybe the diagram is wrong?
Remove the connectors on the engine control unit. We see that the wires are the correct colors - black-yellow and violet-gray. Here's a mystery - they can't change color along the way!
The solution turned out to be simple: another sensor was hidden behind the drive shaft.
This is the oil level sensor. And also with a two-pin connector. This is the same connector that should be on the knock sensor.
Thank you, Opel! You just have to figure out how to assemble three sensors with the same connectors in one place. Ignorance or inattention of “specialists” led to huge financial expenses for the car owner. I had to pay 60,000 rubles to replace serviceable parts.
Our hostess only left money for an hour and a half of diagnostics. There was no need to change anything. This is the main quality of a good diagnostician - the ability to thoroughly check everything possible, and only then recommend repairs. Order diagnostics only from professionals - it’s much cheaper this way!
Many of us have encountered such a problem as turning on the engine icon (Check engine...), the appearance of which frightens car drivers. We offer you the 5 most common reasons why the check engine light comes on on the dashboard.
The engine warning light usually appears without warning. The reason for the appearance of the Check engine cannot be immediately understood. Even if the car has auto diagnostics (for example, in cars such as ,), which scans all car systems for errors and, if any, displays a decryption on the information panel, the reasons for the appearance of the check engine light will not be decrypted.
For most drivers, the appearance of this warning icon on the dashboard means the need to urgently go to an auto repair shop to diagnose and eliminate the reason why the “Check Engine” warning sign appeared. But in fact, in most cases, when the “Check” indication appears, it is possible, and in some cases, perhaps, to eliminate the cause yourself without a trip to a car service center, which will save you money.
Replace the mass air flow sensor
The mass air flow sensor regulates how much air needs to be added to the gasoline mixture for optimal ignition of the fuel. The sensor constantly reports data to the car's computer about the amount of oxygen supplied. A faulty mass air flow sensor increases fuel consumption, increases CO2 levels in the exhaust gas, and reduces engine power and smoothness. Also, if the sensor is faulty, poor acceleration dynamics are observed. In cold weather, a car with a faulty sensor has difficulty starting.
What are the reasons for the failure of the mass air flow sensor:
Most sensor failures occur due to improper installation of the air filter during its scheduled replacement. Also, if you do not regularly change the air filter, as required by the vehicle maintenance regulations recommended by the manufacturer, the mass air flow sensor may fail.
What to do:
Theoretically, you can drive for a long time with a broken mass air flow sensor (several weeks or months).
But you will notice that the longer you drive, the more your fuel consumption increases. Replacing the sensor in a car service is not that expensive, since the work itself does not take much time and is quite simple. The main costs are related to the cost of the sensor, which for some car models can be 11,000-14,000 rubles if it is an original sensor or up to 6,000 rubles if it is an analogue substitute. Replacing the sensor yourself is very simple. But due to the low cost of replacing the sensor, you can entrust this work to a mechanic at a car service center. Remember that you need to regularly change the air filter, observing the vehicle maintenance regulations!
Fault table
To understand the errors that a car may show during operation, we suggest that you familiarize yourself with the table below. Codes indicating problematic operation of the engine, electrical wiring, sensors and other elements are deciphered here.
| Name | Decoding |
| P0100 or P0101 | Indicates poor performance or failure of the air flow sensor. Usually a check of the power wires is required |
| P0011 | The system responsible for synchronizing the intake camshaft is not working or is damaged. When a six-digit code appears, just discard the last two digits |
| P0014 | The solenoid valves in the camshaft phase shifters do not function. An identical problem can also be displayed in the form of codes 1463 or 001463. A check of the sensor's functionality is required |
| P0068 | The load does not match the throttle position. Usually the problem is solved by cleaning the node |
| P0102 - P0103 | The air flow sensor has failed, you need to check the device and the wiring connecting it |
| P0105 - P0108 | Possible breakdown of the air flow pressure regulator |
| P0110 - P0113 | Intake air temperature sensor is broken or not working |
| P0115 - P0118 | The t-coolant sensor has failed. Usually the problem is confirmed by the chaotic operation of the temperature sensor needle or the motor temperature exceeding the permissible limit. Checking the device and electrical circuit is required |
| P0120 - P0123 | Throttle position controller “A” is not connected correctly, is not receiving power, or is faulty |
| P0125 | Excessively low antifreeze temperature in a closed circuit, or sensor failure |
| P0130 - P0167 | One of the lambda probes is not working correctly, you need to check the oxygen controllers and the wiring that powers them |
| P0170 | The fuel remaining diagnostic system does not work. The presence of a problem can also be indicated by codes 017011/017012 |
| P0171 or P0172 | Lean or rich fuel mixture. Perhaps we are talking about a lack of compression, or a broken oxygen mass flow sensor |
| P0173 - P0175 | The mixture is poorly formed in the 2nd cylinder |
| P0176 - P0179 | The emission controller or its wiring is damaged |
| P0180 - P0188 | Failure of the fuel temperature check sensor |
| P0190 - P0194 | Failure of the fuel pressure controller in the rail. The sensor is checked, the connectors on the block are cleaned, and the wiring is diagnosed |
| P0195 - P0199 | The operation of the device that determines the temperature of the engine fluid in the engine is malfunctioning; failure is possible |
| P0200 - P0214 | Injectors are not working correctly |
| P0217 | Engine overheating |
| P0218 | Transmission overheating |
| P0219 | Engine speed too high |
| P0220 - P0229 | The controller responsible for checking the throttle position is not working correctly |
| P0230 - P0233 | Incorrect signal from the fuel pump. This is usually caused by damaged wiring. |
| P0235 - P0242 | Turbocharging sensors are not working correctly or have failed |
| P0243 - P0250 | Exhaust gas turbine shutter solenoid failure |
| P0251 - P0260 | In turbocharged engines - breakdown of the pumping device of the fuel injection system |
| P0261 - P0296 | Injectors are faulty |
| P0300 - P0312 | The presence of misfires in the ignition system associated with poor performance of any of the engine cylinders |
| P0320 - P0323 | The ignition distributor or distributor is faulty |
| P0325 - P0329 | Knock controller malfunction |
| P0335 - P0339 | The crankshaft position controller “A” has failed or is not receiving enough power. |
| P0340 - P0344 | The camshaft adjuster is not working properly |
| P0350 - P0362 | Damage to high-voltage wires supplying current from the ignition coil |
| P0370 - P0378 | Incorrect data from sensors B and A from timers |
| P0385 - P0389 | Crankshaft position controller B has failed |
| P0420 - P0434 | Failure of catalyst sensors |
| P0440 - P0455 | The fuel supply control system functions intermittently |
| P0460 - P0464 | Fuel level controller is broken |
| P0465 - P0469 | The air flow regulator in the purge system is damaged or not powered |
| P0470 - P0479 | Exhaust gas pressure sensor failure |
| P0480 - P0503 | The speedometer controller is not working correctly or is faulty |
| P0505 - P0507 | Engine idle speed control does not work |
ABS errors
When the ABS system fails, the problems are displayed as a two-digit combination.
| Code name | Designation |
| 16 | The power line connecting the left front wheel valve solenoid is damaged or shorted to ground. The code is recognized only when driving at a speed of more than six kilometers per hour |
| 17 | The electrical circuit responsible for controlling the right front wheel solenoid valve has failed |
| 18 | Rear brake system valve line is closed or damaged |
| 19 | The valve relays are faulty. An error can be detected if there is a voltage supplied to the device exceeding 5 volts for thirty seconds |
| 25 | The gear wheel responsible for controlling the rotation speed has failed or is badly worn. This code is only displayed when the wheel is spinning at least 25% faster than other devices for two minutes |
| 35 | The electrical circuit that closes the pump relay that supplies fuel back does not work. Damage registration is possible if the response lasts more than five seconds |
| 37 | The line responsible for turning off the brake pedal is damaged. Usually the cause is a broken sensor wire |
| 39 | Incorrect operation of the left front wheel controller. You need to make sure the integrity of the cable and sensor |
| 41 | The ABS sensor on the left front wheel is broken or disconnected. You need to unscrew the wheel and try to insert the plug into the connector with your hands, sometimes it just comes off. |
| 42 | Identical to the previous error, but for the controller on the right |
| 48 | Low car battery voltage. The driver's task is to check the operation of the battery and diagnose the presence of acid in the banks. It is recommended to perform testing with the power unit switched off or running. |
| 55 | The control module of the anti-lock braking system has failed |
Replacing spark plugs and high-voltage wires
Spark plugs in a car are the main components for igniting the fuel mixture. If the spark plugs are faulty, the spark will not be supplied correctly to ignite the gasoline mixture. Faulty spark plugs often result in a lack of spark or an incorrect spark interval, which results in the engine not running properly. If the spark plugs do not work properly during acceleration, especially from a standstill, you may feel slight jolts.
What are the reasons for spark plug failure:
Most spark plugs in pre-1996 vehicles need to be replaced every 25,000 to 30,000 kilometers. In newer cars, spark plugs last more than 150,000 km. However, these scheduled spark plug replacement intervals may be reduced by various factors related to fuel quality and driving style.
What to do:
If your spark plugs have not been changed for a long time, or you feel failures in the engine operation associated with ignition, then you must immediately replace them with new ones without delay.
Do not try to save money by untimely replacement of spark plugs, since the cost of spark plugs is not very expensive, as well as the work of replacing them. By replacing old spark plugs, you will improve engine performance and reduce your vehicle's fuel consumption. Changing spark plugs yourself is quite easy. Basically, they are easily accessible under the hood of the car. You need a regular spark plug wrench to remove the spark plugs from the engine. It is also advisable to monitor the condition of high-voltage wires, since over time they can become unusable and allow electricity to pass through, which is transferred to the spark plugs, which will reduce the strength of the spark. Remember that regularly replacing spark plugs, in accordance with your car’s maintenance schedule, protects your exhaust catalyst from breakdowns and also improves engine performance!
If the Check engine indicator light comes on on the dashboard of your car (or simply the “check” is on), you should at least be wary. The reasons for this can be very diverse - from a loose gas tank cap to serious problems with the engine.
All Opel Astra error codes: decoding and troubleshooting methods
The Opel Astra H is equipped with a large number of different sensors that monitor the operation of various components of the car. Over time, car parts wear out, which can lead to various errors in the electronics. Decoding Opel Astra H error codes in Russian will be useful information for any owner of this car or a car mechanic.
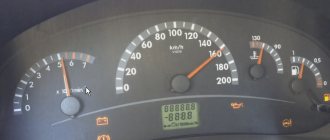
A sign of an existing error in the control units is a burning “Check Engine” icon on the left side of the speedometer.
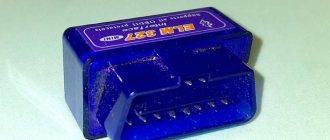
One way is to read errors using a diagnostic scanner, which can read the codes and display them on the computer screen along with a decoding of the designation. But not every owner has such a device.
Therefore, the more common way is to independently determine the code and search for it in the Opel Astra H error code table in Russian. The method of displaying data depends on the type of gearbox on the Opel Astra.
Check Engine Light
Scanner for reading codes
To display a list of errors on the liquid crystal display of the instrument panel of a car with a manual or robotic gearbox, you must perform the following steps:
- Get behind the wheel of a car.
- With your right foot, gently press the gas and brake pedals. You need to press gently and not too hard.
- Wait a few seconds and insert the key into the ignition. Continue holding the pedals with your feet.
- Turn on the ignition while continuing to hold down the pedals.
- After some time, three ESP symbols will appear on the display screen in the center of the instrument cluster, and below them a six-digit digital message, which is an error code.
On Astra cars with automatic transmission the procedure is slightly different:
- Get behind the wheel of a car.
- Insert the key into the ignition and turn it to the ignition on position.
- Press the brake pedal with medium force and hold it in this position.
- Switch the gearbox selector to “Drive” mode.
- Turn the key off and turn off the ignition and release the brake pedal.
- With either foot, press the brake and gas pedals simultaneously with medium force.
- Turn on the engine ignition.
- After a few seconds, an error code will appear on the screen that can be read.
If several errors are stored in the control unit, they will be displayed one after another. The end of the error list is indicated by six zeros. If there is no error list, the display will also show six zeros.
The video from the Amazing Road TV channel shows the process of reading errors from the Opel Astra N instrument cluster.
How to decrypt correctly?
The resulting six-digit codes consist of a fault code (the first four characters) and its meaning (the remaining two). Sometimes a five-digit code appears, in which case you must put a zero in front of the symbols. There are four categories of diagnostic codes, designated by letter.
The letter is not written on the display, it is only available in the error tables and is used to identify the node that has problems in operation:
- letter B indicates problems with electrical components (power windows, various switches, door locks, airbags, etc.);
- the letter C indicates problems in the chassis;
- the letter P indicates errors in the engine and gearbox control units;
- The letter U indicates errors in electronic units (parking sensor control unit, airbag control unit, etc.).
For example, using the code on the instrument cluster ECN 161450, we determine the error number - 1654. According to the table, only one error P1614 can correspond to it - a communication problem between the immobilizer and the chip in the key. The first digit after the letter in the code determines the class of the error.
Combination of Opel Astra with the “Check Engine” indicator on
There are three class options:
- the number 0 indicates a code common to the ODB II diagnostic system;
- numbers 1 and 2 are reserved by the factory to determine the error class;
- number 3 is a reserve number.
When reading errors, keep in mind that the third digit from the beginning in the error code indicates the type of malfunction.
The following error variations are available:
- numbers 1 and 2 refer to the fuel supply system;
- number 3 indicates problems with the ignition circuits;
- number 4 refers to auxiliary components (catalytic converter system or fuel vapor recovery system, etc.);
- number 5 is responsible for engine idle speed sensors;
- number 6 indicates problems with the vehicle’s electrical and electronics;
- numbers 7 and 8 indicate the presence of problems in the transmission control units.
The last two digits in the code indicate the serial number of the error.
The P1614 error discussed above consists of the following component groups:
- P - problem in the engine control unit or gearbox;
- 1 - error code set by the manufacturer;
- 6 - there is a problem in electrical or electronic circuits;
- 14 is the error number.
For Opel Astra H cars with diesel sedan and station wagon, the method of reading and decoding errors is absolutely identical. Due to the specific design of cars with a diesel engine, they may have their own errors (for example, failure of glow plugs).
The main error codes for the Opel Astra H in Russian for XER series gasoline engines and CDTi diesel engines are given in the table:
| Error code | Decoding |
| P0100 - 0104 | Air flow meter problems |
| P0105 - 0109 | Malfunction of the sensor for measuring the mixture pressure in the intake manifold |
| P0110 - 0114 | Incorrect operating parameters of the intake air temperature sensor |
| P0115 - 0119 | Check the cooling system temperature sensor circuits |
| P0120 - 0124 | Problems with the throttle position sensor |
| P0125 - 0126 | Abnormal coolant temperature |
| P0130 - 0135 | Check the first oxygen sensor |
| P0136 - 0141 | Check the second oxygen sensor |
| P0170 - 0172 | Check the composition of the working mixture |
| P0176 - 0179 | Check the working mixture composition sensor |
| P0180 - 0194 | Malfunction of the sensor that measures the fuel temperature |
| P0195 - 0199 | Malfunction of the sensor that measures the oil temperature |
| P0200 - 0204 and P0213 - 0214 | Malfunction of fuel injection nozzles |
| P0215 | Fuel check valve failure |
| P0216 | Erroneous signal in the ignition timing timing circuit |
| P0217 - 0218 | Engine or transmission overheating |
| P0219 | Engine speed controller failure |
| P0220 - 0229 | Throttle unit errors |
| P0230 - 0233 | Fuel pump power problems |
| P0234 | Excessive engine load |
| P0235 - 0250 | Malfunctions in the turbocharger (relevant for diesel engines) |
| P0251 - 0260 | Errors in fuel sensors in pump injectors (for diesel) |
| P0261 - 0272 | Injector malfunctions (for diesel) |
| P0300 - 0304 | Problems with ignition by cylinder |
| P0320 - 0323 | Problems with ignition distribution |
| P0325 - 0334 | Knock sensor errors |
| P0335 - 0339 and P0385 - 0389 | Engine crankshaft position sensor errors |
| P0340 - 0344 | Camshaft Position Sensor Errors |
| P0350 - 0354 | Ignition coil malfunctions |
| P0370 - 0381 | Faulty glow plug circuits (diesel) |
| P0382 and P0400 - 0408 | Exhaust gas recirculation system failure |
| P0410 - 0419 | Problems in the intake manifold |
| P0420 - 0434 | Poor catalytic converter efficiency |
| P0440 - 0455 | Errors in the fuel vapor filtration system |
| P0460 - 0464 | Fuel quantity sensor malfunction |
| P0465 - 0469 | Manifold purge sensor malfunction |
| P0470 - 0479 | Errors in the gas pressure sensor in the exhaust manifold |
| P0480 - 0485 | Cooling fan errors |
| P0500 - 0503 | Speed sensor error |
| P0505 - 0507 | Errors in idle speed parameters |
| P0510 | Throttle limit switch faulty |
| P0520 - 0523 | Malfunction of the sensor that detects oil pressure |
| P0530 - 0534 | Air conditioning system failure |
| P0550 - 0554 | Errors in the power steering system |
| P0560 - 0563 | Incorrect voltage in the electrical on-board network |
| P0565 - 0580 | Malfunction of cruise control devices |
| P0600 - 0609 | Electronic control unit errors |
| P0620 - 0622 | Generator errors |
| P0705 - 0709 | Automatic transmission sensor faulty |
| P0710 - 0714 | The fluid sensor in the automatic transmission is faulty |
| P0715 - 0718 | Incorrect operation of automatic transmission torque converter sensors |
| P0720 - 0727 | Malfunction of the sensor measuring the crankshaft speed |
Sensors
One of the common errors on the Astra GTC is error 011014, which indicates a problem with the air temperature sensor supplied to the engine. The sensor can be replaced immediately or wait a few days, since there are not isolated cases of this error indication disappearing.
Serious problems are indicated by error code 59761 or 059761, indicating a faulty thermostat. In this case, there is a slow warming up of the engine, which does not reach operating temperature even after driving for several tens of kilometers.
The problem may be caused by erroneous data from the temperature sensor, so you must first make sure it is working. Late releases of the machine when the thermostat fails may display error P00b3.
On diesel Astras, a problem with the thermostat may be indicated by code 011508.
The appearance of error 013604 is accompanied by a noticeable increase in fuel consumption. This error indicates an open circuit in the second oxygen sensor. The problem may be in the wiring of the sensor, in its connector and in the sensor itself.
Before purchasing a new sensor, you need to look at the condition of the wires and wiring connectors.
Another solution to this problem could be to reflash the engine control unit to Euro 2 standard, since it does not require a second sensor.
Error 006800 was observed on a 2008 Astra, first diagnosed as a problem with the throttle assembly.
At the same time, there is some uneven idle speed and slightly increased fuel consumption in this mode.
The reason was damage to the plastic valve cover through which air was leaking into the engine crankcase. When replacing a part, it must be taken into account that the engine covers of the 1.8 liter Z18XER and 1.6 liter Z16XER are identical.
Engine problems
One of the most common reasons for the Check Engine light to come on is errors 030101, 030201, 030301 or 030401, indicating cylinder misfires. In this case, there is “triple” of the engine, jerking and increased fuel consumption. This problem is associated with the poor design of the ignition module on the Opel Astra, which often fails. In this case, only replacing it will help.
On high mileage vehicles, error message 212052 may appear. This problem is due to contamination or dampness of the electronic gas pedal. If the Check Engine light comes on sporadically, you can simply wait until the moisture that has gotten into the pedal or on the connectors dries. Otherwise, you will need to disassemble and clean the pedal pad.
On new cars, error 000970 was often recorded, caused by mismatched operation of the vehicle's CAN bus due to the battery being disconnected during transportation. In these cases, the error went away over time.
On used cars, along with error 000970, codes 001462 and 001463 appear, indicating problems with the solenoid valves of the engine camshaft phase shifters.
If the procedure for cleaning the contacts does not help, then you will have to change these valves along with the camshaft gears.
After replacing the timing belt yourself, it is not uncommon for errors 001161 and 001166 to appear, signaling incorrect valve timing. In this case, it is necessary to recheck the correct installation of the shafts. Sometimes the cause of these errors is incorrect operation of the solenoid valves of the phase regulator (they may appear together with errors 1462 and 1463).
The display of errors on the display of the instrument cluster is clearly shown in the video from the author Mr11vlad11.
Problems with electrical wiring
The most common problem of all Opel Astras is flooding and oxidation of the contacts of the fuse box and the engine control unit. This often appears shortly after washing the left arch of the car and is shown with code 000970.
The engine cannot be started. To fix the problem, it is necessary to disconnect the contacts of the blocks and wash them with special cleaning liquids. Then the contacts should be lubricated with a special lubricant that prevents re-oxidation.
On cars with automatic transmission, error 170000 may appear. The appearance of the error is accompanied by poor gear shifting while driving. One of the main reasons for this error is damage or rotting of the wires going to the box selector. But there may be other problems, which can only be identified by a detailed inspection of the automatic transmission components.
A common malfunction is rotting of the generator wiring or burnout of the diode bridge. In this case, the battery lack of charge light comes on and error 062103 appears. The situation can only be corrected by replacing the bridge or damaged wiring and cleaning the oxidized contacts. Sometimes incorrect operation of the diode bridge is indicated by error 062104.
Other problems
On some Astra GTC cars with a 1.8-liter Z18XER engine, error 017011 is observed, indicating that the mixture is too lean. At the same time, there is an increased consumption of gasoline at idle speed - about 2.5 l/h. The reason lies in the damaged membrane of the vacuum brake booster, through which air leaks into the engine.
In some cases, at idle, you can hear a quiet hiss of air in the amplifier housing. There is only one way to solve the problem - replacing the vacuum assembly. A close one is error 017012, which can also be interpreted as an excessively lean mixture.
In this case, the cause may be a damaged membrane, clogged injection nozzles, or impaired operating parameters of the oxygen sensor.
Reset error
After eliminating the cause of the error, it remains stored for some time in the memory of the control unit.
You should not rush to reset the error, since it will soon be overwritten by other data that does not contain erroneous information. A faster reset method is any ODB II tester for vehicle electronics.
You can remove yourself only the InSP service indicator, which lights up in the field of the daily mileage counter.
To do this you need to do the following:
- Turn off the ignition, press and hold the daily mileage reset button. After 3 seconds, an interval indication will appear on the display, looking like “InSP 15000” or “InSP 0”.
- While holding the button, press the brake pedal and turn on the ignition.
- Without releasing the button and pedal, wait 10–12 seconds, the display will show “InSP 35000” for gasoline cars and “InSP 50000” for diesel cars. The InSP sign will flash for a while and then disappear.
Loading …
Video
The process of resetting the service indicator is shown in the Amazing Road TV video.
What does the Check Engine Light mean?
The name of the Check engine indicator literally translates as “Check engine”. However, when the light comes on or blinks, the engine may have absolutely nothing to do with it. A lit indicator may indicate problems in the fuel supply system, failure of individual ignition elements, etc.
Sometimes it can be a very minor problem - for example, a loose gas cap or a faulty catalyst. However, you should not ignore the indicator signals under any circumstances, as this can result in serious problems.
Sometimes the cause of the indicator light may be poor fuel quality. So don’t be surprised if, after refueling at an unfamiliar gas station, you see the Check Engine light flashing.
Typically the indicator is located on the car's dashboard under the engine speed indicator. It is indicated by a schematic engine or a rectangle with the inscription Check engine or simply Check. In some cases, instead of an inscription, a lightning symbol is depicted.
Is it possible to continue driving while the light is on?
The brake pads are worn out, it's time for the next maintenance, the speed is switched incorrectly, low-quality fuel is used, the on-board voltage has dropped - all this can cause the Check indicator to light up. First of all, you should check the motor. If the reason for the signal to turn on is due to engine malfunctions, it is dangerous to continue driving.
The problem is aggravated by the fact that it is impossible to independently determine the malfunction of a modern internal combustion engine by smell or color. You should contact professionals who will use a scanner to identify the malfunction, if, of course, there is one.
A burning Check light may indicate various breakdowns - it is better not to ignore it
Therefore, if after restarting the car the light does not go out, you can only drive it to the nearest car service center. There they will conduct a comprehensive diagnostic of the engine and its systems.
Operating a vehicle with the Check Engine icon illuminated leads to increased fuel consumption, unstable engine operation, and decreased traction characteristics of the vehicle. Moreover, in this case, the car owner may lose the guarantee for car repairs.
Decoding error codes with meanings
Combination options are different - it all depends on the chosen method. Remember that when you start the self-diagnosis mode, six-digit codes are displayed on the odometer panel. When using a personal computer with proprietary software installed – five characters. The first is a letter that allows you to determine the type of breakdown, and only then the combination is displayed.
First character
Letter characters have the following meaning:
- C – the problem concerns the car suspension.
- P – the transmission or gearbox is not functioning.
- B – elements of the body structure are not working properly - the immobilizer, central locking, mirror folding system, power windows, and so on.
- U – electronic components – additional modules or units – have failed.
Second character
The second character usually doesn’t interest us, but still:
- 0 – common code for OBD-II;
- 1 and 2 – manufacturer code;
- 3 – reserve/
Third character
The number in the third position determines the malfunction itself:
- 1.2 – elements of the fuel or air supply system have failed;
- 3 – the ignition is not working properly;
- 4 – the additional control system does not work;
- 5 – no idle;
- 6 – the electronic control unit module or the electrical circuit through which the manufacturer connected it has burned out.
- 7.8 – the gearbox does not function.
Why did the light come on and how to fix it
The main situations in which the indicator lights up and the recommended courses of action for the car owner:
- If the Check engine lights up and goes out immediately when starting the car, there is no damage to the engine. The cause of the fire is most likely harmless - the fuel tank cap is lost or not screwed in properly. Just wrap it tightly and check if the warning disappears.
- If the indicator lights up while driving, you should stop and check the wires. You may find a cable hanging loose under the hood or an open battery terminal. This applies to all attachments - wires, hoses, etc.
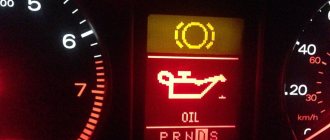
- If the light flashes while driving, you should stop and check the sounds made by the engine, pay attention to the oil level, and inspect the sides of the engine. If no visually obvious violations are detected, it is recommended to drive to the nearest car service center and carry out diagnostics.
- If the engine is running normally and the Check light is constantly flashing, there is most likely an ignition failure. You should check the spark plugs and coil, pay attention to the quality of the fuel. To do this, it is better to contact the nearest auto diagnostic center.
- If the indicator is constantly on, you need to stop, unscrew the spark plugs and check the gap. Gaps that exceed 1.3 may cause the light bulb to burn out.
- In addition, when the “check” is on, the ignition is usually checked. Any car service center has special testers that allow you to determine the wear of wiring insulation.
- A faulty fuel pump can also cause the light to come on. You should stop and listen to the sounds the fuel pump makes. A smooth hum without clicks or pauses is considered normal. If extraneous sounds appear, the pump should be dismantled, washed inside and the filter cleaned.
- Serious engine malfunctions can be indicated by the coolant temperature. If it is above 85–90 degrees, and the Check engine lights up while driving, the engine is definitely faulty. In this case, it is advisable to call a tow truck or drive at low speed to the nearest car service center.
We have already noted that the Check light comes on every time you start the engine in yellow or orange. This is normal if the flashing lasts no more than 3-4 seconds and stops when the other dashboard lights flash. Otherwise, follow the steps recommended above.
Video: Check sensor lights up
Table: reasons for the Check engine light to come on and suggested actions
| When and in what cases does the “check” light come on? | Possible reasons | Suggested Actions |
| When driving, when accelerating | Harsh acceleration, faulty air filter | Replace filter, accelerate smoother |
| When the indicator flashes, the engine starts | The fuel in one of the cylinders does not burn completely; the gasoline either burns out in the exhaust pipe or immediately enters the catalyst | Replace spark plugs, check coil and armored wires, check timing marks |
| After refueling | Low fuel quality | Change gas station |
| When the ignition is turned on | Normal car reaction | Nothing should be done |
| After washing the car, engine, after rain | Water got into the Check engine wiring | Treat with WD40, dry, clean contacts |
| Cold | Knock sensor faulty | Replace |
| On a hot engine | Camshaft sensor faulty | Replace |
| At high speeds | Missing ignition coils or faulty crankshaft sensor | Replace coil or sensor |
| At idle | Throttle sensor malfunction | Replace |
| After replacing spark plugs | “Poor” combustible mixture | Change the octane number of gasoline to a higher one |
| After replacing the air filter | More air began to flow, the composition of the exhaust changed, the lambda probe reacted | Turn off the engine and start again |
| After replacing the timing belt | A terminal has come off from some sensor, most likely the air hose | Check terminals |
| After installing gas equipment | Fuel injector emulation is done incorrectly | Tune |
| After installing the alarm | Only one power line is connected to the turbo timer, the second one contains a temperature sensor, brake pedal and mass air flow sensor | Reset Check engine, connect both lines |
| After replacing the fuel filter | Low pressure filter installed | Replace filter |
| With a simultaneous increase in fuel consumption | Driving too long, oxygen heating up or poor quality fuel | Refuel with high-quality fuel and give the car a rest |
| On long climbs | Worn timing belt, faulty sensors | Check and replace |
| After replacing the ignition module | Module connection problems | Remove and reconnect the positive terminal from the battery |
| At sub-zero temperatures | Malfunction of the throttle position sensor or disconnection of its chip | Replace the device or replace the chip |
| When you press the accelerator pedal | Air filter clogged | Clean or replace the filter |
Is resetting errors correct or not?
- Messages 25
- Name: Sergey
- City: Bila Tserkva
- Car: astra g 1.4 z14xe
- Registration: 01/11/2009
#2
- Messages 2,070
- Name: Mikhail
- The city of Odessa
- Car: Hyundai Accent
- Registration: 05/11/2008
hi. I need to clear the errors. I read somewhere here on the forum that the removed positive terminal needs to be attached to the negative terminal. So the question is, to the also removed negative terminal or directly to the negative terminal of the battery?
#3
- Messages 25
- Name: Sergey
- City: Bila Tserkva
- Car: astra g 1.4 z14xe
- Registration: 01/11/2009
#4
- Messages 2,070
- Name: Mikhail
- The city of Odessa
- Car: Hyundai Accent
- Registration: 05/11/2008
Yes, I’ll play it safe a little. Because I allowed my father-in-law to remove the Akum from the running engine of my car, and then I read on the forum about the consequences. at least it went well.
#5
- Messages 25
- Name: Sergey
- City: Bila Tserkva
- Car: astra g 1.4 z14xe
- Registration: 01/11/2009
Well, this is one thing, this is another. By the way, you can’t short-circuit the battery terminals either.
#6
What are you doing here? A.
- Messages 3,327
- Name: Yuri
- City: Dnepr
- Car: OPEL Z18XE+automatic transmission
- Registration: 08/26/2008
so to be or not to be? I read somewhere here. It seems like short-circuiting completely resets errors. Don’t hit hard if you wrote it wrong.
#7
- Messages 375
- Name: Alexander
- City: Alexandria, Kirovogradskaya
- Car: Dacia Logan 1.6 2008
- State number: VA7940AK
- Registration: 03/02/2009
#8
- Messages 2,070
- Name: Mikhail
- The city of Odessa
- Car: Hyundai Accent
- Registration: 05/11/2008
The book on Opel writes that in order to reset the errors of the control device, it is enough to remove the negative terminal from the battery for approx. for 10 seconds. And if after what seems like 20 starts (I don’t remember exactly, the book is in the car) the error does not recur, it is automatically erased from the control unit.
Resetting or zeroing the Check indicator
In most cases, as the table shows, Check lights up when a sensor fails or the operating conditions of the vehicle change. However, even after diagnosing and eliminating the malfunction, the light sometimes continues to light.
The fact is that the “trace” of the error remains in the computer’s memory. In this case, you should “reset” or “zero” the indicator readings. You can easily do this yourself by performing a number of simple operations:
The sensor is reset and the Check light is no longer on. If this does not happen, contact the service center.
When the Check Engine light comes on on the dashboard, you almost always need to stop the car immediately. Using the recommendations given in this article in practice will help you avoid complex, expensive engine repairs. Good luck on the roads!
Hello everyone, this error P1101, on other cars without a turbine, occurs because we do not let the catalyst pass when it gradually becomes clogged.
On a turbocharged engine due to the intake filter, catalyst, and as the master said, dirt sticking to the valves on the bypass valve, which switches the air flow to the XX long manifold for medium and short power loads. What a dependence on gasoline, straight!!! In Russia, the old GOST for gasoline has not yet been abolished, and so I will divide gasoline into two so that it is clear which one can be poured, this is euro, which cannot be AI-95. Let's start with the old guest, he means pure gasoline, + condensate, octane boosters, iron oxide, manganese oxide, sulfur, or gel like at TNK, which he himself personally poured out Rexton gasoline from the ramp. The new standard, which was introduced a long time ago, is pure gasoline, octane boosters, esters, which are saturated using the creasing method at the plant using special technologies, it is clean, does not produce carbon deposits and burns well, and at the same time slowly at 95 octane. Old Guest gasoline, does not burn, octane boosters are only mixed in and kill the combustion so that it proceeds slowly at 95 octane, while there is not enough energy in the cylinders, we press the supply more and more, but there is no sense, soot in the gases passes through the crankcase ventilation and enters in the throttle and in the intake valve there is a long/short switching, the recirculation valve also becomes clogged, the valves become covered with salts - they overheat, there are deposits in the oil, and most importantly, the turbine impeller becomes covered with a layer of burnt-out crap, there are metals, sulfur, etc., this upsets the imbalance, and so Once it gets into the bushing, the turbine dies after a certain time. The catalyst is gradually covered with oxides and DC. As a result, not only these errors will occur, but also a bunch of others. I have a 1.4T, I only pay 95 euros ecto from nova at Lukoil where they accept visa cards and savings cards. I have several diagnostic scanners that I use and check my Opel, there are no errors. And so we repeat regarding the throttle valve, error P2135 - Throttle / Pedal Position Sensor / Voltage Correlation of Switch “A” / “B” - this means the correlation is a different value for the same damper action, for example, it has the same voltage at 8%, and when, after pressing, it comes back again and the computer forces it to open by 8%, it already shows something else, while the control is based on two sensors from 0 -5V and 5-0V, there are no coincidences, either something is wrong, or the damper position sensor is covered. I had this error on a Cruise with a mileage of about 1, I ordered the valve to be washed, other people took it apart, washed it, I came to the room and I threw it all off and it’s still rolling. I can make a scanner at will if everyone needs it, to scan specifically the automatic transmission engine using the EOBD OBDII protocol. cost 4000 rubles, with your own hands and on German equipment. There are a lot of definitions for variables too.
Diagnostics of Opel Astra H without a scanner
To read errors on your car, you don’t have to go to a service center or buy a scanner. There is an option to use one of the two methods below. Much depends on which gearbox is installed on the car - manual/robotic or automatic.
If a computer is not available or there is no special adapter for connection, you can perform the diagnostics yourself. To do this, just start the self-diagnosis mode.
For manual and robotic gearboxes
The sequence of actions if you have a car with a manual or robotic gearbox is as follows:
- The driver simultaneously presses the gas and brake pedals. The ignition must be turned off at this moment.
- While continuing to press the pedals, you need to insert the key into the ignition and turn it. There is no need to start the engine.
- On the instrument panel (where the mileage is displayed) the inscription “ECN” (error code number) and detected errors in the form of codes will be displayed. If there are several errors, they will be displayed one by one. To understand what exactly the problem is, you need to decipher the code.
For automatic transmission
If your car is equipped with an automatic transmission, you can read the error code like this:
- Insert the key into the lock, turn it, wait until the ignition turns on. There is no need to start the engine.
- Depress the brake pedal. At this time, without removing your foot from the pedal, move the gearbox to position “D”.
- Turn off the ignition and take your foot off the pedal.
- Depress the gas and brake pedals at the same time. At this time, also turn on the ignition.
- If everything is done correctly, you will see “ECN” (error code number) and error codes on the dashboard.
Note! When performing self-diagnosis on a car with an automatic transmission, you must press the gas pedal to the floor. The brake is an exception; it can be pressed with average force.