14 February 2018 Lada.Online 89 139 10
AVTOVAZ first began installing side mirrors of the new SE model (with heating, electric drive and turn signal indicators) on the Lada Granta liftback. Then they began to be equipped with Luxe trim levels of the sedan. The following describes how to install and connect standard liftback mirrors with your own hands to simpler versions of the Lada Granta sedan, as well as to the Lada Kalina station wagon and hatchback.
Heated mirrors
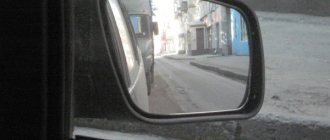
Autumn and winter will bring both rain and snow, or even better, both at the same time, mirrors and our
visibility will suffer. Therefore, in wet weather, in snow or when the mirrors are icy, the “mirror heating” function is indispensable, because it will literally warm them up in 4-5 minutes and dry them, just while the car is warming up.
We buy special mirrors
Installation:
1. Remove the rear mirror trim and the mirror element - this is the most difficult and important thing.
2. Next, unscrew the 3 bolts from the interior and disconnect the mirror from the bracket.
3. Now you need to pull the wires through the special holes where the adjustment cables pass.
4. Assemble the mirrors in reverse order.
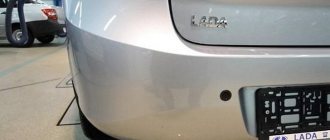
A special feature of the Lada Granta Liftback is a new modification of the side-view mirrors. By default, they are included as standard, unlike the Lada Granta Sedan, Priora, VAZ 2109, 2108, 21099.
Due to various reasons, such as an accident, collision, impact, reflectors are damaged. The replacement process is not at all complicated; every car enthusiast can do it.
In order to provide methodological assistance to inexperienced owners of the Lada Granta Liftback, we recommend following the instructions below.
Installation
Remove the door trims and dismantle the old exterior mirrors (by removing the mounting screws). Mirrors of the new SE model are installed in place of the old ones without modifications.
To install the joystick, make a hole in the door trim using a file or a utility knife. Sample:
To stretch the wires from the interior to the doors (see connection below), you will need to drill a hole in the door rosette with a drill (or find a suitable female-male connector).
Sequence of actions when replacing a side view mirror yourself
- We place the car on a level platform and provide unobstructed access to the front door from the side where the replacement will be.
- We unscrew the two screws that secure the door card trim and pry the plastic clips around the perimeter.
- From the back side, disconnect the block with wires from the electric drive control unit, disconnect the speaker terminals, and remove the card.
- Using a Phillips-head screwdriver, unscrew the three screws and remove the side-view mirror from its seat.
- We replace the block with a new one and screw it into place. We lay the block with wires and connect them to the sockets. We assemble the structure.
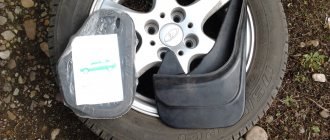
How to remove Lada Granta mirrors
- Remove the mirror adjuster retaining bracket.
- Remove the 3 screws securing the mirror to the door frame.
- Remove the mirror.
- The photo shows the Granta side mirror assembled.
- Disconnect the connector from the power mirror wires.
- Remove the 3 screws securing the mirror to the door frame.
- Remove the exterior mirror Grant assembly.
Photo source:
Sources
- https://1ladagranta.ru/komplektuyushhie/nakladki-zerkala.html
- https://zarulemvaz.ru/zamena-zerkalnogo-elementa-na-grante/
- https://xn—-8sbabr6ahc3e.xn—p1ai/granta-remont/436-snyatie-i-razborka-vneshnikh-zerkal-granta.html
Wiring diagram for mirrors on Grant Liftback
There are six pins in total, of which:
- No. 1 – horizontal adjustment;
- No. 2 – —/— vertically;
- No. 3 – weight of the control unit;
- No. 4 – heating;
- No. 5 – turn signal repeater;
- No. 6 – general “minus”.
Connection diagram by wiring color
- blue – left side;
- white – side lights;
- blue – right side;
- white – black – “plus”;
- black – “minus”;
- green – common on both sides of the mirrors;
- red – general.
Wiring diagram for Lada Granta Liftback mirrors on the control unit
- gray - black and blue - black - control unit on the driver's side;
- black - “minus”;
- white-black - “plus”;
- pin No. 7 - not used. Connect third-party contacts;
- white - dimensions;
- green, orange - control unit on the passenger side.
If you want to connect Grant Liftback mirrors to a VAZ, purchase a control unit from a Lada Kalina or a VAZ Niva. The standard unit is not intended for installation on other VAZ models. The pinout of the terminals occurs according to the following diagram:
- blue – left and right side;
- black – “minus”;
- yellow – common on both sides;
- red is a plus.
Required
| Name | vendor code | Price, r |
| Heated, electrically adjustable exterior mirrors with turn signals (LED) | 4 500 | |
| Joystick/control unit from Lada Kalina (with central locking) | 11180-3709810 | 850 |
| Connector – electric mirror block (female) | CB-00090291 | 150 |
| Block for power window control unit 1118 | CB-00039007 | 50 |
| Connection block to power window button | CB-00033485 | 50 |
| 10 PIN connector with contacts for mirror control | 170 | |
| Wing turn signal plug | 21700-8212104 | 150 |
| Door card blank | 83191 3K030 | 30 |
Reviews
| № | Positive |
| 1. | Vitaly: There were no problems connecting the reflector. I installed it myself, the scheme is quite simple and intuitive. |
| 2. | Kirill: in winter the mirror on the left side cracked, I replaced it myself with a new one. There were no difficulties with disassembly, the design is quite simple, the connection diagram consists of two blocks. |
| 3. | Vasily: after a side impact, the right side mirror cracked. I had plenty of free time, so I installed the new one myself. At the same time, I replaced the rubber seal; it was deformed and moisture penetrated inside. |
| 4. | Alexander: after two years of operation of the Lada Granta Liftback, the insulation in the doorway on the wiring was worn out. Replaced the entire block with wires. Now the line is completely new. |
| 5. | Konstantin: when the reflector burst, I didn’t contact the experts, I installed a new one myself. The procedure is simple, the case is held on by three screws, the block with wires is connected to the standard connector. |
| 6. | Victor: the housing on the left mirror was cracked, I bought a new one at the car market. I transferred the filling myself, it turned out to be very simple. I didn’t contact the specialists at the service station, I did everything with my own hands and I advise you. |
| 7. | Gennady: the right turn signal suddenly stopped working, so I disassembled the reflector myself. The reason was poor contact at the terminal. I pressed it with pliers and everything works fine. |
| Negative | |
| 1. | Ignat: the design of the side reflectors is not perfect; they do not fit tightly, despite the presence of a rubber seal. I decided to buy a reflector block from Renault Logan, it has an identical mount. |
| 2. | Vasily: the quality of the wire insulation is poor; after two years of use, Granta replaced it with new wiring. Insulation cannot withstand freezing temperatures. |
| 3. | Sergey: I changed the left side mirror adjustment cables for the second time in a year. Low quality components. |
Conclusion The process of independently replacing side-view mirrors on the Lada Grante Liftback is not at all difficult. The design is fixed with three screws, connection to the power circuit is carried out by two blocks with wires. Following the recommendations given in this manual, replacing a new mirror will take no more than 10 minutes. Negative reviews from some owners are unfounded and are caused by violation of the operating conditions of the technical equipment and failure to comply with maintenance schedules.
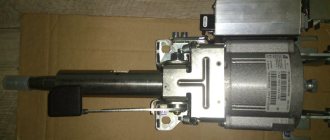
Installation of heated mirrors on Granta
| The option “heated rear-view mirrors” is a very useful thing not only in winter, but also in summer in rainy weather. Installing heated mirrors on a Lada Granta with your own hands is not difficult, the main thing is to figure out in advance how to disassemble the mirrors, prepare a wiring diagram and the necessary tools. |
Required:
- Elements of heated mirrors from the company (for example, Salina at a price of 550 rubles)
- Wire 0.75-1mm2 several meters 50r.
- Terminal “small mother” (2 pcs). 10 rub.
- Terminal ring “ground for screw” (2 pcs). 10 rub.
- Clamp terminal (1 piece). 5 rub.
- Fuse holder (1 piece). 28 rub.
Connecting heated mirrors Lada Granta
- We fasten the two negatives from the heated mirrors onto the ground screw above the fuse block.
- We solder two positive wires to the fuse holder (15A) and connect them to the gray wire under the carpet. There will be two gray wires in the harness (one is the fuel pump), and the second is the heated rear window. Using a multimeter or test light, we find +12V, which appears after turning on the rear heated glass.
Thus, we connected the Granta heated mirrors through 2 fuses and a relay.
All that remains is to connect the mirror elements to the terminals and check the operation. If you want to connect heated mirrors to a separate button, you can use the following diagram:
Now we perform the assembly in reverse order. In total, this modification of the mirrors took about 3 hours of time. By the way, along with installing heated mirrors, you can immediately make noise insulation for the doors.
Similar materials
Heating element for side mirrors
The cold season is ahead, creating additional difficulties for motorists, including fogging and freezing of side mirrors.
Driving with such mirrors is not only inconvenient, but also dangerous. And opening the window every time to clean and wipe is not much fun, especially if it’s cold and rainy outside. Many foreign cars are equipped with a heated mirror system. It is really very convenient because it allows you to keep your mirrors clean in any weather. But only on budget models, as well as on domestic cars, such equipment is very rare.
There is still a way out of the situation, and more than one:
- Purchasing mirrors with an integrated heating system;
- Purchase and installation of factory heating products (film, printed heaters);
- Folk remedies;
As for mirrors, this is the most expensive solution to the problem; moreover, it is not always possible to find elements that are suitable for mounting. Factory products are cheaper, but they require selection according to shape.
Among the simple folk remedies, you can use a regular car incandescent lamp, which is placed in the mirror housing. This solution to the problem is inconvenient because there must be enough space inside the case to install the lamp and the base for it.
The simplest and cheapest, yet effective way to provide heated mirrors is to use nichrome wire.
How to equip a Lada Granta with heated and electrically adjustable mirrors?
This work requires a little more skill than, for example, installing a spoiler. Therefore, having a little skill in handling car electrics, or an assistant with such, is welcome.
Heating improvements
So, if you just need heating, then it is better to use a standard part, replacing the glass with the same one with a thermoelement, or install it yourself.
Precautions before starting work:
- Be sure to turn off the voltage of the vehicle's on-board network! (remove battery terminal)
- To prevent accidental damage to the wires when the door is accidentally closed, install limiters.
Tools and materials you will need:
- Branded mirror elements of heated mirrors;
- Insulating tape;
- Several meters of 0.75-1 mm2 wire;
- 2 terminals “mother small”;
- 2 ring ground screw terminals;
- 1 screw terminal;
- 1 fuse holder;
- Round needle file, soldering iron, set of screwdrivers, heat shrink.
Wiring
The next step is wiring. To install the wiring, you will need to remove the front door trim.
When the door is disassembled, the wires are pushed into the door through the fastening hole, and the interface block is disassembled. Through it and the corrugation, the electrical wiring is pulled into the housing. In order to simplify the task, you can drill an unoccupied contact in the block, and thus thread the plus and minus. To pull the wiring through the door corrugation, it is more convenient to use wire. Important (!) - for your own convenience, it is better to throw in extra wires.
Heated mirrors on Granta
1. Elements of heated mirrors from a company (for example, Salina at a price of 550 rubles)
2. Wire 0.75-1mm2 several meters 50r.
3. Terminal “small mother” (2 pcs). 10 rub.
4. Terminal ring “ground for screw” (2 pcs). 10 rub.
5. Clamping terminal (1 piece). 5 rub.
6. Fuse holder (1 piece). 28 rub.
9. Round needle file, heat shrink and electrical tape.
It is worth noting that on our website there is already a similar publication about heated mirrors on the Lada Kalina, which you can install yourself.
Connecting heated mirrors Lada Granta
To install the wiring, you will need to remove the front door trim. Now we push the wires through the mirror into the door and disassemble the connection block. We pull the wires through the block and corrugation into the interior. In order not to suffer, you can drill a free contact in the block and thread the positive and negative wires through it (it is still better to connect the ground in the cabin than on the door - the contact will be better).
We pull the wires through the corrugation of the door using wire. We do similar work on the passenger side.
It was decided to connect the heated mirrors in Grant to the heated rear window (this is the most popular method, which is also used on foreign cars).
1. We screw the two negatives from the heated mirrors onto a screw with ground above the fuse block.
2. Solder two positive wires to the fuse holder (15A) and connect to the gray wire under the carpet. There will be two gray wires in the harness (one is the fuel pump), and the second is the heated rear window. Using a multimeter or test light, we find +12V, which appears after turning on the rear heated glass.
Thus, we connected the Granta heated mirrors through 2 fuses and a relay. All that remains is to connect the mirror elements to the terminals and check the operation.
If you want to connect heated mirrors to a separate button, you can use the following diagram:
Connection
Connecting the central lock
. We use a circuit of two relays so as not to go under the panel to the central locking unit:
Connecting heated mirrors
(to the wiring harness under the driver's threshold)
Connecting mirror turn signals
:
- Option 1: Pull the wire from the direction indicator on the fender.
- Option 2: To the wiring harness under the driver's threshold (blue - left turn signal; blue-white - right).
We transfer the wires from the power windows from the standard buttons to a new block with a joystick.
For Lada Kalina and Granta with heated and electric side mirrors (without direction indicators):
- The new mirror has a chip with six wires, but the old one has only five. We pull the sixth contact, which is used to operate the turn signals.
The process of installing exterior mirrors from a liftback on a Lada Granta sedan is also shown in the video:
Are you considering replacing old mirrors with new ones with turn signals?
Heated mirrors – Lada Granta tuning and repair
Random photo
Tuning grants
On a modern car, heated mirrors are a necessary and irreplaceable thing, and Granta is no exception: you can make heated mirrors with your own hands!
We purchase heated mirror elements “Salina”, the cost is about 500-600 rubles.
- Wire with a cross section of 0.75-1.0 mm (10 meters) - 150 rubles.
- Small female connector (2 pcs.) - 10 rub.
- Ground ring connector for screw (2 pcs.) - 10 rub.
- Clamping connector (1 pc.) - 5 rub.
- Fuse block (1 pc.) — 30 rub.
- Soldering iron
- Sample
- Thin and regular screwdrivers
- Round needle file, heat shrink, electrical tape
We take the end of the wire that was pushed into the door out of the door. This is where a needle file comes in handy: we firmly attach the wire to the needle file with wire, and pull the file through the corrugation
We attach the minus to ground (I attached it to ground above the fuse block). We combine the “pluses”, connect them to the fuse through the block, and cover the exposed areas with heat shrink.
There are two gray wires in the wiring harness: one is the power supply to the fuel pump, the other is the heated rear window. Using a probe, we determine which of them goes to heated the rear window (“plus” appears on it only when the rear window heating button is turned on). We connect the fuse block with a continuous clamp to the found rear window heating wire
We connect power to the mirror elements (using female connectors). We put everything back together in reverse order.
We enjoy the excellent performance of the heated mirrors on the grant!
Tags: heated mirrors on the Lada Granta, heated mirrors with your own hands on the grant
Add a comment
Lada Granta FAQ - Guide to Lada Granta - tips, modifications, tuning, styling, photos © 2013-2015
Popular on the site
Currently on the forum:
This page is searched for: Heated mirrors. How to connect?.
Currently commenting:
Jet black or grey-black
I would like to know the model of injectors, the type of internal combustion engine, the power supply system of the internal combustion engine..
Dimensions and tidy do not light up. CHY, all relays and presets are in order! New button! Backlight on p
On my smartphone it freezes every once in a while, then crashes, it says the pages could not be loaded
Thanks, I think so too
Often, when opening a page, it says that there is no such page, although a few minutes ago someone
Hello! I can’t find the lower rubber bands for the injectors, I found the upper ones, they fit from ten
Do not bother. Xenon in a headlight not intended for it is definitely already a collective farm. And St.
Mine doesn't understand. Is this the end of the update or what?
Wroom.ru
Media registration certificate No. FS 77-76203 16+
Solina. You can buy car mirrors and mirror elements from us