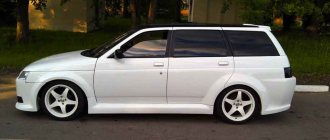
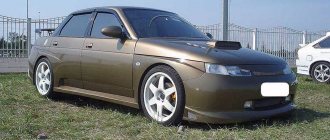
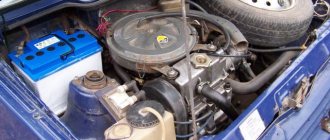
Tuning VAZ 2114... The forums of domestic motorists are full of topics with similar names. This article will highlight the main aspects of tuning this model, discussed by car owners: modifications to the body, optics, power unit, chassis and interior. In particular, chip tuning, installation of body kits, lowering, sound insulation, acoustics, interior reupholstery and other issues will be analyzed.
Of course, there is no urgent need to modify your car. However, VAZ 2114 owners want to transform their “iron horse”, turning it into something exclusive. There are 2 ways for this:
- take the car to a service station;
- carry out all the work yourself.
However, the vast majority of car owners combine both options.
2114 tuning involves improvements in almost every respect:
- exterior;
- power unit;
- chassis;
- release;
- interior.
Exterior
Transforming the appearance involves installing both complex body kits and individual elements, as well as replacing wheel rims and other actions.
Wheels
Usually, work on a car begins with the wheels, since standard steel or alloy wheels do not impress 2114 owners. Tuning consists of purchasing wheels with an increased diameter (up to 18 inches), as well as low-profile tires. Naturally, with such a set the car looks very impressive, but ride comfort is sharply reduced, since low-profile tires transmit all the defects of the road surface into the cabin.
Optics
VAZ 2114 owners independently upgrade the optics by installing xenon, LEDs and lenses, as well as painting the headlights inside with black paint. But there are also proprietary options for head optics and rear lights - chrome headlights with running lights for 4,900 rubles, tuned, chrome-plated optics in the Audi A5 style for 10,700 rubles, optics with angel eyes for 9,500 rubles. etc.
Body kits
This option is also often practiced. Online stores and car markets offer all sorts of options for aerodynamic body kits, differing in style and materials of manufacture. You can choose a kit to suit every taste: FRESH for 9,800 rubles, LSD for 8,700 rubles, Fan Extreme for 9,500 rubles, E-4 for 9,700 rubles, LEX for 9,200 rubles, Sniper for 8,500 rubles ., LEX-Line for 9,400 rubles. etc. These are mid-price body kits. The more expensive ones include kits like AVR-CUP for 14,000 rubles. and etc.
Typically, such a kit includes bumpers, door sills, spoiler, wing and other components. But all this can be purchased separately. Of course, purchasing at retail is more expensive, but it allows you not only to work gradually, but also to combine elements from different sets. For example, a front bumper of the Alonso type costs about 4,000 rubles, side skirts of the E-4 type cost about 1,500 rubles, LEX eyelashes can be bought for 150 rubles, a spoiler with brackets will cost about 1,300 rubles, a Thorn type skirt DM (for the front bumper) is estimated at 1,600 rubles. etc.
Such devices are made from fiberglass, fiberglass and ABS plastic.
Overlays
This is a more economical option. It involves the installation of inexpensive accessories: deflectors on the hood (“fly swatters”), windshields on the windows, eyelashes on the headlights, integration of a fine mesh into the radiator grille and bumper air intake, wheel arch covers, etc. Such devices are cheap (no more than 1,000 rub.), and they are also easy to install.
Body
Processing in this area is carried out by installing fiberglass hoods (type AVR-CUP for 6,000 rubles) with air intakes. Some go for the installation of “lambo doors” that fold upward, but in this case the main difficulty lies in adjusting the gaps. And often the car is painted in different colors to create contrast.
All of the listed accessories can be purchased at the car market or in stores. In addition, you can even find a VAZ 2114 tuning store, where all options will be presented.
Are you interested in tuning domestic cars? We recommend reading about the improvement of the Lada Priora in our article. Review of the new car industry - Lada Vesta - here.
Instrument panels VAZ VDO (LED)
You can install a more beautiful and convenient panel with LED indicators, the so-called VDO panel. Here VDO is the panel manufacturer.
| Connecting VDO on a Kalina car | ||
| 1 | Pink-white | To electric power steering |
| 2 | Blue and white | To the hazard warning indicator |
| 3 | Gray-blue | To emergency oil pressure sensor |
| 4 | Brown blue | To the parking brake switch |
| 5 | Yellow-blue | To the immobilizer control unit |
| 6 | Black | To the airbag control unit |
| 7 | Yellow | To the outside light switch |
| 8 | Blue | To the right turn signal switch |
| 9 | Blue with black | To left turn signal switch |
| 10 | White-blue | TO ECU |
| 11 | . | To brake pad wear sensor |
| 12 | . | To seat belt sensor |
| 13 | Black | To the traction control control unit |
| 14 | Red-blue | “RESET” key on the steering column switch |
| 15 | Pink-blue | To brake fluid level sensor |
| 16 | Black | To ABS |
| 17 | Green | To the high beam switch |
| 18 | White | To the instrument cluster light control |
| 19 | Brown | Panel weight |
| 20 | White-red | Terminal “30” |
| 21 | Orange | Terminal “15” |
| 22 | Yellow-red | To fuel flow sensor |
| 23 | Orange-white | MK key “forward” |
| 24 | White black | MK key “back” |
| 25 | Black and white | Outside temperature sensor (-) |
| 26 | Yellow-green | Outside temperature sensor (+) |
| 27 | Pink | Fuel level sensor |
| 28 | Grey | Speed sensor |
| 29 | Green-white | Coolant temperature sensor |
| 30 | Brown-red | Tachometer (low voltage) |
| 31 | . | Official. Panel diagnostics. |
| 32 | Brown-white | Terminal “L” of the generator relay regulator |
Power unit
With the engine, everything comes down to cost, so there are 2 options:
- minor improvements;
- dramatic changes.
Minor improvements
As a rule, 2114 owners are limited to chip tuning and some technical improvements. Chip tuning involves adjustments in the software of the engine ECU 2114:
- fuel supply adjustment;
- changing the ignition timing.
However, since this model does not have a turbocharger, there is no possibility of achieving a serious increase in power - the output will increase by 7-8%.
In addition, owners change air and fuel filters, as well as some other elements. It is worth remembering that chip tuning can be aimed not only at increasing power, but also at reducing consumption and increasing the elasticity of operation.
Drastic changes
In this case, serious modification of the engine should be done:
- installation of a modernized receiver;
- cylinder boring;
- installation of a new camshaft with cams of a modified configuration;
- work with the cylinder head (these measures involve grinding the channels in the intake manifold and receiver, as well as other changes).
However, some go further: they either completely change the power unit to a more powerful one, or install a turbocharger (low or high pressure) on it. Of course, such measures are exotic, but they also take place.
Naturally, with this approach, the price for tuning a VAZ 2114 rises sharply.
Pinout of the dashboard of VAZ2110, 2111, 2112
- fuel reserve warning lamp;
- dashboard lighting lamps;
- right repeater indicator lamp;
- left repeater indicator lamp;
- VAZ plug block;
- coolant temperature sensor;
- indicator lamp for external lighting;
- carburetor air damper warning lamp;
- oil pressure warning lamp;
- handbrake indicator lamp;
- battery charge indicator lamp;
- VAZ tachometer;
- indicator light “CHECK ENGINE”;
- speedometer dashboard;
- brake fluid level warning lamp;
- hazard warning lamp;
- high beam indicator lamp;
- fuel level indicator.
Release
As a rule, in this case, tuning is limited to installing a direct-flow muffler. There is a myth that such a measure can significantly increase engine performance, but this is not the case. Strictly speaking, there is an increase in power. However, it is so insignificant that it is extremely difficult to feel.
In addition, one muffler is not enough. High-quality work implies installation of the entire kit. This is a resonator with adjustable brackets (from 1,500 to 3,500 rubles), a tuned collector for 3,500 rubles. and, in fact, a muffler with an aluminum nozzle (round or oval) for 4,500 - 5,000 rubles.
Pinout of the dashboard VAZ2108, 2109, 21099
Connection diagram of the instrument cluster before 1996.
1 – relay-interrupter for the parking brake warning lamp; 2 – tachometer with voltage stabilizer; 3 – instrument cluster lighting lamp; 4 – temperature indicator; 5 – BSK control unit; 6 – fuel level indicator; 7 – resistor 50 Ohm, 5 W; 8 – control lamp “CHECK ENGINE” for the toxicity reduction system; 9 – control lamp for high beam headlights; 10 – side light indicator lamp; 11 – backup warning lamp; 12 – warning lamp for unfastened seat belts; 13 – control lamp for left direction indicators; 14 – resistor 470 Ohm, 0.25 W; 15 – electronic voltmeter; 16 – control lamp for right direction indicators; 17 – warning lamp for emergency oil pressure; 18 – fuel reserve warning lamp; 19 – control lamp for the carburetor air damper; 20 – indicator lamp “CHECK ENGINE” for the fuel injection system; 21 – parking brake warning lamp.
Instrument cluster wiring diagram after 1996
1 – tachometer; 2 – instrument cluster lighting lamp; 3 – temperature indicator; 4 – BSK control unit; 5 – fuel level indicator; 6 – control lamp “CHECK ENGINE” for the toxicity reduction system; 7 – control lamp for high beam headlights; 8 – side light indicator lamp; 9 – backup warning lamp; 10 – warning lamp for unfastened seat belts; 11 – control lamp for left direction indicators; 12 – battery charge indicator lamp; 13 – control lamp for right direction indicators; 14 – warning lamp for emergency oil pressure; 15 – fuel reserve warning lamp; 16 – control lamp for the carburetor air damper; 17 – indicator lamp “CHECK ENGINE” for the fuel injection system; 18 – parking brake warning lamp; B1 – resistor 91 kOhm; B2 – resistor 50 Ohm, 5 W.
Chassis
It is necessary to understand that modifications to the suspension should not contradict traffic regulations.
But this does not stop enthusiasts who upgrade the brake system by installing different calipers, pads and brake discs.
There are also frequent cases of underestimation, and this is usually not done by purchasing special springs or installing air suspension. As a rule, owners simply saw off one or more coils from the springs. Naturally, everything is done approximately, and this significantly impairs controllability.
Do-it-yourself modification of the VAZ 2114 suspension
Creating a sports car requires significant modifications to the chassis. First of all, you should increase its rigidity by replacing the shock absorbers with sports analogues. Excessive body roll is eliminated by installing anti-roll bars of greater rigidity than those provided by the manufacturer.
Of course, the strong suspension is best emphasized by beautiful sports wheels. Tires and wheels are selected depending on the preferences of the owner and the intended operating conditions. Light wheels and grippy tires are one of the keys to confident handling of your car.
Interior
Interior improvements are no less varied than external tuning of the 2114 - the price for this can fluctuate quite significantly. As a rule, with a strictly limited budget, everything results in the installation of pleasant little things: an armrest, attachments, decorations, holders, installation of LED lighting, etc. More serious actions usually begin with high-quality sound insulation. To do this, the interior is disassembled, after which it is glued with vibration-isolating sheets on a rubber basis, as well as splenium. All layers are glued end to end and rolled with a roller.
This is followed by the installation of high-quality acoustics and a radio. To create purity of sound, component acoustics are used, supplemented by an amplifier and subwoofer. In this case, everything depends solely on the budget. The cost of such a set can range from 15,000 to 80,000 rubles.
Next comes the turn of the seats. They are often replaced with Recaro-type sports seats, which perfectly hold the body in turns. But they're not cheap. Upholstery of the interior is also practiced, and this can be either a budget option with fabric or leatherette, or a more expensive one - upholstery with natural leather or a combination of leather and suede such as Alcantara.
Replacing the steering wheel is also not uncommon for the VAZ 2114, but this may result in claims from the traffic police. The instrument panel also sometimes needs to be replaced. Instead, an option like GF 613 or some other is installed.
External tuning of Lada Samara 2
Body tuning elements are designed to improve the aerodynamic performance of the car, not to mention the visual appeal of these parts. Often, most standard plastic parts are replaced: bumpers, moldings, door handles and mirrors. New optics are a very noticeable element; moreover, they can surpass standard headlights and lanterns in quality and brightness.
Despite the abundance of factory parts for tuning, the most noticeable are the bells and whistles made by yourself. It is in the garages of homemade craftsmen that an ordinary hood or fenders acquire stylish air intake grille slits or a unique color. The advantage of independent tuning is affordable cost with decent quality of workmanship. A popular tuning method for the “Four” is the lining on the headlights, popularly called “eyelashes”. It is not uncommon for owners to replace standard halogen lamps with brighter xenon lamps.
Do-it-yourself tuning of VAZ 2114 headlights on video:
The aggressiveness of the car is manifested in every detail, so you should pay attention to the glazing. Tinted windows make the image of the VAZ 2114 more harmonious, just do not forget to comply with the requirements for their light transmittance adopted in our country.
Content
When carrying out tuning, many people pay attention to the fact that the interior should be changed. The interior of the VAZ 2114 is gray, unremarkable, and often shabby. At the same time, almost all cars of the automaker in question leave the water with an unfinished interior, which causes quite a lot of complaints. That is why, some time after purchasing a car, many people have a question: VAZ 2114 interior tuning - what stages of work need to be performed to improve comfort, what can be changed and what result can be achieved.
Removing the car dashboard
- Using a Phillips screwdriver, remove the three screws that secure the center console;
- remove the cover, the protrusion located at the bottom, remove the protrusion from the bracket;
- Using a nozzle, unscrew the five screws located in the console on the right and remove the screen;
- Disconnect the terminal with the (-) sign from the battery. If there is a radio receiver, you need to remove it, remove the plug from the shield;
- Disconnect the wires coming from the cigarette lighter, remove the cartridge;
- Using a narrow screwdriver, remove the handle from the levers;
- pull the handle towards the heating and fan switch;
- unscrew the two screws above the panel and the two located under it using a screwdriver;
- unscrew the screw located behind the panel;
- Also unscrew the two self-tapping screws securing the cover;
- disconnect the harness and wire connectors. To avoid confusion when installing the panels, you should mark the order in which they are connected;
- unscrew the fastening bolts;
- unscrew the two self-tapping screws, those that secure the bottom bracket using an 8 key;
- unscrew the self-tapping screw securing the light guide and remove it;
- Also unscrew the screws securing the heating unit;
- remove lamp sockets;
- after removing the external parts, remove the decorative insert;
- unscrew all nuts with a 21 key;
- hydrocorrector, remove its lamp;
- Unscrew the screws that are attached to the cross member on the left.
- Finally, the panel itself is removed. The panel is assembled accordingly in the reverse order.
In general, the repair work is quite doable even with your own hands, but before starting dismantling work, you need at least a pinout mapped on paper, otherwise it will be difficult: you will need to “trace” every wire and every connection that is on the “path” from devices to the power button.
Source
