You will need: two 13mm wrenches, a Phillips-blade screwdriver.
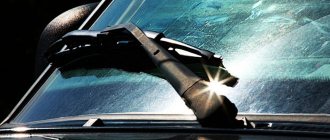
1. Remove the windshield wiper from the car (see section 9 “Electrical equipment”, subsection “Front windshield wiper”).
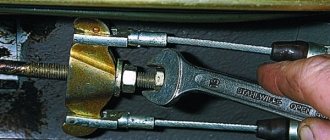
2. Loosen the tightening of lock nut 1 and adjusting nut 2 of the clutch drive and remove the cable guide from the clutch release fork.
3. Slide the cover from the lower end of the cable sheath and unscrew the nut securing the end to the bracket, holding the end from turning with a second wrench. Remove the tip from the bracket on the gearbox.
4. Unscrew the two nuts securing the windshield wiper bracket and remove the bracket from the studs. Please note that the bracket is installed with an inclined platform towards the front of the car.
5. Unscrew the screw securing the protective cover and remove the cover holder.
6. Bend the cover to the side to gain access to the cable end attachment to the clutch pedal. Using a screwdriver, remove the retaining clip from the pin.
7. Remove the cable end from the pin.
8. In the passenger compartment, unscrew the bolt securing the cable holder to the pedal bracket and remove the cable into the passenger compartment.
9. Remove the bushing from the clutch pedal pin and check its condition. Replace a broken or worn bushing. Please note that the bushing is split, which is not a defect.
10. Install the new cable in the reverse order of removal, having first lubricated the cable guide and the clutch pedal pin with Litol-24 or LSC-15 grease.
11. Tuck the edge of the cable seal into the hole in the bulkhead, first pushing it towards the engine compartment. After installing the cable, adjust the clutch pedal travel.
Reference manual for servicing VAZ, LADA 110 cars.
Ignition adjustment 2110. Engine compression for VAZ 2112, immobilizer for VAZ 2111. Valve cover for VAZ 2112, cylinder block gasket for VAZ video. The cost of a generator for a VAZ. replacement of fuses for VAZ 2112, design of the oil receiver for VAZ 2112. oil recommended by the factory for the box of VAZ 2112. replacement of the water pump (pump) for VAZ 2112. Replacement of valve stem seals for VAZ 2110.
To replace the clutch cable on a VAZ-2112, you need to drive the car onto an inspection hole or overpass. If this is not possible, then you can simply raise the left side of the car on a jack. But the latter replacement method will be less convenient. Also, in this case, you will need to put the car on the handbrake, and put a beam under the rear wheels so that the car does not move while the work is being carried out.
Replacement Tools
To work you will need:
- The key is "8".
- Two keys for "14".
- Screwdriver (phillips).
Sequence of work
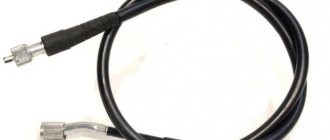
For comparison, old and new clutch cables
They go in this order:
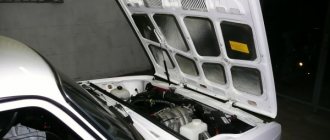
- Move the air filter housing to the side.
The air filter housing will interfere with us, so we will move it to the side. Moreover, all the housing latches were broken and it was dangling under the hood
Pull the cable out of the bracket
Clutch cable bracket in the cabin - you'll have to tinker with it
Important! Before installing the cable, you need to adjust the clutch pedal so that it is 10-13 centimeters from the floor level. We have already written in more detail about replacing the clutch itself on a VAZ-2112.
Video about replacing the clutch cable
Clutch adjustment on a VAZ-2112
During clutch adjustment
To adjust, you will need to rotate the bolt, which is located on the cable on the gearbox side. When the pedal distance is adjusted, tighten the nut and press the pedal 2-3 times. If all is well, then tighten the locknut on the casing. Next, the car is assembled in the reverse order.
The clutch cable must first be lubricated with LSC-15 or Litol-24.
Checking status
Normal PT adjustment ensures that the vehicle is held on a slope. This corresponds to 3-8 clicks of the handle on newer nines or 5-7 clicks on a VAZ 2109 produced before 1995.
To carry out the test, follow a few simple steps:
- Find a slope that has about 25 degrees;
- Turn the handbrake to the required position;
- If the car starts to roll, the handbrake does not hold, adjustment is required;
- If there is no such slope nearby, the check is carried out in a garage;
- Place the car on a flat surface, raise the handbrake handle all the way;
- Approach from behind and try to push the car with maximum force;
- If the car begins to move, the RT requires adjustment;
- Check the operation of the handbrake at 2 clicks on newer versions of the VAZ 2109 and not reaching 5 clicks on versions before 1995. If the handbrake is working at full strength, the cable will be tightened. It will also need to be adjusted.
Operating a car with a tightened PT cable is also dangerous, as this leads to overheating and wear of the rear brake pads.
Bottom view
Adjustment
To adjust the PT cable you will need a pit, overpass or lift. Next we proceed according to the following algorithm.
- Raise the handbrake handle 2-3 clicks from the passenger compartment.
- Get under the car and loosen the locking nut of the parking brake cable equalizer. Before doing this, it is better to treat the nut with a wire brush to remove all dirt.
- Then act according to the circumstances. If the cable is overtightened, it must be loosened by appropriate manipulation of the nut. If the cable holds too weakly, the nut must be tightened more tightly.
- If tensioning the cable does not produce any result, then the element is already at the limit of its capabilities. Therefore, the only solution to this situation is replacement.
- When adjusting the degree of tension, be sure to evaluate the adjustment of the cable along the PT lever. As you remember, normally it is 3-8 clicks for more recent versions of the VAZ 2109, or 5-7 clicks for nines that were produced before 1995.
- Check the freedom of rotation of the rear wheels. If you overtighten the cable, the wheels will spin with difficulty and not as freely as they should.
- After making the adjustment, tighten the locking nut back and check the operation of the handbrake again by driving up a slope or pushing the machine with the PT on.
Adjustment process
If the adjustment did not give a positive result, the cable turned out to be worn out, overtightened and does not allow adjusting the operation of the RT, you will have to change it, thereby repairing the handbrake.
Replacement
In some cases, heavy movement of the cable in the sheath is due to lack of lubrication. To eliminate this defect, fill the shell with transmission or engine oil. Pour until grease flows out of the opposite end of the cable casing. Remember to move the cable while adding lubricant.
Cable replacement procedure
But lubrication is more of a temporary measure. If signs of cable wear are detected, it is better to replace it with a new one. This is done as follows.
- Loosen the tension on the PT cable locking nut.
- Unscrew the equalizer adjusting nut, which will loosen the handbrake drive cables.
- Raise the rear of your VAZ 2109 using a jack, then remove the brake drum and brake pad.
- Unscrew the drive cable end from the drive arm.
- Disconnect the fastening nut, and then remove the PT cable holder on the rear suspension beam of the vehicle.
- Remove the shell bushing from the hole in the brake shield.
- Pass the end of the PT cable through the hole in the brake shield.
- Remove the PT cable from all holders on the body of your car.
- Disconnect the end of the PT cable from the equalizer.
- Push the cable end out of the bracket to remove the cable.
- Install a new, tested cable, proceeding in the reverse order.
- Do not forget to adjust the cable tension and the performance of the restored RT at the final stage of assembling the unit.
How to prevent cable failure on a VAZ 2110
A failed clutch pedal that fails at the most inopportune moment is a very unpleasant result of careless and extreme driving. The cable resource is extremely long and does not often require replacement. Its breakdown most likely indicates the age of your iron horse.
Typical driving mistakes that lead to cable failure:
- Do not press the clutch pedal while driving, causing it to slip. This can cause not only cable breakage, but also gearbox failure;
- starting from a standstill with high torque is also the main factor that ultimately leads to cable breakage and requiring its replacement.
By the way, failure of the cable is another one of the most benign and simple breakdowns on the VAZ 2110. Replacing the clutch fork (about 10% of the total number of relevant faults) can be a much more unpleasant problem. In this case, repairs will cost several thousand rubles.
Thus, if your clutch pedal has sunk to the floor, there may be several reasons:
- the cable needs to be replaced;
- the clutch fork is broken;
- the cable simply flew off its seats and requires re-tightening the bolts.
Advice from professionals
- Carry out technical inspections of your vehicles regularly. This manipulation will allow us to identify future breakdowns and eliminate malfunctions at an early stage of development.
- Respond promptly to emerging signs. Do not operate a vehicle with worn parts.
- When making repairs, use only new and high-quality spare parts.
- Once again, spend a little and entrust the work to qualified mechanics if you don’t know how to remove the clutch cable of a VAZ 2110.
- To extend the life of the clutch cable, systematically lubricate it with a special substance using a syringe provided for this procedure. This feature will prevent chafing of the element.
Carefully monitor the condition of your car. Timely maintenance will extend the life of the vehicle.
https://mylada.net/remont/zamena-trosa-scepleniya-na-vaz-2110.htmlhttps://luxvaz.ru/vaz-2110/58-zamena-trosika-scepleniya.htmlhttps://carnovato.ru/ zamena-trosika-sceplenija-regulirovka/https://portalvaz.ru/zamena-trosa-scepleniya-vaz-2110-svoimi-rukami/https://vaz-2110.ru/podveska/zamena-trosa-stsepleniya-na- vaz-2110.html
Shifting gears without clutch
Not every driver of a VAZ 2110 imagines how to not only start, but also drive a car without using the clutch pedal. Of course, this skill is very specific, but it can be vitally important when the clutch cable breaks at the most inopportune moment.
The easiest way is to start the car in first gear, first pressing the gas pedal halfway. After turning the ignition, the car will immediately move off with a very noticeable jerk, so be extremely careful when trying to start it this way. Similarly, we turn on the reverse gear.
Driving for a long time in first gear can cause the engine to overheat. If there is a considerable distance to be covered, it is better to learn how to shift higher gears without using the clutch, for which:
- release the gas pedal and, at the moment of least resistance, switch off the gear, moving the transmission lever to the neutral position;
- then engage the next gear, continuing acceleration.
The proposed algorithm for downshifting in the event of a non-working clutch requiring replacement is somewhat different:
- Having switched to neutral gear, we revise the throttle, thereby increasing the speed of the input shaft;
- and only then switch to a lower gear.
A few notes
Taking advantage of the fact that you have climbed quite deep into the inside of the car, you can carry out some additional actions so as not to return to this in the near future.
- It is advisable to change the release bearing along with the clutch;
- You also need to check the clutch paddles and the clutch basket itself. If there is significant wear, do not be lazy to replace them, otherwise in the near foreseeable future you will have to climb into the hole again;
- The driven disk must be centered
. It would be good to use a special mandrel for this purpose. If this is not available, you need to at least select a wooden round of the required size. When the basket fasteners are tightened, if the alignment is done correctly, the mandrel (or its substitute) should come out without any effort. But don’t fall out on your own.
Replacing the VAZ 2110-2112 clutch cable with your own hands, recommendations
In order to replace the clutch cable, you will need the following set of mechanic tools:
- flat and Phillips screwdrivers;
- a set of open-end wrenches and sockets with a ratchet.
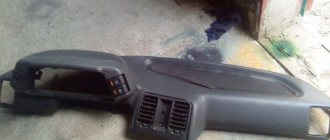
Next, you need to perform a simple algorithm of actions, which involves dismantling the VAZ 2110 windshield wiper and window trim. Of course, it is possible to replace the clutch cable without the above steps, but complete instructions according to standard recommendations will still be more clear.
- 1. First, you need to discard the front facing panel for the wind window frame (jabot), held in place by a set of screws;
- 2. Next, remove the windshield washer tubes, wiper arms (in the case of an old-style frill) and, finally, the casing itself.
- 3. Remove the windshield wiper, having first disconnected the negative terminal of the battery and disconnected the expansion tank, for which:
- the gear motor connector is dismantled;
- unscrew the nuts of the left and right fastening of the trapezoid, as well as the bolt holding the gearmotor to the bracket;
- finally, the wiper base, removed from the studs, can be removed from the air supply box.
Changing the clutch cable, basic algorithm
Replacing the VAZ 2110 clutch cable is extremely simple. Even a novice amateur motorist will be able to do the job, and it’s quite difficult to make a mistake. What we do:
- 1. To start, use two 19 mm open-end wrenches. loosen the nuts of the clutch cable end, tilting it away from the bracket;
- 2. Disconnect the cable from the fork that controls the clutch release;
- 3. Now you need to disconnect the cable end from the clutch pedal lever. This can be done through the interior, but if you worry about dismantling in advance, then the task is greatly simplified. First, remove the protective cover of the mechanism.
- 4. The end of the cable is unscrewed with a nut, additionally secured with a locking bracket. Unscrew the pedal lever nut, thereby releasing the cable;
- 5. To release the upper end of the cable sheath, unscrew the corresponding bolt of the thrust plate in the passenger compartment. Then the thrust plate is removed along with the cable;
- 6. The old cable is removed through the interior. When replacing, the lead of the new cable is lubricated with silicone.
↑ Route planning
In the CityGuide system, the route is built to the final destination, with the ability to add intermediate stop addresses. To get directions, you first need to select the map you need. You can enter your destination in several ways:
- through the search string;
- by specifying the address;
- from the POI menu;
- in history;
- from saved points to favorites.
- indicate a location on the map by touching the device screen;
- select a route from those previously saved in the navigator’s memory.
The choice of the finishing point is a signal for constructing a route. After completing the work, the system displays the result on the screen, visualizing the path and hints. Navigation of the Lada Vesta car provides for the construction of two types of routes: the shortest and the optimal. The construction of the optimal route is carried out for optimization reasons, taking into account distance, speed limits, class of roads and the possibility of avoiding potential traffic jams. You can set the route type in the navigation menu. If along the way there is a need to deviate from the specified trajectory, the route is automatically rebuilt.
Adjusting the newly installed cable
After the VAZ 2110 clutch cable has been replaced, all that remains is to make its final adjustment, spending about 30 minutes of your personal time. Thus, we ensure comfortable and reliable operation of the VAZ 2110 clutch mechanism.
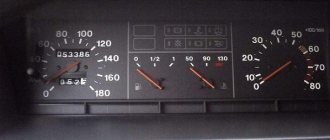
The degree of tension is adjusted by changing the position of the lower end of the cable fixed in the gearbox bracket. You can navigate by the position of the adjacent pedal. When the adjustment is completed, we check it using a tape measure or ruler.
The pedal travel from its initial position to its stop on the floor should be within 125 mm with an error of 5 mm up or down. If the pedal position does not correspond to the specified recommendations, adjustment should be continued.
When the clutch pedal suddenly falls to the floor, most likely the cable has broken. Replacing the clutch cable of a VAZ 2112 is easy and even done in several ways. You don’t need any special tools or specialist skills; any driver can replace the VAZ 2112 clutch cable on his own.
conclusions
As you can see, this work is quite simple and you can handle it yourself without resorting to the services of a specialist. If difficulties arise with its implementation, you can always call a specialist for help.
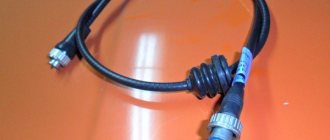
Home » Repair » VAZ 2110 – 2112 » The clutch cable of the VAZ-2110 has the following design: a metal cable runs inside a rigid plastic sheath.
On one side it is attached to the pedal, on the other hand it is connected to the release fork through a bracket by means of a mechanism for adjusting the position of the clutch pedal.
What to do if the clutch pedal does not work
If this is exactly what happened, do not panic, call a tow truck or ask other drivers to tow the car. You can drive without using the clutch, start in first gear and either drive slowly with the hazard warning light on, or rev the throttle while changing gears. Driving for a long time without a clutch will “kill” the gearbox, but if you need to get to the garage or workshop once, you can. Of course, you can do it your way if there is no other choice and the price of transportation suits you.
Popular problems and their solutions
There are several characteristic faults that occur on the VAZ 2110. Let's try to understand the reasons for their occurrence, and also consider ways to solve the problem.
- The clutch drives. The reasons may be: The pedal has insufficient travel, the tension is too tight. To eliminate this, you need to adjust the drive;
- The driven disk is deformed. Only replacement will help here;
- The driven disc hub sometimes gets stuck. If so, try washing it and lubricating the input shaft splines. If the element or the shaft itself is worn out, then replace them;
- The friction linings are broken and the rivets are loose. The best solution is a complete replacement of the casing, which includes a spring and a disk;
- The pressure plate is warped or warped. Replace the linings, but first make sure that there are no deviations in the end runout of the disk;
- There were problems with the cable. Pull it up. If there is no result, replace with a new one.
- The friction linings on the driven disk often burn or wear out. There is only one solution - replacement;
- Oil has reached the surface. We have already described how to solve the problem above;
Purpose of the cable and its place in the device
VAZ 2112 cars have a mechanical drive; it is installed on passenger cars of the VAZ family and not only, which are equipped with low-power power units. This type of drive compares favorably with others due to its very simple design and low cost of production. In addition, the mechanical drive is easy to repair and maintain because it contains a minimum number of necessary elements, see photo below:
- As can be seen from the diagram, the main element of the mechanical drive is represented by a flexible cable enclosed in a shell
- The clutch pedal is located inside the car and is connected to the lever (clutch fork) through a flexible cable.
- At the junction of the fork and the cable there is an adjustment device, which is designed to regulate the free play of the pedal
- The operation of the drive is incredibly simple: the driver presses the pedal
- This sets the VAZ 2112 clutch cable in motion, which pulls the lever device
- This device (fork) moves the release bearing along the guide
- The release bearing presses on the legs (petals) of the basket
- Thus, the clutch is disengaged
Symptoms of a problem
So, it is recommended to change the part in question if you notice that the clutch pedal has become too tight. You should not postpone the work, otherwise the cable will simply burst, and then you will not be able to use the machine.
An equally common symptom is spontaneous gear shifting. Such troubles occur precisely because the cable has become unusable. The danger is that a car parked in neutral can quietly roll away while its owner goes about his business.
Be sure to change the cable when:
- lubricant begins to leak from its shell;
- The VAZ constantly jerks while driving.
As you can easily see, there are not many signs of a malfunction, and therefore it is not difficult to remember all the options. At the same time, knowing the symptoms will allow you to quickly respond to cable damage and replace it yourself.
Let's start replacing
As you know, there are two ways to replace the clutch cable on a VAZ 2112, with and without removing the frill and wiper. Which one is faster is a moot point; without removing it, it seems to be faster, but then when installing the cable in place, a lot of inconvenience arises, so I recommend leaving the method without removing the frill to yoga. The standard instructions included with the car require their removal, therefore:
- Carry out work on a cooled engine.
- Disconnect (just in case) the battery terminals
- Take off the frill, don't be lazy
- Unscrew the wiper so it doesn't interfere
- We unscrew the nuts that secure the clutch cable in the bracket on the VAZ 2112 using two 19mm wrenches (twist one, hold the other)
- After this, remove the cable from the bracket
- Then you need to disconnect the cable end from the fork
- If the cable breaks, there may be nothing left to remove
- After this, use a screwdriver to unscrew the protective cover covering the clutch pedal.
- And remove the casing
- Unhook the bracket that secures the cable end to the pedal
- To make this easier, you need to raise the pedal as much as possible and use a screwdriver to pry out the clip
- Since we removed the frill, it is now much more convenient to remove the bracket from under the hood
- From the interior, using the “8” key, unscrew the bolt that secures the thrust plate of the upper cable tip
- In the image below, the steering column was removed for clarity; in general, replacing the clutch cable on a VAZ 2112 does not require removing the column
- Then we pull out this support plate
- Pull the cable into the cabin
- Now push the new cable under the hood from inside
- After this, replacing the VAZ 2112 clutch cable in the reverse order of disassembly
- You can coat the inside of the cable with engine or transmission oil
- For lubrication in the winter season or closer to it, grease is better, as is used in CV joints
- Just keep in mind that it is most difficult for her to lubricate the cable from the inside.
- As you can see, replacing the clutch cable on a VAZ 2112 is quick and easy, all that remains is adjustment, which you shouldn’t forget about
Loading, Please Wait!
This may take a second or two.
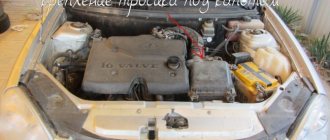
Hi all! We continue to mock the car, and this time we will make the clutch pedal softer and quieter.
I think many owners of tens and other front-wheel drive VAZs have noticed that the clutch pedal becomes tighter over time and a squeak appears. There may be several reasons for this, and I want to talk about the fight against one of them. In search of the cause of the tight pedal and creaking, I took the easy way and first tried to lubricate the cable and boss, which naturally did not bring any effect.
Having eliminated the cable, I moved on. The cause of a tight pedal and squeaking is the friction that occurs between the bushings and the axis of the clutch release fork. This happens because over time the lubricant loses its properties.
The main source of the problem is the lower bushing, since it is metal, and as you know, metal slides without lubrication with great reluctance, with the risk of scuffing, etc.
i.e. with excess friction. The upper bushing is plastic and even without lubrication the axle glides well in it.
This is what these bushings look like.
Thus, the main task is to lubricate the lower bushing. Ideally, you would have to remove the box, replace both bushings with new ones and fill them with fresh grease. But since we have enough more important things to do, throwing away the box in vain was not part of my plans. I decided to implement an improvement that I learned about a long time ago, but as always, I never got around to it.
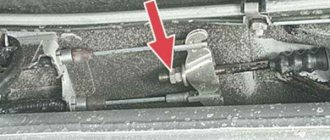
The essence of the modification is to drill a hole in the plastic bushing of the clutch fork axis, and then lubricate both bushings through this hole.
It all sounds very simple, and in reality the same thing happens. Next in order: We remove the air filter box so that it does not interfere. We find this very bushing. And it is located at the checkpoint, strictly under the thermostat.
We drill a hole in it with a diameter of about three millimeters so that the nose of the syringe can fit through. By the way, in order to reach the bushing, you will need a fairly long drill. You can probably try to drill a short one, but the wiring harness and CO pipes will get in the way. You need to drill until the drill rests on the fork axis.
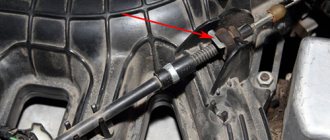
Then we fill the syringe with oil, I used transmission oil, and slowly pour it into the hole. The oil will not go away quickly, because...
The bushing fits tightly to the axle.
To speed up the process, you can slightly lift the bushing (as far as the latches will allow) by prying it around the perimeter with a screwdriver.
You need quite a lot of oil so that it flows along the axis and properly lubricates the lower bushing. I poured about thirty cubes, there is no need to be afraid of overdoing it, the excess will simply flow out. You can plug the hole using a screw.
If you suddenly need to lubricate the bushings again, this can be done by simply unscrewing the screw.
After the procedure has been completed, we get behind the wheel, squeeze the clutch and almost have time to get upset, because nothing has changed. But We don’t give up, we press the clutch five or ten times again, and on the next press the pedal falls down with less effort and without the nasty squeak.
Conclusions:
After lubrication, I finally got rid of the annoying squeaking noise and the clutch pedal became much softer. The feeling can be compared to replacing the clutch with a new one.
PEACE to everyone, like and share the post with friends
, this is another modification for the VAZ from the
MUST HAVE category!
Issue price: 50 ₽ Mileage: 179,800 km.