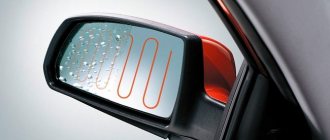
Heated side mirror VAZ 2112
VAZ 2112 heated mirrors are an option that is not always found in the standard equipment of VAZ cars. However, in latitudes with continental and moderate continental climates, such an option as heated rearview mirrors for the VAZ 2112 is simply necessary. So, as everyone knows, in such a climate there are often periods of high humidity, during these periods the glass fogging or freezing occurs.
Choosing mirrors
We decided to purchase and install heated mirrors ourselves, but the question of choice is not an easy one, since today a huge number of different models are sold on the markets, which differ in appearance, price and technical characteristics. To help with the
choice, we will not describe or list unnecessary ones details, but rather consider the points that will be important to pay attention to when purchasing
Visual characteristics
An important characteristic is the reflection coefficient, in other words, reflectivity:
- You can see this value for your car in its passport
- According to the standard, the reflectance coefficient (reflectivity) for a car mirror must be more than 40 percent
- Otherwise, you run a high risk of not seeing what’s going on behind your car and getting into an accident.
The second equally important characteristic is the correctness of the transfer (without distortion) of the shape of objects:
- It is difficult to evaluate this characteristic
- All you have to do is look at your reflection in the sample being tested.
- And if your reflection resembles the reflections in the funhouse mirrors, then you should not purchase such a product
In addition, you should pay attention to the presence of an anti-reflective coating on the mirror element:
- Only high-quality “tinting” will protect your eyes from being blinded by reflected light.
- However, it is worth considering the fact that excessive darkening further reduces reflectivity and can lead to incorrect color rendering
Mechanical characteristics
When purchasing heated side mirrors, you need to pay close attention to the position adjustment present, as well as on what principle it is implemented:
- For example, if you take standard mirrors from a VAZ 2110, they have a lever adjustment mechanism, which has a number of disadvantages
- Therefore, a cable mechanism is more preferable, since it is smoother and has better adjustment accuracy compared to a lever mechanism.
- However, the ultimate dream of every car owner, without any doubt, is electrically controlled elements
- In this case, a joystick is located inside the car, with which you can easily set the location of the side mirrors as you prefer.
It is worth recalling a point that applies not only to the choice of mirrors. Rather, this is a general recommendation that everyone needs to remember when purchasing any spare part:
Immediately pay attention to the quality of the mirror element, carefully inspect all the parts of the case. The parts should show cracks, scratches, chips, or other mechanical damage. In addition, you should pay attention to the packaging and branded packaging. Any self-respecting manufacturer supplies its products exclusively in branded packaging, it usually indicates the address and telephone number, and also contains detailed information about the model. Therefore, feel free to open the box to make sure that there are instructions inside in your native Russian language, as well as an installation diagram. In addition, an important factor is the presence of the necessary fasteners in this kit, a set of wires and seals, which will allow you, during self-installation, to reduce additional costs, in addition, significantly reduce the time required to complete the work
Heating efficiency
Another parameter that interests us, for the sake of which all the actions were done:
- Because ultimately you need a mirror that will be able to work effectively under adverse conditions
- We need to evaluate the heating rate and quality of the heating element and how quickly moisture, snow and icing will evaporate from the surface
- You won’t be able to evaluate such phenomena on your own without special sensors and a computer program, so all you have to do is connect and test in real conditions, observe visually and record the time
This concludes, additionally watch the video on this topic, good luck in installing the heating.
What is suitable from Priora for VAZ 2110
Two differences, but big ones.
Priora has a more advanced VAZ-21126 engine, which not only spins up faster and is quieter, but is also much more lively at high speeds, which is what the old engines lacked.
Calculations and miscalculations
To summarize, we admit that the Lada 2170 Priora is a step in the right direction, it’s a pity that it’s small and belated. The improvements are visible only to those who have not tried a good foreign car, and there are fewer and fewer of them. In other words, Priora has many advantages over the “ten”, but only they can be fully appreciated. owners of "ten".
Lada Priora is a pretty successful restyling, but it would have been 5-6 years earlier.
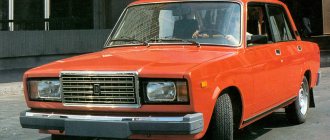
Lada 110 is a good solution for its time (12 years ago). But, unfortunately, its quality was never brought to an acceptable level.
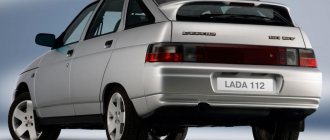
VAZ-2110-Priora
Previous generations: No
The main premiere of 2006 can be called the beginning of mass production of the first child of the new LADA PRIORA sedan family. The plant first introduced the public to this car in 2003, when it presented an experimental sedan called “Project-2170” at the Moscow International Auto Show. A year later, a hatchback from the same family was shown in the capital, which by that time had received the designation PRIORA. In mid-summer 2006, the main stage of preparation for the production of new cars was completed, and at the end of the year the first cars arrived at dealers. In 2008–2009 LADA PRIORA should completely displace the outdated LADA 110 family from the production program. Constructors and designers expect that a thorough redesign of the platform and body will be positively received by customers, and the inevitable increase in price will occur within reasonable limits. In a significant design change that certainly makes the PRIORA cars more attractive, the fit of the body panels has been improved and the gaps between them have been kept to a minimum. High quality body assembly is ensured through the use of modern electronic methods for designing and manufacturing dies using mathematical models. Japanese companies helped solve this problem. LADA PRIORA with a sedan body has an aerodynamic drag coefficient of 0.32, which is one of the best indicators among analogues. Modern lighting technology, the absence of plastic parts, side pillars with special moldings that catch water when the windshield wipers operate - all this distinguishes the new product from the representatives of the previous family. Italian specialists took part in the development of the original interior together with factory designers. As a result of the joint work of specialists, the following appeared: new instrument cluster, steering column switches, steering shaft housing, gear lever, door and ceiling trim, four-spoke steering wheel with an airbag module, etc. New interior elements include a small box with a central armrest on the floor tunnel with space for a phone and a socket for connecting it. An eyeglass case is placed on the ceiling along with the individual lighting lamp. Much attention was paid to improving the parameters of the air environment in the cabin. Athermal glass is installed on all manufactured cars. A new climate system with electronic control and air recirculation has been developed for the PRIORA family. The new heater for the “norm” and “standard” configuration options is complemented by a built-in air purification filter. Luxury options are equipped with a heater and air conditioner in a single unit. The sound insulation of the cabin has been significantly improved, the squeaks of plastic parts have been completely eliminated, and in order to reduce air noise, a noise-absorbing element has been installed at the inlet of the air filter. The cars of the PRIORA family are equipped with a modernized 16-valve engine with a displacement of 1.6 liters. Changing the crank mechanism with a shortened piston made it possible to reduce the mechanical losses of the VAZ-21124 engine and increase power to 98 hp. With. at 5800 rpm and torque up to 145 N•m at 3600 rpm. A new control system with a Bosch M7.9.7 controller guarantees reliable engine starting at low temperatures, while the engine is available in versions that meet the requirements of Euro-3 and Euro-4 standards. The new engine has improved the dynamic properties of the cars, while maintaining their high efficiency, especially when driving at high speeds. An increase in acceleration dynamics and maximum speed dictated changes in the chassis. Tires of size 18560R14 appeared on the cars, the installation of which had a positive effect on increasing the lateral stability and resistance of the car to drift. The “norm” and “standard” options are equipped with wheels measuring 5.SJx14 with a reinforced lip, while the “luxury” options are equipped with alloy wheels of the same size. Increasing the overall rigidity of the body had a positive effect on the stability of the kinematic parameters of the electric power steering and improved the stability and controllability of the vehicles. The newly redesigned body shells of the PRIORA family contain 12 base reinforcements, allowing the vehicle to confidently meet the latest EuroNCAP passive safety requirements. In order to increase the level of passive safety, the following were introduced: a soft pad on the instrument panel to prevent injury to the front passenger, an airbag for the front passenger installed on luxury versions, an energy-intensive beam that protects the driver’s legs, and three-point seat belts for those sitting in the rear seat. The bodies of cars of the PRIORA family compare favorably with the bodies of the LADA-110 family with increased corrosion resistance. The share of galvanized steel in them from the total mass of the body is 52% or 29% of the total surface area of the body. Wheel arches, sills, floor parts are made of galvanized steel with double-sided coating. For hinged body panels (fenders, hood, trunk lid), steel with one-sided zinc coating is used. Anti-corrosion treatment of bodies includes applying a two-component primer to the welded body, 100% protection of welds. LADA PRIORA cars are equipped with reliable electronic equipment with advanced switching. Blocks with increased tightness were used, additional fuses for power circuits were introduced, and for the first time, a multiplex system was used on AVTOVAZ products, which reduced the number of electrical wires in car doors.
Heating installation options
Installation of mirrors from Priora on VAZ 2112
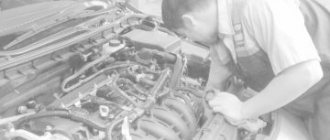
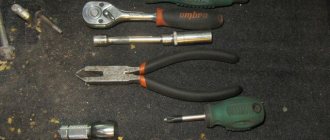
How to install heated mirrors on a car with your own hands:
- There are several ways to install heated mirrors on a car.
- Of course, you can purchase and install ready-made tuning ones, where heating is already provided, the price, of course, can hit the budget hard and it is not yet known how high-quality the heating element is installed in them
- Another option, you can purchase separately two universal heating elements, then install them on both mirrors, then connect the heating to the car’s network
- The third option would be to make the heating yourself, the cost would be pennies, and its efficiency would simply be “off the charts”
- Considering that when installing such a system, you can use various time relays, or a relay with a switch-on delay, or connect a heating relay paired with a temperature sensor (which will give automatic switching on in cold weather)
- In addition, there are common circuits for connecting to an installed heated rear window, where connecting the heated mirror on a VAZ 2112 will not be difficult, and in addition, such a system will be able to withstand a small additional load, so such a connection is very advisable
Easy installation method
Of the variety of ways in which you can equip a car with a heated mirror system without much effort, one remarkable option should be immediately noted - heating using regular (or a pair of) car incandescent light bulbs. Here are your instructions:
- We proceed from the knowledge that one small light bulb with a power of only 21 Watt, which is screwed into the housing, will be able to completely defrost even a heavily icy mirror in just 2-3 minutes.
- And if heating using one powerful light bulb (21 Watt) seems impractical to you, and if there is slight fogging, a constantly connected load of such power will be undesirable, you can use two 10 Watt light bulbs or one, but two-pin
- Then we use one of its contacts for defrosting, and the second for preventing fogging.
Connected Priora SE mirrors to 2112
To begin with, I bought a set of wires in a colored braid of 3 meters, which was in vain.
I bought a control unit for the electric drive of mirrors on a VAZ 2110, it was difficult to find, and I never found the response block. But more on that later. I bought small female and male terminals and a couple of standard female terminals
You won’t find a mating block for mirrors anywhere, so it was decided to assemble them on terminals
I ran the wiring to one side, which was not particularly easy, but I have experience))
But there weren’t enough wires for the second door and the question arose about purchasing another set, but this turned out to be difficult, since ready-made sets of 3 meters were no longer sold, only individually. For a set of 7 colors I paid 370 rubles, and if individually, then 700. You understand, it’s not ice. But one day I went to the guys at the car market to get a response block for the control unit for mirrors and wires, and they told me: “There is a ready-made connection kit for 12R, 500 rubles.” I took it without thinking, because the kit included a block for the joystick, and wiring for the left and right doors.
On the same day I began to stretch wires. I started from the central tunnel. I had to remove the terminals from the finished block and pass them in a bunch through the hole where the wires were routed to the cigarette lighter. In principle, it took me about 30 minutes. The main thing is to remember which wire came from where from the block.
Further on the Drive I found a connection diagram
I sat down, figured out what was what, and went into battle. I threw it into the passenger door, crimped the terminals on the mirror and on the wires, then into the driver’s door: I hooked it to the ones that had been wired earlier and pulled it through. Everything is in its place. True, I had to extend the wires of the driver's side repeater, because in the finished braid it is short, and the ground wire is in the same place.
Actually the connection itself: 1. Power everything with the plus block number 5, thick blue wire. I removed the terminal from the block and crimped the positive one from the mirror braid with the positive one into one terminal and inserted it into its rightful place. I thought it was more reliable than twisting.
2. Ground connection. I found a pin above the mounting block and connected it to it. 3. Organized the joystick backlight.
The block is still in the same mounting block 4. I connected the adjustment of the driver's mirror. The colors from the braid matched the colors on the mirrors. I checked it - it works)) I'm happy.
I had to tinker with connecting the passenger mirror, since the colors from the braid no longer matched, but about 15 minutes and everything was fine. 5. Heating connection. Block 5 in the mounting block. Thick brown wire. I connected it the same way as the positive one, not twisted))
6. Connecting repeaters. Since I decided to leave the repeaters in the wings, I found 21 connector blocks in the area of the mounting block.
and connected as indicated in the diagram. It’s easy to find the wires from the repeaters: 2 wires go to the terminal)) and there are 2 such terminals in total. Here, too, we had to twist them, since it’s very difficult to remove the terminals from this block. Connect, check and rejoice))
It may be necessary to install mirrors from Priora on a VAZ 2110. In this case, you will need the correct diagram, which you can find here.
What you need to connect mirrors
For installation we will need:
- The mirrors themselves;
- SE fender caps (optional);
- Straight hands (or master);
- Wiring and joystick;
- A mad desire to transform the car.
View of Priora SE mirrors on VAZ 2110
View of mirrors on a car.
Plastic plugs that will be required during installation.
Connection diagram for Priora SE mirrors on VAZ 2110
Before installing mirrors from Priora SE on a VAZ 2110, read the connection diagram.
Connection diagram for Priora SE mirrors on VAZ 2110
Standard side mirrors - article number and price
Mirrors for VAZ 2114
For the Lada Priora car, standard parts with electric drive have catalog number 2170-8201017. Price – about 3,100 rubles per set.
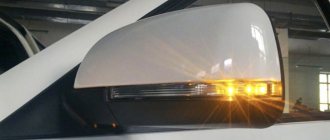
Heated mirrors on the Priora received a larger mirror element. Thanks to this, the driver does not have to lower them when reversing – even this difficult-to-reach area is visible. For the SE version, repeaters were added to the mirrors. Priora with electric drive, repeater and heating (catalog number 2170-8201021, price - about 3,800 rubles per set) was much more expensive than conventional versions.
Please note that kits are often sold unpainted or painted to match the body color. If necessary, paint the body of the mirror device before installation. Painting it yourself will turn out much better. Some stores offer painting only the upper parts of the body, but you can choose any painting method yourself. Speaking about the rear-view mirror of a Priora car, you can notice that it is ordinary, as simple as two rubles, attached to a holder that is secured under the trim.
How to install Priorovsky heated mirrors on a VAZ 2112
In January there were severe frosts in Volgograd, and after a month of parking in an open parking lot, I discovered that the right mirror on my two-wheeler had burst in half (how did that happen?). In this regard, and not only, I have long wanted heated mirrors. I decided to install prior mirrors. Again, I bought a pair at the car market for 3500.
Well, I bought pads for them. I bought the pads from an auto parts store on Kholzunov.
...Here comes the continuation. When installing, I was guided by the entry in the bulletin board of the Priora Mirror + control of the Kalinovsky unit. User evgen56rus has everything written out in detail there with the pinout of the contacts. So first I prepared a cable from an external USB port, bought terminals and attached them over the original ones
Then I crimped everything with heat shrink tubing.
I’ll write a little about the pinout of contacts: Although, as I wrote above, the user evgen56rus has everything written out.
Connection: first mirror
1 to the mirror on the BLUE wire 7 to the mirror on the RED wire 6 to the mirror on the GREEN wire Second mirror 3 to the mirror on the BLUE wire 7 to the mirror on the RED wire 8 to the mirror on the GREEN wire
pin 2 to plus for illumination, we connect pin 4 to plus to the buttons for control (I also connected it to the buttons, you can connect it to the ignition) pin 5 to minus (ground) I connected to ground, which went to the buttons. Next I made a cutout in the door card
Currently, Lada Priora is equipped with electric drive and heated exterior mirrors. One of the popular modifications is the installation of side mirrors of the new SE model (with heating, electric drive and turn signal indicators). We'll tell you how to replace old-style mirrors with new ones with your own hands.
Required
: Electrically controlled external mirrors with turn indicator (article: 2170-8201050-75 and 2170-8201051-75, price about 3,500 rubles), turn signal caps SE.
Communities › VAZ: Repair and Modification › Blog › Mirrors from Priora for VAZ 2110-12.
Good day everyone, members of the VAZ: Repair and Improvement community! It’s no secret that the original mirrors on the 10th family have little information content, constant rattling, etc. Someone makes and remakes them, but I took a different path, so to speak, not the easiest. I remember the day when I saw a new luxury Priora with new mirrors. A thought arose in my head: “Have Vaz really learned to make nice and functional mirrors?”
The choice was obvious, you need to take them. With this post, I may not open America to you, friends, but perhaps it will help those who are planning to change their mirrors.
Why did I choose mirrors from Priora? The answer is obvious. 1) Appearance, they refresh the car 2) Heating 3) Electrical adjustment 4) Turn signals
Someone will say: “So what?” “There are tons of cheaper options with the same features.” Let's return to point 1
Most popular options
Panoramic (spherical) mirrors
Installation and connection of side mirrors SE on Priora
Instead of the usual interior element, you can install a panoramic one. They require a trial period that lasts approximately 2 weeks. Panoramic accessories provide a better view, but “move away” objects. If during this time the driver gets used to distortions and constant recalculation of the distance to objects, the accessory can be left.
The advantages of such models are:
- no blind spots;
- free movement along the rows;
- focus on a panoramic view, rather than on the side elements, and a holistic perception of the road situation at the rear;
- control over the behavior of rear passengers.
Anti-glare
When choosing which mirrors to put on a VAZ 2114, if you often have to drive in poor visibility conditions, pay attention to options with anti-dazzle
Wedge cover
The surfaces of the reflective layers are placed at an angle to each other. Two layer positions, for day and night operation, can be switched manually or electrically. During the day, images are reflected from the mirror surface, and at night from the outer glass surface.
Liquid crystal reflective layer
A layer of liquid crystals is located between two glasses and normally reflects objects with normal brightness. In blinding light, the crystals change their characteristics and reduce the brightness of the image. The transparency of the crystals is determined by an electronic control system.
Tinting
Tinting with special films weakens the light that blinds the driver. But the effectiveness of tinting depends on the individual qualities of the driver.
We install mirrors from Lada Granta on Priora.
The mirror housing is from Granta, the corners (brackets) attached to the body are from Priora. Don't think that the rear view mirrors will now be black and white. No, they will not do! These are mock-up brackets for attaching Lada Granta mirrors to the Priora body.
You get a unique car exterior and the ability to choose turn signals in the mirrors: With two diodes. The diode repeater for the side mirror of the Grant will now be available on the Priora.Running repeater in Lexus style. Running repeater in Lexus style on Priora. Double ticker in AMG Mercedes style. Mercedes style is possible on the Lada Priora.
Other methods and connection diagram
The largest category of cars that do not have heated mirrors, of course, are all our domestic car models, so the most pressing question for the VAZ 2112 is how to connect heated mirrors, now we will tell you the answer. So:
Installing heating is a very popular variety of tuning procedures, because it is not particularly difficult and is therefore available to every interested car owner, the connection diagram is shown in the photo below
Electrical diagram for connecting heating elements
Of course, when it is urgently necessary to do heating, then the purchase and installation of new mirror elements with a built-in heater is the most popular and most often used option
Installation of heated rear mirrors 2110
In January there were severe frosts in Volgograd, and after a month of parking in an open parking lot, I discovered that the right mirror on my two-wheeler had burst in half (how did that happen?). In this regard, and not only, I have long wanted heated mirrors. I decided to install prior mirrors. Again, I bought a pair at the car market for 3500.
Well, I bought pads for them. I bought the pads from an auto parts store on Kholzunov.
...Here comes the continuation. When installing, I was guided by the entry in the bulletin board of the Priora Mirror + control of the Kalinovsky unit. User evgen56rus has everything written out in detail there with the pinout of the contacts. So first I prepared a cable from an external USB port, bought terminals and attached them over the original ones
Then I crimped everything with heat shrink tubing.
I’ll write a little about the pinout of contacts: Although, as I wrote above, the user evgen56rus has everything written out.
Connection: first mirror
1 to the mirror on the BLUE wire 7 to the mirror on the RED wire 6 to the mirror on the GREEN wire Second mirror 3 to the mirror on the BLUE wire 7 to the mirror on the RED wire 8 to the mirror on the GREEN wire
pin 2 to plus for illumination, we connect pin 4 to plus to the buttons for control (I also connected it to the buttons, you can connect it to the ignition) pin 5 to minus (ground) I connected to ground, which went to the buttons. Next I made a cutout in the door card
Currently, Lada Priora is equipped with electric drive and heated exterior mirrors. One of the popular modifications is the installation of side mirrors of the new SE model (with heating, electric drive and turn signal indicators). We'll tell you how to replace old-style mirrors with new ones with your own hands.
Required
: Electrically controlled external mirrors with turn indicator (article: 2170-8201050-75 and 2170-8201051-75, price about 3,500 rubles), turn signal caps SE.
Installation
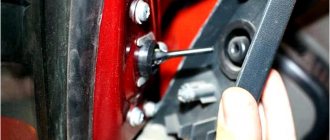
Remove the standard side mirrors (pry off the mirror triangle with a screwdriver and remove the three mounting screws). Install the new mirror in the reverse order.
We stretch the turn signal wires to the mirrors:
- Remove the door trim.
- Remove the turn signal from the fender and disconnect the block. We install plugs instead.
- Pull the wires out of the fender and into the interior. To do this, unscrew the sill trims in the cabin, peel back the carpet and felt and pull the black wire in the engine panel. We determine which of the two +12 V wires using a multimeter or a test lamp. We insulate the second wire.
- Route the wire from the passenger compartment to the car door through the corrugation.
Connection
Old style mirrors (without direction indicators) have two connectors (3 and 2 wires):
The mirrors of the new SE model have 1 block of 6 wires:
We cut off the wires from the SE mirror block and solder it according to the diagram:
The process of installing and connecting mirrors of the new SE model is also shown in the video:
Heated side mirror VAZ 2112
VAZ 2112 heated mirrors are an option that is not always found in the standard equipment of VAZ cars. However, in latitudes with continental and moderate continental climates, such an option as heated rearview mirrors for the VAZ 2112 is simply necessary. So, as everyone knows, in such a climate there are often periods of high humidity, during these periods the glass fogging or freezing occurs.
Communities › VAZ: Repair and Modification › Blog › Mirrors from Priora for VAZ 2110-12.
Good day everyone, members of the VAZ: Repair and Improvement community! It’s no secret that the original mirrors on the 10th family have little information content, constant rattling, etc. Someone makes and remakes them, but I took a different path, so to speak, not the easiest. I remember the day when I saw a new luxury Priora with new mirrors. A thought arose in my head: “Have Vaz really learned to make nice and functional mirrors?”
The choice was obvious, you need to take them. With this post, I may not open America to you, friends, but perhaps it will help those who are planning to change their mirrors.
Why did I choose mirrors from Priora? The answer is obvious. 1) Appearance, they refresh the car 2) Heating 3) Electrical adjustment 4) Turn signals
Someone will say: “So what?” “There are tons of cheaper options with the same features.” Let's return to point 1
How to connect
Usually only two wires come out of the heater element; they can be connected without observing polarity; the connection will always be parallel and polarity does not matter. Since you can and should turn on the heated mirrors together with the rear window heater, you can connect directly to this system. That is, when you turn on the heated rear window, the heated mirrors will also turn on, the relay and button for heated mirrors are not needed in this case.
If you plan to connect separately from the heated rear window, then you need to stock up on a power button, a relay and a 10 A remote fuse (if you use a 10-amp power button, you can do without a relay, since you can connect heated mirrors directly, due to low power consumption).
If you still need to make heated mirrors from scrap materials, then, as mentioned above, the easiest way to do this is from a car light bulb. This method is universal and suitable for absolutely all cars.
First of all, the mirror body itself requires a little modification; it needs to create a heat shield. This can be done using foil by simply gluing the inside of the case. Then place and secure there the socket with the car light bulb, making sure that the lamp does not touch the mirror itself or the body (the lamp heats up quite strongly, and if touched, it can damage the mirror element or melt the mirror body).
You can also make a heated mirror on a car, with two operating modes, a powerful mode aimed at quickly defrosting the mirror and a weak one to protect against fogging. This can be organized by installing, for example, a two-contact lamp (21\5). Into the mirror housing, and connecting it accordingly. In this case, 21 Watt will work for rapid defrosting, and 5 Watt will be enough to protect against fogging.
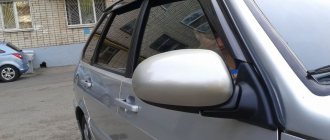
Mirrors from Priora for VAZ 2112
In January there were severe frosts in Volgograd, and after a month of parking in an open parking lot, I discovered that the right mirror on my two-wheeler had burst in half (how did that happen?). In this regard, and not only, I have long wanted heated mirrors. I decided to install prior mirrors. Again, I bought a pair at the car market for 3500.
Well, I bought pads for them. I bought the pads from an auto parts store on Kholzunov.
There I also took a control unit for power windows and mirrors from Kalina with two buttons, and took more Kalina buttons to install on each door.
I didn't take pictures of the buttons. The block is sold without pads. To connect, I want to use a cable from an external USB port (or from an external COM port), I bought it at the poultry market in the Krasnooktyabrsky district.
Connection to the ESP connector, I couldn’t find the connector in the store either, I’ll connect it like this:
Buttons for 120 rub. The block costs 650 rubles. pads 170 rub. But, I just bought all these things, I haven’t connected them yet. I’ll do the interior noise, and then I’ll start connecting the ESP and mirrors. So, to be continued...
...Here comes the continuation. When installing, I was guided by the entry in the bulletin board of the Priora Mirror + control of the Kalinovsky unit. User evgen56rus has everything written out in detail there with the pinout of the contacts. So first I prepared a cable from an external USB port, bought terminals and attached them over the original ones
Then I crimped everything with heat shrink tubing.
The mirrors fit into their standard places without any modifications, I inserted the connectors from the heating and mirror adjustment wires into the inside of the door, inserted purchased pads into them, and connected the ends of the purchased pads to a prepared USB cable
I’ll write a little about the pinout of contacts: Although, as I wrote above, the user evgen56rus has everything written out.
Connection: first mirror 1 to mirror on BLUE wire 7 to mirror on RED wire 6 to mirror on GREEN wire Second mirror 3 to mirror on BLUE wire 7 to mirror on RED wire 8 to mirror on GREEN wire
pin 2 to plus for illumination, we connect pin 4 to plus to the buttons for control (I also connected it to the buttons, you can connect it to the ignition) pin 5 to minus (ground) I connected to ground, which went to the buttons. Next I made a cutout in the door card
Heated mirrors. One of the contacts of the mirror heating block was connected to ground (housing), the second contact was combined with the same contact of the second mirror and connected to the contact block, which was apparently provided for additional options at the factory. I bought a button for heating the rear window and inserted it in the place where there was a plug before.
Now you can use heated mirrors separately from the heated rear window. A very good thing in the rain dries drops from the mirror. And the mirrors are adjustable, very convenient.
Basic faults
The fasteners have become loose. Each part is held in place by several fasteners at different points. They may become so loose that tightening them will be useless. Everything will depend on the severity of the damage. In some cases, replacing the fasteners will be sufficient. The heating does not work. Check the connection of the wire blocks. Perhaps it is enough to strengthen the wire connections so that they no longer come loose. The electric drive does not work. Adjusting the position of mirror devices while sitting in your seat is much more convenient than doing it manually. Check the wiring. Turn signal repeater. If the repeater does not work, it means the signal is not reaching it. The problem, again, is the wiring. Broken mirror element. It will be enough to replace it with a new part, but during replacement you should be extremely careful
It is important to prevent splinters from getting under the cover.
Problem and solution
Winter is coming. And here, unfortunately, side rearview mirrors cannot always help the car owner. Winter is a particularly difficult time of year for motorists. We will not now list all possible technical problems, starting with starting the engine, but will touch only on purely mechanical problems:
- Firstly, with the design of mirrors, it turns out that their reflective element is recessed into the body, which makes it difficult to use mechanical cleaning means, such as a brush or scraper
- Secondly, any attempt to manually clean the reflective surface will ruin the settings, which will render the side mirrors useless
- Third, if you use too much force, you may scratch or even break them.
- On the VAZ 2112, heated mirror elements can completely solve such problems
Work principles
The heating of the side reflectors is based on any electric heater (low-temperature, of course), electrical wiring, and a button (on the dashboard) to control:
- The electrical wiring for heated mirrors is connected to the car's on-board network at twelve volts.
- Closing the contacts with the power button connects the mirror heating (its heating element) to the network; the electric current passing through the heating element heats up the surface of the mirror, the heated surface begins to melt the formed ice, in addition, the warm surface will stop fogging
Specifications
Any models must meet the following criteria:
- Clear reflection. All details should be visible even when shaking and swaying.
- Visibility. The road behind the car should be visible to the horizon.
- No color or shape distortion.
- Separating the interior mirror in case of an accident. The structure should fold or break off when hit with a head.
- Folding exterior mirrors. They should fold in the event of a sudden collision.
- Safety. No sharp corners, splinters due to damage, etc.
- Dimensions. The outer casing should not protrude beyond the vehicle body by more than 20 cm.
Delivery by transport company
Delivery by one of the transport companies with a representative office in your city. Delivery time: 2-10 days depending on the distance of your locality from Togliatti. The most convenient and fastest way to deliver orders of different sizes. Delivery cost from 250 rub. depending on weight and delivery distance.
Orders are sent by transport companies based on 100% payment for the order.
We cooperate with:
Business Line
Baikal Service
Energy
GTD (formerly KIT)
Zheldor expedition
Attention! Regardless of which delivery method you choose, check the integrity of the goods and packaging upon receipt of the cargo (parcel).
To improve the quality of customer service, video recording of order packaging is performed.