Domestic manufacturer AvtoVAZ regularly tries to introduce something new into its products. The plant often focuses on the wishes of consumers, so the advice of most drivers of previous Lada models was no exception.
As you know, the old VAZ-2110 and VAZ-2112 models did not provide audio preparation, which is why the owners of these versions of the Lada were forced to completely redo the interior to accommodate the acoustic system. Audio preparation in Grant was provided for during design.
All the necessary wires for the acoustics are present in the stock car. There is also the possibility of placing the multimedia system in a special opening in the dashboard. There is also electrical wiring for the radio, rear and front speakers.
Taken together, this makes for a PRETTY SIMPLE connection to the AUDIO SYSTEM YOU WANT to do. However, once you understand the electronics of the machine and allocate a sufficient amount of time for this, you can carry out the installation yourself.
The feasibility of conducting audio training in the Lada Granta largely depends on the assembly of the car. On the “Norma” and “Standard” fret trim levels, the owner only needs to connect the audio system to the controls, because the manufacturer independently carries out the audio preparation.
Features of audio system installation
When connecting the stereo system wiring, it is necessary to take into account certain features of the electrical supply.
This is provided using red and yellow wires. The first is responsible for remembering the audio system settings, the second is for turning off the radio, which is controlled by the car’s ignition. It is recommended to use a parallel connection type for both wires so that the audio system can only be turned off manually. In this case, it will not be affected by the car’s ignition key, but there will be a problem of excessive electricity consumption in parking mode, which is solved by installing a special regulator for the red electrical wire. With its help, you can turn off the radio by hardware when leaving the car for a long time. This regulator can be connected to the alarm system, that is, when the vehicle is locked, the audio system will turn off automatically.
The disadvantage of this system is the extra current consumption, but in any case it is much less than the indicators that provide power to the radio during standby mode.
If the audio system suddenly turns off due to excessive volume, display flickering, or high-pitched sounds, it is not due to a power failure. This situation occurs when the car battery is discharged and the current ceases to be constant. The problem is solved by connecting an additional capacitor, which provides constant power to the radio.
Once you have successfully connected all the necessary connectors to the car's electrical wiring, you can begin installing the front and rear speakers.
Good sound in the car: what is it, how much does it cost and how to install it
What's bad about the stock audio system?
Since the audio system does not directly affect the safety or reliability of the car, automakers traditionally do not try to make it sound better: the main thing is that the “music” is reliable and does not spoil the statistics with breakdowns. As a rule, cars on the assembly line are equipped with audio components from well-known brands - Blaupunkt, Clarion, Panasonic, Philips. But you shouldn’t buy into the “good name” - the standard equipment includes the simplest versions of the equipment without the goal of pleasing music lovers.
Standard acoustics usually have a narrow frequency range, playback with a “plural” sound and a flat, non-volumetric sound stage. In addition, at high volumes, the speakers often begin to “play along” with interior decoration details, “decorating” the soundtrack with trills and vibrations of fragments of the dashboard and door panels.
Of course, here we are not talking about premium-segment cars, which are equipped from the factory with components from elite brands (Harman Kardon, Bang & Olufsen, Bose), and are distinguished by special body preparation, the presence of amplifiers, a subwoofer and carefully calculated placement of speakers.
What is high-quality sound in a car?
This is an opportunity not only to enjoy the vocals of pop stars, but also to appreciate the skill of performers of individual instrumental parts, soloists with a wide range of voices. The “correct” speakers accurately convey all the nuances of the sound of instruments, without embellishing the sound or hiding its features. A good sound should be pure, without impurities in the form of resonance of interior parts. Of course, non-standard music can also be louder than “native” music, but this cannot be considered the main factor in a high-quality installation.
Who should leave the stock audio system?
Despite all its disadvantages, a standard audio system is usually reliable, has sufficient volume, and reproduces sound well in the range of human speech and many popular music genres. So if you drive an inexpensive car from morning to evening on rough roads in the company of talkative passengers, listen to chanson or FM radio and value the original condition of the interior, most likely, standard acoustics are just for you.
How many speakers should a car have?
The number of speakers is not the most important factor; the type of speaker system is much more important. To accurately convey all the nuances of a phonogram, the acoustics must be component - with at least two frequency channels. In fact, each such loudspeaker consists of two speakers: a high-frequency tweeter (“tweeter”) and a low-mid frequency speaker - midbass, as well as a frequency crossover filter.
The minimum required in a car is one pair of such two-channel kits, located in the front. This is the so-called front, which is generally enough to “feel the difference” against the background of the standard system. For better reproduction of low frequencies, it is advisable to place another pair of conventional (single-component) loudspeakers with a larger diameter (at least 16 cm or “ovals” 6x9 cm) in the rear part of the cabin.
Ideally, this should be a special low-frequency speaker - a subwoofer connected to a separate channel. Further increase in the number of speakers will affect not so much the sound quality, but rather better audibility at different points in the cabin.
How to select speaker parameters?
The first problem when selecting speakers to replace the standard ones is the size, because the standard ones are often smaller than the standard ones in diameter and depth. In addition to geometry, loudspeakers must be suitable for electrical parameters.
Two characteristics are especially important - resistance and sensitivity. If we are talking about connecting acoustics on a budget - directly to the head unit (without an amplifier), then the resistance should be at least 4 Ohms, and the sensitivity should be about 92 decibels.
How to choose inexpensive but high-quality speakers?
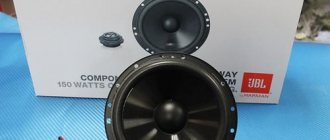
Most world-famous car audio manufacturers offer acoustics from all three price groups. There are few exceptions, for example, Focal with its exclusively top-end models or JBL with its budget orientation. A set of inexpensive front speakers (two tweeters, two midbass and two crossovers) of a good brand will cost about $45-50.
At the same time, loudspeakers with similar characteristics from an unknown manufacturer can be bought for $15, but, as a rule, these work for no more than a year. When it comes to an inexpensive audio system, it is recommended to pay attention to American brands that fall in the $45–50 range (Polk Audio, MTX, Kicker). They are traditionally designed for use in the free volume of a door, trunk, etc.
What needs to be done besides replacing the speakers?
The first condition is to choose the right place for the speakers. High-frequency tweeters should be placed higher, closer to the listener and directed towards him. Midbass (mid-low-frequency range speakers) are usually located lower; the subwoofer can be placed in any part of the cabin.
It is also important to ensure that the speaker is firmly attached to a massive body part. If this is not a standard plastic podium, then you will have to make at least spacer rings, for example, from thick plywood.
And finally, even local vibration and noise insulation will significantly improve the sound of the loudspeaker. If it is not possible to treat all the door panels in which the speakers are installed with special materials, you need to stick a piece of absorbing material at least opposite the back of the speaker. This will significantly eliminate unwanted sounds from vibrating metal.
How expensive are high-end acoustics?
Mid-price speaker systems from reputable brands sell for $100–120 per set, top models cost an average of $250–300. There are also premium-level acoustics priced at about $900 – 1,000 per pair. These are handmade speakers for true car audio connoisseurs and highly professional installers.
Such kits are produced to order and, if you are interested in their price, you also need to remember about the cost of installing them in a car (and this can be $1,000 or $2,000) - only high-class installers will help you fully realize the potential of such speakers.
What is the difference between a simple audio system and an expensive one?
In addition to more expensive speakers, a high-end audio system differs in the way they are installed. If in an inexpensive system the speaker “plays” the volume of the door, trunk or the entire cabin (depending on where it is installed), then for each (with the exception of some tweeters) speaker of the Hi-Fi system, its own chamber is created, the volume of which is determined by the manufacturer or installers.
An advanced system must have a subwoofer ($60 - 600), several power amplifiers ($70 - 12,000) for channel-by-channel amplification of front, rear, and subwoofer signals. All components are connected with special wiring ($100 - 1000). The entire car undergoes soundproofing work with complete disassembly of the interior and trunk ($400 - 1,000). Naturally, with this approach, the head unit does not remain standard, and it is either replaced ($60–1,500) or upgraded ($100 or more).
Finally, car audio professionals finalize the sound stage by changing the angle of the loudspeaker axis by a few degrees, adjusting the level and frequency range of the signal from each speaker. As a result, a more or less high-quality audio system will cost at least $2-3 thousand, and a truly perfect one can easily cost $10 thousand.
How to choose a speaker system?
If the owner of a LADA Vesta needs high-quality sound, we recommend choosing two-component speakers. For these accessories, the high-frequency emitter is placed in a separate unit in relation to the low and mid-frequency head.
It is advisable to install such components in the front doors. The rear door panels can be "addressed" with lower quality coaxial speakers, which will serve as an expansion of the sound theater. To install high-frequency heads, additional cabling will be required. This is how the speakers are installed.
Reviews
| № | Positive |
| 1. | Kirill, 33 years old: the standard front speakers are quite enough for me. To add volume to the sound, I installed a couple on the rear shelf. |
| 2. | Vasily, 44 years old: The standard radio on the Lada Granta Liftback is not bad, the sound is good. There are not enough speakers in the back row. I didn’t bother, I set the speakers to “13”. |
| 3. | Vitaly, 33 years old: after purchasing the Lada Granta Liftback, I supplemented the standard audio system with only two rear speakers, that’s enough for me. |
| 4. | Gennady, 41 years old: to increase the volume of sound, he added two speakers to the rear side doors and the rear parcel shelf. The standard radio works, no problems. |
| 5. | Mikhail, 35 years old: I heard a lot of complaints about the standard system, my feedback is positive. Yes, it is not super powerful, but it is enough for the average driver. |
| 6. | Gennady, 29 years old: the standard 2-DIMM radio on the Lada Granta Liftback is quite enough for good sound. Anyone who wants a concert hall should buy it separately. |
| 7. | Vyacheslav, 38 years old: I heard that they install rear speakers on the Grant at “16”, but I didn’t bother. I bought it on “13”, I’m happy, there are no complaints about the sound, it’s not ideal, but it’s enough for me. |
| Negative | |
| 1. | Vasily, 28 years old: I didn’t believe the negative reviews until I bought the Lada Granta Liftback. Weak and terrible. Change the speakers and radio. |
| 2. | Kirill, 33 years old: I took the car with me, it had a standard radio, I replaced it with a new one from Pioneer. It's a completely different matter. |
| 3. | Georgy, 41 years old: when buying Grants, I knew in advance about problems with acoustics. I bought coaxial speakers and a good radio. |
How to remove the trim?
This is necessary for installing speakers. Here, the Lada Vesta owner will need maximum care and attention to eliminate the risk of scratching the plastic panels. Using a screwdriver is highly undesirable. It is better to arm yourself with a plastic card.
To remove the plug located on the end of the door, you will need to use a card to pry it through special recesses. Using the same principle, we dismantle the buttons for electric window lifts. Fastening components in the form of tendrils are located on the front, rear and side sections of the MUS.
The fastening of the casing is represented not only by screws, but also by 4 “hedgehogs”. The risk of breaking them is quite high if the owner does not use a specialized tool during dismantling. These “hedgehogs” are borrowed from cars from Renault-Nissan. You can use elements from Grants instead, but minor preliminary modifications will be required. Such “hedgehogs” are stronger and their price is several times lower.
According to these manipulations, the upholstery on the driver's side is dismantled. Removing the trim from the right door panel has its own peculiarities. There is no need to remove the window lift button. There is also no need to look for a self-tapping screw plug. A sufficient measure would be to remove the handle cover.
Where are the wires for the rear speakers in Grant
When the alarm clock is set, the technicians suggested immediately placing speakers in the front door. "Temp" This was said with the sign METAL ONLY.
columns are screwed to the upholstery
Naturally, this result did not suit me. Without hesitation, the speakers decided to rearrange the metal of the “shirt”,
As you know, the standard speaker size in Grant is 13cm. I knew in advance that the 16cm columns would fit without problems, and I knew in advance that I would have to grind the metal. So, take a look before the intervention: Remove grid and column:
As you can see, the size of the landing area is small and, moreover, it does not coincide with the markings of the casing pipe network. Remove the skin, mark the appropriate size:
markings for columns 16 cm
Take a jigsaw with a metal file
We then place the column in the desired location and cover all cracks with a vibrating layer. This creates a box for the speaker to play.
insert column, remove holes
Then place the pad in place and see how much space there is.
You'll need this space if you have regular speakers with a huge magnet. In this case, rings are placed under the column so that the magnet does not prevent the glass from falling. You can see for yourself in the photo, but in reality there is more than 1cm of space for the ring. If the rings are oily, you need to securely hold the skin and make noise. In my case, the magnets were narrow and the rings were useless. The cutting points must be treated with some chemical: any metal still exposed will rust. I sprinkled it heavily with Movil.
The result: cleaner sound. Previously, even with an average volume, there were small extraneous noises from small areas of the skin. They are currently unavailable. The bass has become softer. the fact that the speakers are now more difficult to repair and at least the "games" but the volume.
READ How to Disassemble a Headlight on a Grant
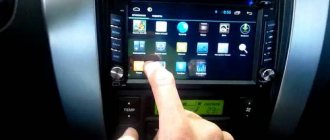
Installation of 1 din radio in Grantu standard and norm
What is needed to install a radio in a VAZ 2190:
- The radio itself is also the head unit;
- flat screwdriver;
- Straight arms.
Abbreviations and symbols in the text:
- GU – head unit;
- MMS – multimedia system;
- DIN (din) – installation size for acoustics in a car.
Lada Granta Standard
The audio preparation of the Lada Granta Standard is arranged as follows: the car has power wiring harnesses connected to the head unit. Such wires are present only in the radio; there are no visible outputs of wires for the speaker on the doors.
Therefore, on the basic configuration of the car, the wires do not reach the audio system speakers. Under the panel on the driver's seat side there are wire outlets for the radio.
In order to connect them into one system, you need to find the corresponding audio system wire outputs on the Lada doors. After finding all the necessary outputs, the wires located on the panel are connected to the wires that are built into the doors.
On a car of this configuration, you will need to run the wires to the dashboard alone.
A few words about this configuration. The “Lux” assembly has a factory pre-installed radio with speakers. The radio has at its disposal such additional functions as a 5-inch touch screen, which also has a line input, a Bluetooth headset, and the ability to read flash media.
Lada Granta Norma
In the Lada Grant Norma, the audio preparation is configured in such a way that the door wires are connected to the head unit, which already powers the audio system itself. The car owner will only have to connect the radio and speakers.
The Lada Granta series has a flaw: the AvtoVAZ connectors for audio systems do not match the connectors of audio equipment manufacturers. Because of this, you have to additionally purchase the necessary wires and connect them directly, while paying attention to the corresponding symbols.
We recommend: Replacing the Lada Priora heater radiator without air conditioning
For example, the space for the speakers on the Norma doors is indicated by a corrugated pattern. It will be necessary to cut an opening to connect the speakers.
Step-by-step instructions for installing the head unit
Required:
- a narrow flat screwdriver or plastic spatula for installing acoustics;
- 1-din radio with frame.
The seat in Grant is designed for 1 din.
To work with large 2-din sizes, you will need to cut out the partition and install a decorative frame. Step 1 . Using a flat-head screwdriver, remove the plastic plug for the radio. To do this, carefully pry it around the edges and pull it towards you.
The placeholder for the radio is installed from the factory.
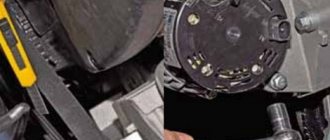
Step 2 . On the back of the plug there is a mount for ISO connectors. There are two connectors: music power and wires for the speakers.
When connecting the pads, you can’t confuse them - they have fastenings of different shapes. 8 wires at the speaker terminal. The second power connector.
Step 3 . If necessary, connect an adapter for your radio to the ISO. Usually it comes included .
If an adapter is not needed , proceed to step 4.
If an adapter is needed for acoustics, it is included in the kit. Example in the picture.
Step 4 . We remove the glove compartment. Holding the glove compartment clamps in the upper position, forcefully lower the glove compartment down.
Overcoming resistance, we pull the lid towards ourselves - the glove compartment is removed.
Removing the glove box on a Grant is easy when you know where its latches are located.
Step 5 . We climb under the panel in the area of the front right passenger's feet with a flashlight. Behind the felt on top we find a thick black wire - at its end there is a plug for the factory antenna.
We extend the plug to the installation location of the radio.
Here we are looking for the antenna wire.
Step 6 . We install metal slides for the radio. a screwdriver to bend the fastenings of the slide at the top and bottom to ensure secure fastening.
These fasteners secure the slide into the panel opening.
Step 7 . We connect the power connectors, speakers, antennas to the radio. We insert it into the slide all the way. We attach a decorative plastic frame.
If you plan to install an amplifier, you must first stretch the wires under the panel and bring them to the installation site of the power unit.
What to do if the length of the wires and antenna is not enough
To get by without extending the wires , you will have to suffer:
- We put our hand under the panel in the glove compartment area;
- We put the radio in the slide and connect it to the plugs;
- We blindly connect the power, the connector for the speakers, the wires for the amplifier, and the antenna.
Disadvantages of the method : we spend a lot of time, the process is dreary and inconvenient. We'll probably rip off your wrist.
Plus : there is no need to build up wires, which will then interfere with the installation of the PG, resting against the back wall.
If, after installing the acoustics, the alternator belt begins to whistle, the solution to the problem is here.
As you can see, immediately behind the GU in Grant there is a vertical partition, which greatly interferes with blind installation.
If the radio tape recorder dangles in the slide and rattles
It happens that the acoustics hold weakly in the sled , although they sit firmly. Solving the problem:
- Using the keys for dismantling (included with the control unit), remove the radio;
- We take a small piece of vibroplast (resin-based foil) and glue it onto the slide from the inside, top or bottom - this way we will ensure that the tape recorder is completely pressed against the slide without unnecessary vibrations;
- Once again, use a screwdriver to press down all the fastenings of the slide: some might have been under-tightened;
- We put the acoustics back and check - all unnecessary vibrations during shaking should disappear.
Vibroplast helps not only with soundproofing a car.
Restyled Lada Granta: all prices announced
AvtoVAZ has published full price lists for all models of the updated Lada Granta family, which now also includes hatchbacks and station wagons, formerly called Kalinas.
As previously announced, the most affordable Grant is priced at 419,900 rubles - ten thousand more than the pre-reform model. This is how much a sedan with an eight-valve 1.6 engine (87 hp) and a manual transmission costs in the Standard configuration: this includes one airbag, Isofix mounts, audio preparation, 14-inch steel wheels and the ERA-GLONASS system (now it is installed on all Grants without exceptions).
Since all four body types are now in the same family, their set of equipment is absolutely the same. A hatchback and a liftback, all other things being equal, are 15-17 thousand rubles more expensive than a sedan, a station wagon - 25-27 thousand. Moreover, the former Kalinas with a name change acquired simpler configurations and became cheaper! The hatchback costs 23,700 rubles, and the station wagon costs 28,300.
Lada Granta Sedan1.6 (87 hp) MT51.6 (106 hp) MT51.6 (106 hp) AMT51.6 (98 hp) AT4
| Standard | RUB 419,900 | — | — | — |
| Classic | RUB 455,500 | — | — | — |
| Classic Optima | RUB 481,500 | — | RUB 521,500 | — |
| Comfort | RUB 501,500 | RUB 516,500 | RUB 541,500 | RUB 581,500 |
| Luxe | RUB 538,800 | RUB 553,800 | RUB 578,800 | RUB 608,800 |
| Luxe Prestige | — | RUB 572,800 | RUB 597,800 | — |
Lada Granta Liftback1.6 (87 hp) MT51.6 (106 hp) MT51.6 (106 hp) AMT51.6 (98 hp) AT4
| Standard | RUB 436,900 | — | — | — |
| Classic | RUB 470,500 | — | — | — |
| Classic Optima | RUB 496,500 | — | RUB 536,500 | — |
| Comfort | RUB 516,500 | RUB 531,500 | RUB 556,500 | RUB 596,500 |
| Luxe | RUB 553,800 | RUB 568,800 | RUB 593,800 | 623,800 rub. |
| Luxe Prestige | — | RUB 587,800 | 612,800 rub. | — |
Lada Granta Hatchback1.6 (87 hp) MT51.6 (106 hp) MT51.6 (106 hp) AMT51.6 (98 hp) AT4
| Standard | RUB 436,900 | — | — | — |
| Classic | RUB 470,500 | — | — | — |
| Classic Optima | RUB 496,500 | — | RUB 536,500 | — |
| Comfort | RUB 516,500 | RUB 531,500 | RUB 556,500 | RUB 596,500 |
| Luxe | RUB 553,800 | RUB 568,800 | RUB 593,800 | 623,800 rub. |
| Luxe Prestige | — | RUB 587,800 | 612,800 rub. | — |
Lada Granta Universal1.6 (87 hp) MT51.6 (106 hp) MT51.6 (106 hp) AMT51.6 (98 hp) AT4
| Standard | RUB 446,900 | — | — | — |
| Classic | RUB 480,500 | — | — | — |
| Classic Optima | RUB 506,500 | — | RUB 546,500 | — |
| Comfort | RUB 526,500 | RUB 541,500 | RUB 566,500 | RUB 606,500 |
| Luxe | RUB 563,800 | RUB 578,800 | RUB 603,800 | RUB 633,800 |
| Luxe Prestige | — | RUB 597,800 | RUB 622,800 | — |
In the Classic version, two rear headrests, electric power steering, tilt-adjustable steering column, front windows, central locking, on-board computer and a gear shift indicator are added to the initial set of equipment. For the same configuration, you can purchase an Optima set of air conditioning and heated exterior mirrors for 26 thousand rubles. And cars with a sixteen-valve engine (106 hp) and an AMT “robot” are available only with this minimum kit.
You can’t buy a Grant in the Comfort version with two airbags, electric exterior mirrors and turn signals built into them, heated front seats and an audio system for less than 501,500 rubles.
Finally, the top version of Luxe with a heated windshield, climate control, adjustable driver's seat and seat belt height adjustment, full power accessories, fog lights, factory alarm, 60/40 folding rear sofa, remote central locking and 15-inch light alloy wheels are estimated at a minimum of 538,800 rubles. And for cars with a 106-horsepower engine, you can purchase the richest Prestige package: it includes a stabilization system, traction control, rain and light sensors, and rear parking sensors. Additional payment for metallic – 6,000 rubles.
Production of the updated Grant family began on August 13, immediately after AvtoVAZ personnel returned from corporate leave. And the official start of sales is scheduled for September 1: in theory, from the first day of autumn, restyled cars should appear in all Lada dealerships.
Source: https://autoreview.ru/news/restaylingovaya-lada-granta-ob-yavleny-vse-ceny#!page=NULL
Installation of acoustics on Granta
Speaker in the car door
First of all, you will need to dismantle the plastic pocket that covers the compartment for the stereo system. Use a screwdriver for flat type screws. When the pocket is removed, you will see that behind it there are special sockets where ISO plugs from the future speaker system will be placed.
After this, you need to remove the protective metal frame from the radio. We install it in the vacated opening under the plastic pocket. Successful fixation of the equipment is usually accompanied by a characteristic click.
Now you will need to connect the plugs in accordance with the existing ISO standard, to which the electrical wiring of all international format radios meets. Incorrect connection of the audio system connectors can lead to malfunction of all electrical devices in the car, including the radio.
It is worth noting that many car radio manufacturers make individual connectors for them. In this case, the kit almost always includes a special adapter for ISO standard plugs. If your radio does not comply with the ISO standard and does not come with an adapter, you can consider cutting the wires from the radio plugs or from the car's electrical wiring. After this, you will need to properly solder the wires in accordance with the color pinout.
It is strictly not recommended to resort to simply twisting the wires with adhesive insulating tape. This type of connection is impractical, since in winter the tape freezes and cracks, which can cause the wiring to short out and electrical appliances to fail. For a high-quality connection, you can use terminals that are designed for clamping wires.
ISO standard connectors are prepared only once. After this, you will not have to deal with selecting plugs and pinouts when installing a new radio. This procedure should take no more than 3 minutes.
The ISO standard uses 2 types of connectors: brown and black. The first is intended to ensure the operation of all the acoustics of the car. The second is for special functions of the stereo system and its electrical power supply. The pinout diagram for ISO is shown in the figure.
ISO pinout diagram
Acoustics for the front doors of Lada Granta
Installing speakers in Granta doors allows you to be independent of the body type - speakers in the doors do not require an acoustic shelf. This means that you can install speakers in a sedan and a hatchback according to the same principle.
Preparatory work
Before we begin the installation itself, let's figure out how to prepare the car. For this:
- We disassemble the door : dismantle the handle (pry up and remove the trim, unscrew 2 screws), the tip of the limit switch, two screws from the bottom of the door, overcoming the resistance of the retaining pins, pull the door card toward you and remove it from the door;
- We soundproof the door: in the warm season or in a heated garage, we cover all accessible parts of the door with vibroplast. Vibroplast StP M2 is suitable; when applying it to the door, be sure to heat it with a construction hairdryer and roll it with a pressure roller;
- If you have Spleen thermal insulation material, we cover the inside of the door card with it. This will further hide noise from the door when assembled;
- We are preparing spacers , if any are required for installing 16 cm speakers - more about them later in the text;
- We replace the factory terminals on the speaker wire in the door with normal ones (usually good terminals are included with the speakers) - to do this, we simply cut off the unnecessary connectors and attach the terminals we need to the wiring. A high-quality twist with heat shrink is enough;
- If the door panels do not have holes for speakers , we prepare them. It would be optimal to supply factory acoustic grids, which are installed on luxury versions of Granta and Datsun OnDo.
Do-it-yourself installation
Next, we will look in detail at how to correctly install the radio on the Lada Granta manually. If you are not a fan of the standard audio preparation of the Lada Grant, pay attention to this algorithm.
We recommend: Electric additional pump for the heater of VAZ and other cars: selection and installation
As stated earlier, the power wires are initially wired, and all that remains is to understand how to properly connect them to the radio.
After removing the cover that covers the radio, two connectors will be visible in front of you. One connector is intended for connecting speakers in the doors, the second is for power supply.
The black and pink wires indicate ground and plus, and at the same time they are the main ones for power supply. If the connection is incorrect, the audio system will at least not work; in the worst case scenario, you will short-circuit the “–” and “+” terminals, which will result in the fuse blowing.
When connecting directly, be sure to insulate all wires, not just those used, to avoid a short circuit.
After connecting the necessary wires, we secure the speaker with self-tapping screws or screws and close the mesh.
It is recommended to install 5-inch speakers (12.5 cm) on the front doors of Lada Granta cars, but if desired, you can insert 16 cm, as a result of which the sound quality will only increase. Choose speakers so that the glove compartment can open completely. This problem often exists when owners choose larger speakers.
Some craftsmen cut out the trim on the rear doors and install pancakes (6x9), which sound even better. With this option, a teardrop-shaped mesh is purchased in the standard factory place for speakers, and speakers measuring 13 cm are installed.
After doing all this grant-audio preparation, all that remains is to turn on the speaker and wait for the radio to turn on.
Product delivery options
Note! Below are the shipping methods available specifically for this product. Payment options may vary depending on the shipping method. Detailed information can be found on the “Delivery and Payment” page.
Parcel by Russian Post
Available payment methods:
- Cash on delivery (payment upon receipt)
- Using cards Sberbank, VTB, Post Bank, Tinkoff
- Yandex money
- QIWI
- ROBOKASSA
Shipping throughout Russia. Delivery time is from 5 to 12 days.
Parcel by Russian Post 1st class
Available payment methods:
- Cash on delivery (payment upon receipt)
- Using cards Sberbank, VTB, Post Bank, Tinkoff
- Yandex money
- QIWI
- ROBOKASSA
Shipping throughout Russia. Delivery time is from 2 to 5 days. More expensive than regular delivery by Russian Post, approximately 50%. Parcel weight up to 2.5 kg
Express Parcel EMS
Available payment methods:
- Cash on delivery (payment upon receipt)
- Using cards Sberbank, VTB, Post Bank, Tinkoff
- Yandex money
- QIWI
- ROBOKASSA
Shipping throughout Russia. Delivery time is from 3 to 7 days. More expensive than regular delivery by Russian Post, approximately 100%.
Transport companies
Available payment methods:
- Using cards Sberbank, VTB, Post Bank, Tinkoff
- Yandex money
- QIWI
- ROBOKASSA
Delivery is possible to any locality where there is a representative office of the transport company. Delivery time is from 2 to 10 days. Sending large parcels is approximately 50% more profitable than by Russian Post.
Pickup from our warehouse
Available payment methods:
- Cash upon receipt
- Credit, installments
- Using cards Sberbank, VTB, Post Bank, Tinkoff
- Yandex money
- QIWI
- ROBOKASSA
Pickup times must coincide with store opening hours.
In this article we will pay attention to such a product as the original audio training kit for Lada Granta and Lada Kalina 2.
On Lada Granta and Kalina cars, the basic configurations do not have music in the car from the factory. It is installed in rare cases and configurations. Music is definitely included in the luxury package. And this is exactly what this audio kit contains: firstly, these are decorative grilles for the speakers. They are standing at the door. Owners of basic configurations know that instead of these grids they have plugs, that is, not even plugs, but a solid door trim. And in order to install speakers, you need to purchase podiums of the required size or buy this kind of nador for audio preparation. It includes six pieces: two rear door screens (original factory parts), two front door screens, and spacers for the rear speakers so they can be secured. The speakers are installed on the front doors without spacers, but for the rear doors they will definitely be required.
Features of audio preparation of Lada Granta “Norma”
The acoustic wires are laid under the door seal. There is no such audio preparation in the Standard package.
In this case, on the car, the door wires are already routed directly to the head unit, which supplies power to the audio system. The owner of the car will only need to connect the speakers to the radio.
Often, Lada Granta is produced with audio system connectors, which do not always match those from the manufacturers of the audio equipment itself. And then you have to buy the necessary wires yourself in order to connect the system directly, in strict accordance with the designations. However, nothing prevents you from using simple adapters that swap the contact locations to connect any radio available on the market to your car.
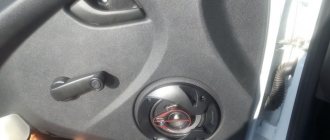
16 cm speakers in the front door. To install such a speaker, you need to cut the decorative cover in the door trim with a utility knife.
On the front doors of the Lada Granta “Norma” car, the place for installing speakers on the trim is marked with a pattern in the form of a relief surface. It is there that, in order to connect the speaker, you will need to cut an opening.
Audio system installation
The installation of the audio system itself is very simple, which cannot even be compared with how it was done on previous AvtoVAZ models. The fact is that the car owner no longer needs to worry about laying the wires correctly. All he needs to do is connect the appropriate wires to the power connector of the radio.
After this, the speakers are installed in the pre-cut opening, secured with complete fasteners. As a rule, standard five-inch speakers are used on the doors.
Decorative element in the rear door trim. There is nothing here in Standard.
Unlike the Standard configuration, where the audio preparation is limited only to the wires to the steering column, in the Norma configuration the wires are laid both in the front and rear doors. Also in the rear door there are decorative elements for installing a speaker, whereas in the “standard” configuration the door is “empty”.
It must also be said that self-installation of speakers and radio is not considered a reason for refusal of subsequent warranty service.
Replacing the standard MMC in Grant
The process - after removing the acoustics, we install a new system.
Difficulties : you may have to finish the fastenings of the new system for VAZ ones. Plus you need the right frame. The factory MMC frame may not fit.
When you buy a new PG for your car, you need to buy a frame for it specifically for Grants. Otherwise there will be holes in the panel.
Have you bought a new 2 din radio, but there is no frame for sale? You can do it yourself . Example at the link.
Lada Granta liftback standard, basic version of Lada Granta Liftback
Lada Granta liftback standard , this is the basic, entry-level configuration of the Lada Granta in the new Liftback body.
Today we will talk about the full list of options that are available in the car. But first, about the differences, how does the liftback in the “standard” differ from the sedan. Firstly, of course, this is the price, the liftback is more expensive.
An important external difference is that the sedan’s bumpers are not painted in body color, while on the Granta Liftback they even in the initial configuration match the body color.
In addition, in the liftback, the wheels in the base are not 13 radius, but R 14! The steel wheels have plastic decorative caps.
You won't find any big differences in the interior. There is hard plastic all around. In the center console, where the more expensive versions have a multimedia screen, the “standard” ones have a regular plastic plug. Although there is audio preparation with two speakers built into the front doors. Photo of the Lada Granta liftback standard interior below.
By the way, the standard version of the liftback does not have a rear window wiper. But as VAZ engineers say, the shape of the rear part of the body is made quite well, so there will be no intense pollution. Naturally, there is no air conditioning in the initial configuration, but there is a driver's airbag and daytime running lights. Below is a complete list of options for the Lada Granta liftback standard .
- Manual transmission (5-speed) with cable drive
- Immobilizer
- Driver airbag
- Daytime Running Lights
- Child lock rear doors
- ISOFIX child seat anchors
- Indication of unfastened driver's seat belt
- Luggage compartment lamp
- Fabric upholstery
- Driver's tools: jack, combination wheel wrench
- Tilt-adjustable steering column
- Steering gear with gear speed 4.02
- Single key for ignition and door locks
- Audio preparation
- central locking
- Body paint pastel or metallized
- Decorative wheel caps
- Wheels on steel rims R 14
- Full size spare tire
As for the power unit, the liftback in the “standard” configuration has one single 8-valve gasoline engine with a displacement of 1.6 liters and a power of 87 horsepower, with a maximum torque of 140 Nm.
This engine is installed on many VAZ models. The engine does not differ in special dynamics and minimal fuel consumption.
However, the simplicity and practicality of the power unit design makes vehicle repair and maintenance more affordable.
Source: https://myautoblog.net/2015/01/lada-granta-liftbek-standart-bazovaya-versiya-lada-granta-liftback/
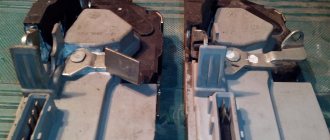
Removing the standard radio in Grant Lux
The difference between grants of the luxury configuration: the MMS (multimedia system) installed from the factory. This is a 2 din device.
To remove standard acoustic grants :
- take a knife or plastic spatula to dismantle the acoustics and disconnect the decorative trims to the right and left of the radio. It is not necessary to take pictures;
- in the gap between the cover and the panel we find the head unit lock. There are two of them on both sides. Press it out with a screwdriver;
- we take out the GU on ourselves.
Everything is described in detail in the video:
Installing a radio
We pry the plug of the car radio socket from below and take it out. The socket contains plugs for connecting: USB, ISO, AUX, FAKRA (antenna).
To replace the standard audio system, you need to remove the trim and deflectors. To do this, you will need to disconnect the ground (disconnect the minus terminal from the battery). Next, remove the trim, prying it from below, and disconnect the block from the emergency parking button of the car. Remove the deflectors (4 screws for the T20 head).
Behind the air ducts, again unscrew the 4 screws. We drag the car radio towards us, disconnect the connectors with the wires. That's it, they took it off. Installation of an alternative radio takes place in the reverse order. Watch the wires during installation, try not to pinch them. Please note that a 1DIN radio is suitable for Lada Vesta.
Installing speakers in a car
In addition to the radio itself, you will need to correctly place and connect the audio speakers.
We recommend: How to properly operate a purchased car
Installation of the rear and front speakers is carried out according to the same scheme. To do this, you will need to cut openings in the door trim, so for ease of installation you need to remove them. The upholstery is removed in the following sequence:
- the door handle is removed;
- The plastic casing under the handle is removed;
- the adjusting handle for raising the glass is removed (only for Lada Granta Standard).
The stock upholstery has 16 cm diameter openings that are specifically designed for speakers. Certain difficulties may arise if you decide to install speakers of other sizes.
For speakers with a diameter of 13 cm, you will need to cut out the central plug in the door trim. The layout diagram is included with the speaker kit. Having understood the intricacies of a particular model, you will have to slightly increase the plane of fastening of the tongues, since standard openings are larger.
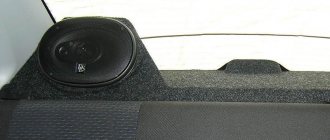
Speakers on the rear parcel shelf of a car
Speakers with a diameter of 16 cm are most often easy to install, but sometimes the sizes do not match. In this case, it is necessary to adjust the metal opening allocated for installing the speaker using an electric jigsaw. After each adjustment, be sure to try on the column, as it is very important not to overdo it in this matter.
After successful installation, you will need to connect power and check the functionality of the speaker. Then you can install the door trim back. A protective grille is placed over the column, which must be secured with self-tapping bolts.
Choose speakers with a flat surface. Otherwise, they will interfere with looking into the glove compartment; to do this, you will have to open the front right door every time.
Sequence of actions when installing rear speakers in a Lada Granta liftback
The speakers will be installed in the factory door openings. The situation with dimensions for openings is atypical. The shape is oval, while the columns are round. It is not known why AvtoVAZ made this decision.
To correctly install speakers in the rear door, do the following:
- remove the door card, handle, control unit;
- select the size of speakers for installation. Size 13 will require less cost and plumbing work compared to size 16.
- Selecting a speaker at “13”: using a utility knife, cut off the edge at the top of the hole for the speaker. The metal body is left unchanged.
- If you select a speaker with “16” or more, use a metal jigsaw to cut off the edge on the metal and plastic casing.
It is important to know. Many car owners are wary when they see that the hole in the speakers is not located in the center of the oval structure (preparation). The problem is familiar, but the defect has not yet been fixed.
- We cut out a stand from wood for the base of the speaker, no more than 0.6 cm thick. For these purposes, it is better to choose plywood.
- We insert the speaker into the door, place a wooden spacer, connect the block with wires - the so-called audio preparation.
To the left rear door: blue/white - brown/blue wire. To the rear right: green / black - yellow / green. We complete the assembly by installing the door card. By analogy, we carry out the installation on the left door.
Audio preparation Grants of different configurations
In the “standard” configuration, the Lada Granta has pre-installed power wiring harnesses, which are located in the console opening. Electrical wires are connected only to the radio, so don’t be surprised if you don’t find them in the doorways. To wire to the doors, you will need to pull power wires, which are located under the console panel. In this configuration of the Lada Granta, the stereo system can be installed independently if due attention is paid to it.
In the Lada Granta Norma, the power wires coming from the console are already routed to the doorways. You only need to connect the audio system in accordance with the assembly diagram. It's not uncommon for the stock door wiring to not match up with some speaker connectors. To solve this problem, you need to purchase suitable wires and replace them in the doorway. Lada Granta Norma has a trim with a special pattern for the speakers. Based on it, you can cut the opening yourself.
During assembly at the factory, the Lada Granta luxury version is equipped with a touchscreen multimedia system and speakers. The improved radio tape recorder is complemented by Bluetooth function and a 5-inch display with line output. In addition, the built-in radio allows you to connect a USB 2.0 flash card, through which you can listen to recorded music.
Continuing the topic of audio, we recommend interesting information on the topic of Fm Radio not only for cars.
What is audio training?
Only the radio has power wires; there are no visible wire outlets on the speaker doors. Thus, on the base model of the car, the wires do not reach the audio system speakers. The wire outputs for the radio are located under the panel on the side of the driver's seat; in order to connect them into a single system, you need to find the audio system wire outputs on the doors of the Lada Granta. Once all the necessary outlets have been found, the wires on the panel are connected to the wires mounted in the doors. On a Standard vehicle, you will have to run the wires from the doors to the dashboard yourself.
How to install 2 din in grant norm or standard
Everything is more complicated here. Need to:
- dismantle the center console trim - unclip the fastenings, move it forward and disconnect the buttons and heater handles;
- cut out a vertical plastic partition that will not allow you to install a 2 din device;
- cut down the plastic casing of the central air duct;
- try on a new acoustic unit, adjust the fastenings if necessary;
- install adapters from the delivery kit on the wiring (if required);
- install the device;
- if we leave the old center console trim: we cut out the partition, try it on, put it in place with the buttons and handles connected, adjust the decorative frame of the control unit, install it;
- if we install a new trim on the console under a 2 din device: we transfer the heater control unit and buttons from the old trim, install them in place, and put a decorative frame on the control unit.
Acoustic shelf VAZ 2115: how to make it yourself
Acoustic shelf VAZ 2115 with subwoofer
For some reason, the following problem may arise: the acoustic shelf of the VAZ 2115 has stopped functioning. Of course, if it is broken, then it will not harm the entire car, so repairing it can be postponed for a while. However, if it cannot be repaired later, then you can try to make an acoustic shelf right at home. A home-made acoustic shelf for a VAZ 2115 will look no worse than the standard one.
Causes of acoustic shelf failure
VAZ 2115 acoustic shelf on your own
Usually it is not the sheer itself that breaks, but the pins with which it is attached. There may be several reasons for this problem:
- Firstly, they could be poorly clamped. By the way, this is the main reason why they break. Therefore, you can simply replace these fasteners by installing the old shelf in place.
- The second reason is that the car was shaken too much on a rough road. Most often this happens in cars whose drivers live in rural areas. However, the breakdown itself may also be the fault of the driver. If you significantly reduce the speed when crossing such a road, then replacing the pins will not even be necessary.
Note: in addition, high speed negatively affects not only the sound system, but also the entire car as a whole.
But failure of the acoustic shelf itself can occur for the following main reasons:
- Exerting mechanical influences on it. This is in case something falls on it. In addition, it is not recommended to place any heavy objects on it. It is not recommended to install an acoustic shelf in the trunk, since objects of varying weights are usually placed there.
- In addition, the shelf may wear out a little during use. And after a few years it may crack when exposed to mechanical waves coming from the speakers.
Acoustic shelf repair
VAZ 2115 acoustic shelf and its repair
Repair work usually does not take much time. Removal and installation take place in a matter of minutes:
To replace the pins, you first need to find exactly the same ones as before.
Note: you can choose a more convenient way to attach the acoustic shelf. It can also be installed using self-tapping screws. Moreover, this option will be more reliable and effective.
- To remove them, you just need to unscrew the bolts that held them in place.
- Unhook them from the acoustic shelf in the same way.
- Now connect new parts to the place where the old pins were attached. Then attach them to the shelf.
Acoustic shelf VAZ 2115 classic
In some cases, repairing the acoustic shelf itself is impossible. If it is broken, then a characteristic creak will be heard in the car. This is mainly why it is replaced, because the sounds produced are almost unbearable. If the cause of this creaking is just a small crack, then this problem can be eliminated, and even quite easily: you can simply glue it together.
Note: you need to choose high-quality glue. The best option would be to use epoxy glue.
In addition, many people just want to replace the standard rear shelf, even if it is not broken. After all, most often it is made of rubberized plastic, which is why the sound of the speakers (see How to choose speakers for a car radio on your own) is quite unclear.
Acoustic shelf for VAZ 2115 and its dismantling
Tips when installing an audio system
As we can see, the installation of acoustic components in the LADA Vesta interior is not capable of generating difficulties and dead ends. The main thing for the owner is to adhere to simple but useful rules, namely:
- We carry out the entire list of manipulations extremely carefully, without breaking the fasteners or scratching the panels.
- Since audio preparation is initially present, we just need to connect the speakers and head unit.
- We do not cut off the standard connectors, but stock up on the previously specified adapters.
- Before directly installing the dynamic heads, we soundproof the door panels.
- Installation of the speakers is carried out on previously prepared gaskets.
Bottom line
As a result, it must be said that in the “Norma” configuration, Lada Granta owners can count on a ready-made 1-DIN type connector (to install a double-width radio, you will have to saw the partition inside the console, and this may entail the manufacturer’s refusal of warranty service ). Next come the wires themselves, which go to the doorways and the fastening elements themselves. The car owner can purchase everything else on his own, depending on his preferences.
Audio preparation is the basis of car audio
It is worth understanding what audio preparation is in a car. This may mean both work on installing audio equipment, and the presence of a special place for an audio system, speaker jacks, and wiring for further installation of acoustic equipment. Such a concept as standard audio preparation is an integral part of the car’s equipment. Its level affects the final cost of the new car and the owner’s further costs for acoustics. The manufacturer can install either simply a wiring harness with the necessary plugs and connectors, or additional elements: speakers, a radio antenna and the radio itself. Expensive versions even have high-frequency beepers and audio system control keys located on the steering wheel.
Selecting a speaker system
Having assessed the audio preparation of the car, you can begin selecting equipment.
Depending on personal preferences and financial capabilities, a minimum set is determined - in fact, a radio tape recorder (or, as it is called, a head unit) and a set of speakers. A true car audio connoisseur will select equipment with increased power, as well as taking into account the possibility of installing additional devices: subwoofer, amplifier. Typically such a complete audio system requires the purchase of an auxiliary battery. When choosing acoustics, beginners should consider the following main characteristics of the equipment. For the head unit - available media formats (CD, MP3) and output sound power. It is worth focusing on the average value of 25 W for a standard four-channel device.
For speakers:
- dimensions of standard sockets and the possibility of changing them;
- power (take into account comparability with GI);
- frequency range during playback;
- sensitivity.
Audio system installation
After purchasing the equipment, the question of installation arises. This event is not easy and requires special technical skills. In most cases, in order to avoid unnecessary headaches, car enthusiasts turn to certified service centers, where experienced specialists will perform the necessary work and provide a guarantee. Undoubtedly, there are people for whom everything related to the car is their hobby. For them, self-installation of sound equipment will be not so much saving money as it will be a pleasant pastime with a further reason for pride. In this case, what does audio preparation mean? In a nutshell, the higher the vehicle’s equipment level, the lower the additional costs for acoustics.
Conclusions and recommendations
Conducting standard audio preparation in cars such as, for example, the Lada Granta has now become much easier, because there is no need to conduct the wires themselves and the owners only have to make their proper connection.
Thus, the corresponding wires are connected to the power connector of the radio, as well as the connector for the speakers. Do not forget about the insulation of wires that are supplied directly.
After this, we cut out an opening in the door, where we insert the speaker and secure them with the appropriate fasteners. Most often, 5-inch speakers are mounted in doors.
Remember that independently connecting an audio system to existing factory outputs is in no way considered an excuse for refusing warranty service.
Sources
- https://expertVAZ.ru/lada-granta/audiopodgotovka-ustanovka-muzyki-magnitoly-norma-lyuks.html
- https://new-lada.ru/audiopodgotovka-lada-vesta-chto-vkhodit/
- https://car-fact.ru/marki-i-modeli/otechestvennye/lada-granta/magnitola-granta.html
- https://la-granta.ru/audiopodgotovka-i-audiosistema-komplektacij-lada-granta.html
- https://carfrance.ru/chto-vxodit-v-audiopodgotovku-lada-granta-v-komplektacii-norma/
Audio preparation is the basis of car audio
It is worth understanding what audio preparation is in a car. This may mean both work on installing audio equipment, and the presence of a special place for an audio system, speaker jacks, and wiring for further installation of acoustic equipment.
Such a concept as standard audio preparation is an integral part of the car’s equipment. Its level affects the final cost of the new car and the owner’s further costs for acoustics. The manufacturer can install either simply a wiring harness with the necessary plugs and connectors, or additional elements: speakers, a radio antenna and the radio itself. Expensive versions even have high-frequency beepers and audio system control keys located on the steering wheel.
Selecting a speaker system
Having assessed the audio preparation of the car, you can begin selecting equipment.
Depending on personal preferences and financial capabilities, a minimum set is determined - in fact, a radio tape recorder (or, as it is called, a head unit) and a set of speakers. A true car audio connoisseur will select equipment with increased power, as well as taking into account the possibility of installing additional devices: a subwoofer, an amplifier. Typically such a complete audio system requires the purchase of an auxiliary battery. When choosing acoustics, beginners should consider the following main characteristics of the equipment.
For the head unit - available media formats (CD, MP3) and output sound power. It is worth focusing on the average value of 25 W for a standard four-channel device.
For speakers:
- dimensions of standard sockets and the possibility of changing them;
- power (take into account comparability with GI);
- frequency range during playback;
- sensitivity.
Audio system installation
After purchasing the equipment, the question of installation arises. This event is not easy and requires special technical skills. In most cases, in order to avoid unnecessary headaches, car enthusiasts turn to certified service centers, where experienced specialists will perform the necessary work and provide a guarantee.
Undoubtedly, there are people for whom everything related to the car is their hobby. For them, self-installation of sound equipment will be not so much saving money as it will be a pleasant pastime with a further reason for pride. In this case, what does audio preparation mean? In a nutshell, the higher the vehicle’s equipment level, the lower the additional costs for acoustics.