During vehicle operation, headlight lenses become covered with a network of scratches and become cloudy, worsening road lighting conditions. To restore characteristics, surfaces are treated with abrasive materials. The master needs to varnish the headlights after polishing, providing additional protection for the plastic from external climatic and mechanical influences.
Varnish for rear and headlights - treatment for polishing and tinting glass
Over time, headlights lose their attractive appearance and transmit light from bulbs worse. If the lighting deteriorates, you should first inspect the headlight lenses. If they are yellow, damaged or cloudy, the risk of getting into an accident increases. The damage listed above occurs due to the use of chemicals, mechanical stress or damage due to ultraviolet exposure.
Varnish for rear and headlights
If you don't take care of your lenses for a long time, they begin to change color and peel off. The plastic headlight deteriorates the fastest. To restore the original appearance, many motorists polish the optics. During the restoration process, you will need a headlight polishing varnish; its application is the final stage and plays the role of a protective layer for the material.
Protective varnish for headlights has a number of positive effects:
- prevents aging of headlights;
- prevents scratches and chips;
- gives a better aesthetic appearance;
- protects against dirt adhesion;
- allows you to save on replacing damaged headlights;
- reduces the influence of an aggressive environment.
Reasons why you need to take up polishing
2 ways to polish plastic headlights: what is needed, how much does it cost, do you need varnish
The first and most important reason why you need to polish your headlights is the risk of an accident, because the headlights not only begin to shine worse, but also scatter the light incorrectly, as a result of which oncoming drivers may be blinded. The outcome could be disastrous. The second reason is purely aesthetic.
The main factors influencing the dimming of headlights are the following reasons:
- Ejection of sand and small stones from under the wheels during high-speed movement, which scratch the surface of the headlight.
- Dust and dirt, which after a couple of years become indelible (if there is no proper care).
- Exposure to harsh chemical detergents commonly used in car washes.
You can remove all these defects yourself, while polishing the headlight glasses is carried out in three stages:
- preparatory work;
- grinding;
- final polishing.
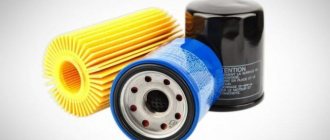
Types of varnish for headlights
All headlight varnishes are applied after polishing, but they differ in the strength of the beam refraction and, accordingly, in the different penetration of light.
Varnish for plastic headlights
Varnishes are divided into groups according to a number of criteria:
- by type of material. There is a varnish for plastic headlights (polycarbonates) and for glass processing;
- as intended. There are mainly 2 main groups: protective and toning. In the protective category, there is additionally a two-component headlight varnish and an aerosol;
- by composition. The composition of the substance is of greatest importance; professionals divide it into 3 types: two-component – varnish, which is sold complete with a solvent;
- urethane. It is completely transparent, comes in aerosol cans and can only be applied to a sanded headlight. It has high protective qualities and increases light transmission. The advantage is the ability to apply to installed headlights without dismantling them;
- acrylic. It has no color, but adds shine and hardens quickly. The disadvantage is the low ability to fill cracks and chips. Can be used for glass headlights, but is useless for plastic.
- H.S. The composition contains a lot of dry residue and a minimum of solvent. Gives a rich shine, acquires better characteristics when applied in 1.5 layers;
Aerosol varnish for car optics
Painting the lighting fixture mask
Car headlights: LED, halogen, xenon, laser and future headlights
The fashionable word tuning involves painting the reflector masks black. Naturally, the paint should not get on the reflector itself. Painting of headlight masks follows the same principles. The dye must withstand heating of 300-400 degrees. You will need black sealant and masking tape. After washing, it is advisable to apply a primer. The paint is applied in thin layers in 2-3 passes. Unpainted areas are sealed. The room must be warm, clean and ventilated. This procedure does not affect the quality of lighting and is carried out solely for aesthetic reasons.
Materials and tools
Polishing varnished headlights can be done using 2 main methods: with dismantling the optics and in the installed state directly on the car. The first option will require more time due to removal and installation work, but will allow you to restore the optics even with significant damage. There is no need to remove the headlight if the damage is subtle.
Regardless of the chosen direction, coating headlights with varnish after polishing will require the following materials and tools from the performer:
- napkins and rags;
- detergent;
- masking tape;
- solvent for degreasing the surface;
- grinding machine, it is better to equip it with a soft nozzle, this will speed up the process;
- abrasive paper marked 320, 600, 1000, 1200, 2000 and 2500;
- varnish If it is 2-component, you need to prepare a container in which the working solution will be prepared;
- A hairdryer will speed up the drying time.
Solvent "Solvent"
Pasting process
After preparing the surface, do-it-yourself headlight armoring with film occurs in stages. You can glue the armor film using the wet and dry method. Regardless of the method, the process of applying a protective coating to the headlight housing is the same:
- Blanks are cut out. You should leave allowances at the edges of at least 2 cm. You don’t have to paste over the side of the optics surface by rounding the corners of the cut out part.
- If you use warming up the workpiece before gluing, preheat it with a hairdryer.
- Pasting begins from the top of the headlight body: bend the upper edge of the film base, apply it to the surface of the headlight, gradually freeing the coating from the backing.
- Press tightly and stick the film.
- After the initial gluing of the protection, it should be smoothed, dried and the protruding edges should be trimmed with a knife.
The peculiarity of the wet method is that the headlight should be covered with a protective film on a damp surface. The body is moistened with water or diluted car shampoo, a film is applied on top, the surface is pressed and smoothed from the center of the body to the edges, expelling the liquid. The part is dried.
Wet-on-wet gluing is technically simple and well suited for applying armor to large surfaces. With the dry gluing method, the film is preheated or heated during the smoothing process. The protection hides small scratches that are already on the case.
Polishing and protective varnish to improve light
Polishing headlights and varnishing significantly improves the penetration of light from the bulb and increases the efficiency of the optics. The technique has a requirement - the presence of smooth glass headlights. If an older type of glazing is installed, where the entire surface is covered with ribs, polishing will become impossible. It is recommended to simply replace the headlight, preferably with a smooth glass.
During the recovery procedures, the following should be performed:
- If you choose a permanent glass polishing method, you will have to cover the adjacent elements of the case with masking tape. It is necessary to provide high-quality protection so as not to disturb the paintwork of the car body.
- Use special pastes with abrasive additives; Delta Kits are a good option, but there is no fundamental difference. The abrasive is useful as a sandpaper to remove the top layer of damage.
- Wash the surface and wipe with a soft, dry, lint-free cloth. After drying, you need to coat the headlight with a degreaser, preferably using an inactive solvent. Before subsequent work, it is important to ensure protection against dust accumulation.
- You can proceed before applying polish. It is important to ensure the protection of the headlight, otherwise the coating will soon become damaged again.
- Varnishing is carried out in 2 or 3 layers, depending on how many times the manufacturer recommends coating the headlight.
Polishing and protective varnish for car optics
You can speed up polishing using various tools, but they are not mandatory. It is recommended to use higher quality materials during the procedure, which include two-component varnish. The process of preparing the working solution is described directly on the bottle or packaging. One of the best varieties are polyurethane-based varnishes; they provide increased hardness and reliability of glazing.
Trusted manufacturers
Common brands of headlight varnish include:
- Japanese Spot-On for professional use, supplied in 125 ml bottles and characterized by a high price (from 8.5 thousand rubles per set);
- Lens Clear from the Body company, intended for small workshops or do-it-yourself application (price from 700 rubles per bottle);
- Infinity from the manufacturer Delta Kits, designed for professional use. The price for the set is 800 rubles. (total capacity of bottles in the set is 15 ml).
Spot-On
Spot-On varnish from the manufacturer Kovax is a 2-component mixture. The reagents are mixed before application. The material is designed to restore the brightness and luminosity of polycarbonate headlights. The solution fills minor irregularities, but is not suitable for products with cracks on the surface of the diffuser. It is recommended to use a spray bottle for application; the shelf life of the mixture is 2 hours at an ambient temperature of +20°C. Dust that has got into the varnish must be removed using the proprietary Tolecut preparation and Kovax finishing paste.
Lens Clear
Lens Clear is supplied in a 400 ml aerosol can. The drug is ready for use. Before application, shake the container to mix the components. During processing, 2 layers are applied to protect the polycarbonate from ultraviolet radiation and sand. The manufacturer allows the use of varnish both in professional workshops and in garage conditions. The advantage of the material is rapid polymerization, which reduces the risk of dust sticking to the liquid varnish.
Infinity
Infinity Protective Varnish consists of 2 components that must be mixed before application. To ensure adhesion of the headlight surfaces, it is recommended to treat them with a special degreasing compound Delta Kits. To speed up the polymerization process, it is allowed to use heat from switched on low or high beam lamps or external sources. For additional protection against chipping, polyethylene armor is glued to the surface of the varnish.
Tinting the glass of your optics is a beautiful tuning effect
There is a way to improve the appearance of the headlights even more, they will not only have a shine, but also a special color. Tinting is used to enhance visual qualities. The headlights get a dramatic look and add tint to the headlights. The only drawback is the complexity of the procedure. To create a tint, you will need high-quality polishing and subsequent frosting of the glass. Only after preparation is the material applied.
The method of applying all types of tint is described in the instructions for the product or on the official resource. To determine the best tinting varnish with the optimal combination of price and quality, you can use customer reviews, but it is not recommended to buy cheap options. Regardless of your choice, you must adhere to the following application principle.
Car optics tinting
Safety precautions
When performing work, it is important not only to do everything according to the instructions, but also to adhere to safety rules:
- When applying varnish, protective clothing is worn. Gloves and safety glasses are required, and protective overalls will also be useful. Additionally, you should take care of the respiratory tract; paint and varnish materials can only be applied in a respirator.
- Preparing the premises. The room where work will be carried out must be clean and have good ventilation.
- Fire safety. There should be no open flame sources near the headlight varnishing area. It is advisable to have a fire extinguisher on hand.
- No outsiders allowed. It is important that children do not have access to the place of work; it is also advisable to limit access to pets.
At the end there is a thematic video.
Instructions for applying a tint coating to optics
If you compare the work of masters and amateurs, you will notice a significant difference in the quality of the final result. The reason is incorrect application or an error in following the rules. Carrying out the procedure yourself leads to risks of destructive effects of moisture or damage to integrity after abrasive stripping. You will have to repeat the polishing process again, only this time with dismantling the entire headlight.
Tinting can be carried out for front and rear optics. To obtain the best result, the most important principles should be used:
- high quality headlight painting becomes possible only after proper surface preparation;
- with careful and proper matting, as well as compliance with polishing rules, the destructive effect on the lens is reduced;
- matting is carried out using sandpaper with minimal grit, otherwise there is a risk of damage to the glass;
- the headlight should be allowed to dry on its own or wiped with a dry, lint-free cloth;
- The surface must be degreased before applying varnish;
- the coating is carried out in several layers, after each you need to wait for drying;
- the varnish is dried again, then the headlight is carefully examined for damage. If everything is in order, you can install the unit back.
Varnish for tinting lamps “Kudo”
An important condition for creating high-quality tinting is strict adherence to the manufacturer’s instructions and recommendations. When choosing the best varnish, many questions arise. Professionals prefer brands from Europe and America, the same applies to tinting for rear optics. The best options with positive reviews are Kudo, Kits, Exxo, Delta and Motip. The listed products are somewhat more expensive, but they cope with the task much better.
Other means
- Toothpaste
You can make your headlights shine by restoring the lenses with toothpaste. We know it sounds strange, but toothpaste has gentle abrasive properties. Additionally, we've heard that headlight lenses oxidize just like plaque on your teeth.
Toothpaste will work wonders on slightly frosted lenses that don't require extensive polishing.
How to restore headlights using toothpaste.
- Use regular toothpaste, avoid toothpaste with crystals or additional cleaning agents as these may scratch the lens.
- Apply a small amount to a cloth and begin polishing the lens in a circular motion until you see improvement.
- Once you have achieved the desired results, thoroughly clean and polish the headlight.
- Baking Soda and Vinegar
You may have used this winning combination before as a regular household cleaner, but it will also work wonders on your slightly cloudy headlights. This mixture works much like toothpaste, helping to reduce and polish hazy headlights for improved visibility on the road.
How to restore headlights using baking soda.
- Make sure the headlight is clean and dry.
- Use a cloth soaked in the mixture to rub the lens in a circular motion until the damage disappears.
- Finish with a final clean and polish and you're ready!
Recommendations from experts
If the buyer wants to make the most of his money and get the best result, he should:
- ensure maximum cleanliness of the room and good exhaust;
- carry out work only with personal protective equipment - gloves and a respirator;
- Before varnishing, glass should be especially carefully examined for the presence of sealant particles; bitumen is especially harmful. It is recommended to dry the glass surface in a thermostat set at 110 °C for 3 hours. When working with a construction hair dryer, this will prevent the appearance of cracks and boiling;
- It is better to avoid polishing pastes before varnishing plastic headlights. The plastic base reacts poorly to pastes and impairs adhesion to the varnish;
- To prevent the appearance of abrasions and stripes, you need to perform the procedure in several stages, gradually changing the direction. Each subsequent abrasive material is used for perpendicular grinding. With a sharp transition to a larger grain size of paper, clouding or a holographic effect appears;
- if the optics cannot be removed, for ease of operation it is better to raise the hood;
- two-component varnish should be diluted in small portions so that each part can be used for 5–10 minutes;
- To speed up the hardening of the varnish, you can warm up the headlight with a hairdryer for 10 minutes, only at a low temperature. The procedure is carried out only immediately after gluing;
- Do not wash or treat headlights for 1 day after application;
- To enhance the protection of the varnish, it is necessary to apply an anti-gravel film on top.
What to polish
The process of returning car headlights to transparency includes two sequential operations. First, the surface is ground to remove dirt and damage, and then polished.
It is after applying the headlight polish that they will acquire the necessary smoothness and shine. Therefore, you need to know how to polish car headlights with your own hands. For this purpose, pastes, polishes, and also folk compositions in the form of, for example, toothpaste are used at home.
Polishes
Car headlight polishing products available on the automotive market are mainly divided into the following two groups:
- With mattifying effect. Polishes of this variety are used to restore the transparency of glass that has received minor damage.
- With a varnishing effect. These products are recommended when deep scratches or serious damage to the factory finish are found on the surfaces.
- Among the range of polishes there are varieties aimed at restoring old car lights and ensuring their protection during subsequent operation.
Sandpaper
In case of fairly deep damage, the headlight surfaces are polished with sandpaper. To ensure the desired degree of cleaning and smoothness, you should select sanding paper with a grain size in the range P600-P2500.
For initial deep sanding, use the coarsest sandpaper, P600. Gradually, the grain size decreases and the last movements are carried out with the finest-grained paper - P2500.
Diamond paste
If the headlights are made of glass, then more effort will be required to properly restore them, and it is not always possible to obtain results using traditional polishing agents.
Abrasive polishing is carried out in different ways. The most difficult is manual processing. To make work easier, you can use power tools.
Pre-treated surfaces are washed from dirt and wiped dry. The paste is spread over a sponge and rubbed over the glass until all traces of damage completely disappear.
Let's sum it up
When comparing good liquids for abrasive stripping and paint processing, it is recommended to use products from the manufacturer 3M. For polishing, the company's assortment includes effective solutions that meet the standard quality-to-price ratio and also provide consistently good results. The paste allows you to restore headlights even with severe scratches and chips.
Polishing mixtures are sold in containers of various capacities, each accompanied by the manufacturer's instructions. It is best to select a varnish based on individual tasks and the assortment in stores nearby.
Method number 3. Using polishing paste and a sander
The fact that the protective layer of your headlights has been depleted can be determined by the appearance of a halo. As noted above, polishing will no longer help if there is a clear spot on the headlight with yellowish edges (without a protective layer, the plastic will become cloudy for just a few weeks). Here all that remains is to either replace the head optics or apply a special protective varnish (the second option is very expensive - about 5 thousand rubles for one headlight, and therefore is only suitable for vintage cars).
The polishing itself takes from 10 to 15 minutes. First, the headlight is covered with tape - this way the coating of adjacent body elements will not be damaged.
The headlight is covered with tape
Further actions depend on what kind of paste is used. As a rule, car services use 3M and Wurth for this. First, a more granular paste is used, as well as an appropriate polishing wheel (the grinder operates at 1500-2000 rpm).
Polishing with a more granular paste Machine speed - 1500-2000 rpm
After this, a finishing paste with a softer polishing wheel is applied. In this case, the machine should operate at a speed of no more than 3000-3500 revolutions, otherwise the plastic will overheat and the protective layer will burn (if it is overheated, it is blown away, and then, as it cools, it becomes covered with cracks).
Polishing with finishing paste
In addition, you can use a universal paste for polishing - for example, this is a product from the Cut company. This paste combines the properties of finishing and regular polishes, and only one polishing wheel is required for the job.
Polishing two headlights on a Mitsubishi Pajero
Using special wipes
Wipes for restoring headlights can only be used as an aid. They will quickly restore only slightly tarnished glass or plastic. Before use, it is also necessary to treat the surface with fine-grained sandpaper (from 1800 grit). Cleansing takes no more than a minute.
The manufacturer recommends washing and drying the headlight before using the wipes. Experienced drivers prefer to additionally sand the surface with sandpaper of more than 2000 grit, or pre-polish with toothpaste.
It is necessary to wipe the cleaned and dry headlight with a special cloth without rubbing the varnish. Apply the product with gloves. The DOVLight coating lasts on the headlight for up to 7 months.
Vinyl models
Initially, only outdoor advertising banners were covered with a vinyl protective layer. The material protected the design well from fading and mechanical damage. Using vinyl as an armor film for headlights, drivers do not reduce the luminous flux of the lighting device: the material transmittance is 99%. The advantages of this option:
Price. You can use vinyl coating for optics and bodywork after preliminary polishing. The assortment includes color film models
It is important to take into account the reduction in track lighting parameters by 10% after using any colored coating. The material is much thinner than its polyurethane counterpart and can be used for gluing ribbed surfaces.
Among the disadvantages, owners of vinyl armor note:
- The appearance of a yellow coating (on average after 12-16 months of operation).
- At air temperatures below -25 °C it may crack. This was discovered by those drivers whose cars were outside in the cold.
- When gluing a ribbed surface, the material must be constantly heated.
Which film to choose
Anti-gravel films can be divided into two categories:
- vinyl;
- polyurethane.
Both types have not only advantages, but also a number of disadvantages. To make the right choice, let’s look at each type in more detail.
Advantages and disadvantages of vinyl
Vinyl films appeared quite a long time ago and were initially used in advertising on banner structures. Then it was not assumed that they would be subjected to a powerful mechanical effect. It was enough to protect the posters from rain and fading in the sun. Therefore, the thickness of vinyl film is much less than polyurethane film. Later, the same technology began to be used for the production of anti-gravel car coatings.
Unfortunately, vinyl also has negative properties. For example, a cloudy yellow coating may appear on it over time. In addition, vinyl film is less resistant to low temperatures: in the cold it can crack and peel off. It is not flexible enough, so headlights of complex shapes can be pasted over only under the influence of high temperatures.
However, this type of coverage is more common and affordable. The price for it is not particularly high. Vinyl armoring won't break your budget.
Advantages and disadvantages of polyurethane
Polyurethane films are more durable. This is due to their thickness, which is 1.5–2 times greater than the thickness of vinyl. Such strength is not at all surprising, since polyurethane coating was first used on the blades of helicopters of the US Department of Defense during operations in the Middle East. This was necessary to protect the equipment from wear and tear under the influence of small grains of sand, which are found in abundance in the air of this region.
Polyurethane retains its properties in any weather: you don’t have to worry that with the onset of frost, your optical system will become more susceptible to damage. In addition, this material is highly elastic, so you can use it to cover even the most intricately shaped headlights.
Unfortunately, this material also has a number of disadvantages. For example, polyurethane transmits light worse, which directly affects the quality of lighting. This factor is not so scary if you have original lenses with powerful xenon lamps installed. But if your headlights themselves are not bright enough, then the polyurethane layer can make the situation even worse.
It is worth adding that the manufacturing technology of polyurethane film is quite complex, and this significantly increases its price. Covering headlights with this material can cost you 3-5 times more than vinyl.
What to choose
When making a choice, rely mainly on your financial situation and the shape of the headlights. If they do not have a lot of bends, then you are better off with a vinyl anti-gravel coating. This will significantly save your budget. Thanks to the low price of vinyl, you can easily replace a film that has become unusable with a new one.
If the financial issue is not particularly acute for you, feel free to purchase polyurethane. With it you can ride even on the most severe off-road conditions without worrying about damage to the optics.