Currently, among the feedback alarms belonging to the middle class, which fully ensure the solution of the tasks set to preserve safety, the “Sheriff” system has proven itself well, which, among other things, attracts motorists with a number of additional functions (for example , the presence of RFID locking and the ability to autostart), as well as an affordable price and ease of installation during installation.
Most car alarm systems offered on the modern market are accompanied by fairly detailed instructions, meanwhile, in each specific case, when dealing with the problem of how to connect a sheriff alarm, you have to take into account many quite important nuances.
The installation of any car alarm, as a rule, begins with choosing a location for the main control unit. Practice shows that it is most convenient for these purposes to use the compartment behind the glove compartment or the free space under the ventilation and heating control unit.
It is best to avoid attempting to install this unit in the engine compartment. Not only is there an increased risk of moisture and other aggressive liquids getting in there, but there are many components in the engine compartment that can interfere with the radio signal, and this, in turn, leads to a decrease in the range of the system and creates conditions for false alarms.
The block is secured in the selected location with the supplied screws or using special braces. As for the engine compartment, it is much more appropriate to install a siren in it, and such a place should not be too accessible from the outside, remote from moving elements and protected from moisture.
When installing the hood limit switch, you should not forget that it must be fixed on a metal surface that is securely connected to the general “ground” of the car, while when pressing and closing the hood, the limit switch rod must move at least 6 mm, and when opening, it must rise completely.
It is best to mount the shock sensor on the hard surface of the jumper between the engine compartment and the passenger compartment (on the passenger compartment side).
The LED is placed so that it best suits its main purpose, that is, it warns a potential attacker as early as possible about the presence and enabled state of the security system.
The Valet button requires a particularly reverent attitude, which, after installation, must be both hidden from view and, at the same time, as accessible as possible to the driver
To connect individual components of the alarm system, you will have to do a certain amount of work in the cabin: make wire leads from the ignition switch (on which +12V voltage appears when the ignition is turned on), stretch the wires going into the cabin from the siren and the hood limit switch (and possibly the trunk ), make a reliable diversion from the nearest “mass”.
When installing such a system, you may have to cut the standard register for controlling the electric drives for controlling the door locks. As a rule, these wires are laid from the main locking (unlocking) switch to additional switches and then to the electric lock drives. For the normal functioning of the security system, the wire going to the main switch is connected to the green wire of the system, and the wire going to the electric drives is connected to the yellow one.
The car alarm connection diagram included in the kit provides complete information about the color masking of the wires and their connection locations. The only thing you should pay attention to is protecting the wires using special corrugated tubes and insulating tape, as well as securely fixing them with cable ties.
Complete sherriff alarm circuit diagram
At the final stage of installing the system, the antenna wire is stretched to its maximum length, which is secured with fastening ties in a place where it is difficult to accidentally damage it. Please note that in order to avoid spurious interference, it is strictly forbidden to wrap current-carrying harnesses and individual wires with the antenna cable. Our manual is suitable for the following models:
- Sheriff ZX-1095
- Sheriff ZX-945
- Sheriff ZX-935
- Sheriff ZX-755
- Sheriff APS 2400
- Sheriff APS-35PRO Platinum2
- Sheriff ZX-750
- Sheriff ZX-1070
- Sheriff ZX-1055
- Sheriff ZX-1060
- Sheriff APS-35PRO Platinum1
- Sheriff ZX-940
- Sheriff ZX-1090
- Sheriff ZX-725 ver.2
- Sheriff ZX-925 ver.2
- Sheriff ZX-910 ver.2
- Sheriff Lady ZX-800
- Sheriff ZX-710 ver.2
- Sheriff ZX-1050
- Sheriff ZX-600 ver.2
- Sheriff ZX-625
- Sheriff APS-35PRO
- Sheriff APS-25PRO
- Sheriff APS-2600
- Sheriff APS-2625
- Sheriff APS-2500
- Sheriff ZX-950
- Sheriff ZX-930
- Sheriff ZX-900v2
- Sheriff ZX-700
- Sheriff ZX-730
- Sheriff PRO-9250
- Sheriff APS-35PRO Silver
- Sheriff APS-2600 Ver.2
- Sheriff APS-2500 Ver.2
- ff APS-35PRO Ruby
The American Sheriff alarm system will reliably protect your vehicle from theft and other criminal attacks. An expanded set of functions will make driving more comfortable. The main drawback is the range of the main communicator, which in practice turns out to be less than stated.
How much are
The Sheriff security system is relatively inexpensive compared to other manufacturers.
Table 2. Sheriff’s pricing policy by region of the Russian Federation
| Name | Price, rub |
| 1. Sheriff ZX-925 | 6845 |
| 2. Sheriff ZX-757 | 8650 |
| 3. Sheriff ZX-945PRO | 5340 |
| 4. Sheriff ZX-1070PRO | 9800 |
| 5. Sheriff APS-2400 | 4375 |
| 6. Sheriff ZX-750PRO | 7000 |
| Prices are relevant for three regions: Moscow, Chelyabinsk, Krasnodar. | |
Design and principle of operation
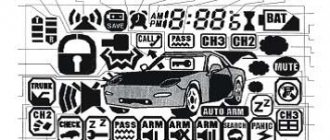
The alarm device includes a head unit, an antenna complex, control key fobs and some other elements, for example, an engine blocker. All Sheriff anti-theft systems have the following functions:
- Vehicle condition monitoring. The system notifies the user using the key fob. The function works like this: if there is an attempt to steal or damage the car, the sensor transmits information to the head unit. The latter sends data to the key fob, on whose screen a message appears.
- Remote control of the car. Depending on the alarm model, the system provides various options for remote engine starting. The user can send a command from the key fob, set the motor activation time, or set frequency indicators.
- Security coding. The Sheriff car alarm operates using a separate channel. It is impossible to crack the security code using standard means.
- Power window control. The function is implemented only in the presence of automatic closers.
- Remote door opening. When the protective mode is turned off, the head unit sends a command to unlock the door locks and trunk.
- Silent mode. When the anti-theft system is turned off and on, the system will not sound an alarm. By making the appropriate settings, the user can achieve automatic activation of the security mode when closing the doors.
- Activation of alarm mode. At the same time, sound and light indications are triggered. The mode is designed to deter criminals.
Pros and cons of the manufacturer
According to user reviews, Sheriff anti-theft systems with feedback and remote start have the following positive qualities:
- Easy to install and use. Anti-theft systems can be installed by yourself. It is enough for a car owner to have minimal knowledge about the structure of the on-board network.
- Affordable price. Sheriff alarms are the most popular among buyers, due to their low cost and advanced functionality.
- A large number of useful functions. The system will not only protect the car from theft, but will also allow you to control adjustable elements of the interior and body.
The negative points include the following:
- Small range of the key fob. The maximum distance at which the remote control can receive and send commands does not exceed 200 m.
- Complex installation and operating instructions. The manual contains unclear recommendations that may cause incorrect installation of system elements.
- False positives. Unreasonable activation of the alarm mode is not typical for all Sheriff car alarm models with auto start. The disadvantage is associated with problems that arise when the head unit interacts with the engine blocker.
- Vulnerability to hacking. Despite the developers' statements about the reliability of the system, car alarms are not resistant to some code grabbers.
- Possibility of purchasing a defective product. Due to incorrect operation of the head unit or key fob, the alarm may not turn off.
The alarm must be used correctly
Alarm units belonging to the Sheriff brand and equipped with auto start have a gearbox selection loop. It is easy to notice that the statement is not true for all devices of the family in question - sometimes software settings are used. In a car with a manual transmission, the owner must perform certain actions, and only then will autostart be allowed. All connections, moreover, are made according to the basic diagram, which is true for any car.
We hope everything is clear here.
Each Sheriff alarm key fob is equipped with a key that allows you to immediately perform a remote start. For most models, this will be the Ch2 key, which is pressed twice. By the way, the sequence discussed above is suitable for a car with a manual transmission. But a car with an automatic transmission can also be equipped with autostart. The Sheriff 1000 car alarm, for example, in the options table has a special setting SF14, which allows you to select the type of gearbox. Initially, the value is set to “1”, that is, “Manual gearbox”.
The owner of a car with an automatic transmission is required to perform the same actions as listed in the text above. But at the same time, as stated in the instructions, the engine stops immediately, and you can leave the cabin at any time.
One-way models
Simple models that do not have feedback have a minimal set of functions. 2 communicators are used for control.
Sheriff APS-2625 and 2400
Sheriff APS-2400 has the following features:
- dynamic coding (the system has minimal resistance to hacking);
- the presence of two-level sensors in the kit that quickly respond to an attempt to open or damage the vehicle;
- the presence of a service button (this element is used to deactivate the alarm if the key fob breaks down);
- the need to link each remote control to the head unit;
- low price (a system with a basic set of functions costs no more than 3,000 rubles).
The Sheriff APS-2625 alarm system is equipped with the following options:
- manual activation of protective mode;
- manual disabling of security functions;
- two-stage deactivation of protective mode.
If the key fob malfunctions or is lost, the system will have to be controlled manually. If necessary, the user can link up to 4 communicators to the main unit. The emergency mode is activated by pressing the emergency button. Impact controllers have 2 sensitivity zones.
Sheriff APS-2500 and 35 Pro
Sheriff APS-2500 is distinguished by the following features:
- remote control of the alarm function regardless of the system operating mode;
- accompaniment of pressing the service button with a sound notification;
- protection of all parts of the car equipped with controllers (if the sensor does not work, the alarm system bypasses it).
The APS-35 Pro model is equipped with 2 auxiliary channels, which are used to connect adjustable interior and body parts. One connector is a power connector, which is rare among budget anti-theft systems. The set includes 2 keychains with shock-resistant housings. The functionality includes the following options and modes:
- quiet and passive security modes;
- Anti-robbery function;
- two-level disabling of the security mode;
- remote control of the “Alarm” option;
- turbo timer;
- separate opening of the driver's and passenger doors.
Two-way models
The processor device of such anti-theft systems communicates with the key fob using a secure channel. The owner regularly receives messages about the condition of the vehicle. The data is reflected on the display of the control panel.
Sheriff ZX-945 and ZX-1090
The ZX-945 feedback alarm has the following features:
- interactive signal coding, providing reliable protection against hacking;
- high range of the key fob (signals are received at a distance of up to 2 km);
- processor unit equipped with 4 communication channels;
- the presence of a liquid crystal screen in the main communicator;
- 2 security modes: active and passive;
- possibility of connecting 2 engine blockers (devices prevent criminals from starting the engine).
Commands from the ZX-1090 alarm key fob can be issued from a distance of 1000 m. The range of the communicator in receiving mode is 2200 m. The spare pager operates at a distance of up to 50 m. Dynamic dialogue coding prevents intruders from intercepting the signal.
Sheriff ZX-1070 and ZX-940
Sheriff ZX-1070 is equipped with a feedback function and an engine auto-start module. The system reliably protects the vehicle from theft, damage and evacuation attempts. An auto-start alarm can be configured so that it starts the engine on a timer or at certain intervals. Other useful functions of the anti-theft system include:
- dynamic signal coding;
- active and passive security modes;
- separate control of activation and deactivation of protective functions;
- passive engine blocking;
- using a displacement sensor.
The Sheriff ZX-940 anti-theft system is equipped with 4 service channels. There is a two-way communication function. The user sees messages about the vehicle's status on the key fob screen. The driver can remotely adjust the seat position, engine start and security system lights.
Peculiarities
How to connect an alarm with feedback and auto start to a car, how to set up the start, how to turn off the device and what is the best way to install it? First, let's look at the features of the system. The Sheriff car alarm is produced by Progressive Innovative Technology from the USA. As a result of numerous tests, the alarms of this brand have shown their effectiveness and functionality. Initially, the Sheriff car alarm was conceived as a budget anti-theft system.
- availability of two-way communication on almost all modern models;
- car alarm allows you to control the central locking remotely, locking the car doors;
- work with the satellite module;
- the car owner can set and disable the security system, while relying on the readings of the key fob;
- active and passive modes for installing a car on protection;
- if the Sheriff car alarm has an automatic start function, then the driver will be able to start and block the engine from a distance;
- The kit includes a shock controller with an alert function;
- the ability to recognize the owner of the vehicle at a distance when approaching the car;
- reliable protection against signal interception and scanning, which greatly increases the safety of the machine;
- the ability to set a security mode on the car even if the engine is running;
- the possibility of motion recognition, as well as wiretapping of the vehicle interior with further notification to the car owner (the author of the video is the Avtozvuk.ua channel - Avtozvuk Database).
These functions are typical for almost all signaling models.
How to find out the alarm model
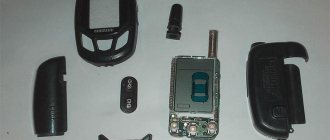
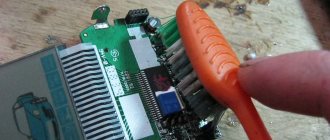
Having learned the model of the security system, the user will be able to purchase a suitable spare part or replace the communicator. You can identify the alarm using the key fob by opening this device. It is necessary to pry the latches and remove the top cover. The alarm model is recognized by markings on the board. The detected combination of characters is entered into the search bar of the browser and the types of security systems are determined. To find out the alarm model, you need to find the markings in the area of the antenna unit.
How to connect
According to the installation instructions, to connect the components of the anti-theft system, you need to perform the following steps:
- mount all the elements (the head unit and service button are installed in a hidden place, the antenna complex is placed on the rear window, the siren must be connected under the hood);
- stretch the wire going from the ignition switch to the head unit (a cable is used that receives voltage when the engine starts);
- extend the wires of the limit switches and siren to the processor unit;
- connect the ground cable (according to the car alarm connection diagram, a standard nut located on the body is used for this);
- cut the standard cables used to control the door locks (such wires are laid from the unlocking switch to the locks);
- connect the main switch wire to the green cable;
- protect the wiring with electrical tape and corrugated tubes;
- connect the antenna unit (the cable of this element cannot be inserted into the wiring harnesses that provide power supply).
User manual
The operating instructions for the alarm contain recommendations that allow you to use the system correctly.
Activation and disarming of security
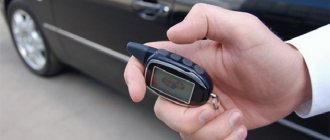
The security mode is activated by briefly pressing button 1 of the key fob. The protective function is disabled using the same key. To activate the option while the engine is running, you need to start the engine and hold down 1 button on the key fob. To disable the function, press the key briefly.
Programming a new key fob
The control panel programming process includes the following steps:
- Removing the security mode and starting the engine.
- Press the emergency button three times. The system will confirm action 1 with a beep.
- Hold down button 1 of the first key fob. The key is released after a long beep appears.
- Long press button 1 of the auxiliary communicator. Completion of key fob programming is accompanied by a sound notification.
Changing your personal code
Before programming, the anti-theft mode is deactivated using the service button. After this, perform the following actions:
- turn the engine on and off;
- enter the first digit of the password by the required number of presses of the service button;
- turn on the ignition;
- using the emergency button, enter the second digit of the code;
- turn off the ignition (the correct password entry is confirmed by a sound notification);
- Press the service button 3 times;
- press 1 key on the key fob (the system will notify you that a new code has been recorded with a sound signal);
- turn on the power to the transponder (after the sound signal appears, the device is deactivated).
The programming menu is exited after 10 seconds of inactivity.
Emergency disabling of security
According to the instructions for use, to emergency disable the protective mode, you need to open the driver's door with the key. After the siren sounds, you must start the engine. 10 seconds after turning on the ignition, press the service button.
How to enable autorun
To enable the alarm to automatically start at a certain frequency, you need to perform the following steps:
- press F twice;
- switch to cursor control mode;
- Press the F button again to confirm the selection of the desired indicator;
- use the door lock button to set the required interval.
The algorithm for enabling automatic start based on temperature differs by choosing a different indicator. The state of the security system does not matter.
Programming engine idle speed
Select the desired parameter as follows:
- The handbrake is moved to the “On” position;
- the ignition is turned on and the engine starts;
- within 20 seconds, press the service button 5 times (4th and 5th presses are accompanied by sound signals);
- the brake pedal is pressed and held (recording the value becomes possible after the parking lights flash);
- after a minute the brake pedal is released.
Engine lock
Remote engine blocking is carried out using the “Stop” button. Deactivation of the motor is accompanied by the disappearance of an indicator that looks like smoke. The function is configured in the cursor control menu.
Antihijack mode
The mode is activated when the engine is running, all types of cars are compatible with it. To begin, press buttons 1 and 2 of the key fob. They are held until 3 light signals appear. Over the next 20 seconds, the alarm will sound short beeps and periodically activate the interlock circuits. After 40 seconds, the alarm mode will turn on. If the engine is started unauthorized, the vehicle will not be able to continue moving and the doors will be locked.
Specifications
Main characteristics of the product Sheriff APS-2500:
- permissible supply voltage - from 9 to 15 V;
- current consumption (with active security mode) - up to 20 mA;
- current from the siren circuit - up to 2 A;
- current in external light signaling circuits - up to 15 A;
- current in the central locking circuit - up to 15 A;
- permissible current in blocking circuits - no more than 0.5 A;
- signal reception distance from the remote control - up to 30 m;
- frequency range - 433.92 MHz.
Possible problems and their solutions
If Sheriff alarms do not respond to commands sent from the key fob, you need to make sure that the antenna is installed correctly. It must be mounted at a sufficient distance from metal parts. An equally common problem is the false alarm of the siren. In this case, the sensitivity of the sensors is adjusted in accordance with the parameters specified in the instructions. If the doors do not lock when the security mode is turned on, check the condition of the wiring. Damaged cables are replaced.
Sheriff car alarms (the term “security systems” is of little use to them by modern standards) is a classic example of budget devices in the lower price segment, which are purchased solely on the principle “so that the doors open and the LED blinks, maybe they won’t get in”). Frankly outdated models continue to be supplied under this brand: for example, the Sheriff APS-2500 alarm system still uses the Keeloq algorithm, which did not protect against code grabbers even ten years ago. In more “fresh” and complex systems, instead of real technical improvement, cheap marketing tricks are used, misleading the average buyer.
As an example, the instructions for the “Sheriff ZX-1090 PRO” alarm system indicate the use of a certain DISARM DIALOG code in it. From the buyer's point of view, it is logical to assume that we are talking about dialog code, which is now considered to be maximally protected from intellectual hacking. In fact, the dialogue code (of dubious complexity) is used here only in the main key fob: for normal use of the entire set it has to be turned off (!), otherwise the additional key fob will not disarm the car.
It is impossible to talk about a full-fledged dialogue code at the level of StarLine systems (in the design of Sheriff key fobs there is obvious mimicry with the second generation StarLine systems) or Pandora.
Only the latest Sheriff models like the ZX-1095, which provide for working with a CAN bus and validating a transponder tag, can be called more or less meeting modern requirements. However, it is still equipped with an additional key fob without dialog code support, and to fully use both key fobs you have to switch to a primitive dynamic code. Thus, Sheriff cannot provide any significant competition in the middle price range, and in fact, the main sales of this brand fall on the most budget lines.
Overview of models and operating and installation manuals
Sheriff APS-2500
An extremely primitive system without feedback, which is controlled by two key fobs with minimal functionality: one button controls arming/disarming, the second activates an additional channel, and in combination with the first, it implements arming with disabling sensors or silent mode.
This “Sheriff” alarm system can actually be considered a radio-controlled central locking module with a tiny share of security functions. With a standard installation, it is not at all difficult to disable it if the machine is hacked. Just look in the instructions to see how to disable the system without using a key fob:
- Open the door with the key.
- Turn on the ignition.
- Press the Valet button within an interval of no more than 10 seconds.
Therefore, for the owner, setting a secret code is a mandatory measure to ensure at least some security. Here its length is fixed, two numbers from 1 to 9, which theoretically gives 81 different combinations. However, the instructions prohibit choosing the number 3 as the first digit of the code, which reduces the number of combinations to 72.
To set a secret code, you need to disarm the car:
- Turn on-off-on the ignition.
- Dial the first digit using the Valet button.
- Turn off, then turn on the ignition again.
- Dial the second digit.
- Turn off and turn on the ignition.
- After waiting for a short signal from the siren, turn off the ignition again.
But in order for the alarm to start working with a secret code, you need to activate the corresponding function:
- After disarming the car, turn on the ignition.
- No later than 3 seconds later, press Valet three times (this is why you cannot use 3 in the first digit of the secret code).
- Turn off and turn on the ignition.
- Press Valet 9 times, going to the F9 function.
- Press the main key fob button - the system will give two siren signals, indicating that the F9 function has been switched to value 2 (secret code).
The procedure for disabling the security status using a secret code is the same as entering it.
Installation instructions for alarm system Sheriff APS-2500
Sheriff APS-2600
A minimally modernized version of the APS-2500, which now has arming and disarming buttons on the key fob of the same design.
Installation instructions for alarm system Sheriff APS-2600
Sheriff APS-35 PRO
The system differs from the APS-2500 model only in the updated design of the key fobs, where the arming and disarming buttons are separated, and the presence of a built-in power relay for an additional channel in addition to the low-current output. The remaining capabilities and level of protection of this alarm system are in no way superior to the APS-2500. True, the restriction on the first digit of the secret code has been removed, which, however, cannot be called a serious achievement.
Installation instructions for alarm system Sheriff APS-35 PRO
Sheriff ZX-750
Two-way communication system on the main key fob. Operates with wideband modulation on the 433 MHz band without using any form of dialog code. In modern urban conditions, this reduces the radius of reliable communication, and you can’t count on protection from code grabbers even more so. The only more or less relevant protection function is the control of a digital blocking relay, which, however, is not included in the package.
Emergency deactivation of the alarm also occurs by pressing the Valet button once, if the secret code is not installed and activated (function F13).
Installation instructions for alarm system Sheriff ZX-750
Sheriff ZX-900
The system, while maintaining common features with the ZX-750, received an increased number of additional channels. Of these, two can be used to control external blocking relays with normally open contacts, and three can have roughly adjustable response time intervals.
The system does not meet modern requirements for anti-theft protection, just like those described above.
Installation instructions for alarm system Sheriff ZX-900
Sheriff ZX-1070
The first alarm with auto start in the line. Supports dialogue code only in the main key fob; it is used only for disarming. To fully use all key fobs from the kit, you must disable the F21 function activated at the factory.
Video: Car alarm Sheriff ZX-1070 - Installation / Alarm connection points on ZAZ Vida
Autostart is possible in three modes - one-time forced, cyclic by timer, cyclic by temperature. A one-time autostart occurs (in the case of a manual transmission, if “program neutral” has been previously performed) after double pressing button 2 on the key fob or when a signal is received at the “autostart from an external device” signal input on the central unit.
Timer autostart after activation allows you to start the engine every hour, or every 2, 4 or 12 hours for no more than two days. After 48 hours the function is blocked.
Temperature-based autostart occurs no more often than every 40 minutes if the temperature drops below the set temperature (+5, 0, -5, -10, -15 or -20 degrees). At the same time, unlike even many systems of the same level, setting the temperature is extremely inconvenient, since it lacks a digital indication. Instead, the instructions literally offer the following:
- Press the F button twice (the cursor is positioned on the IMMO indicator).
- Press the same button again.
- The indicator flashes to indicate the set temperature (for example, three flashes with a pause indicate a setting of -5 degrees).
- Button 1 activates the function and changes its value in a circle, button 2 disables it.
Moreover, even the state of enabled autostart based on temperature on this alarm is indicated by the lighting of the IMMO indicator. To be honest, you still need to try harder to find an alarm system that is more inconvenient and difficult to set up. Taking into account the minimal protection against theft, the overall impression of it is sharply negative.
Installation instructions for alarm system Sheriff ZX-1070
A car alarm is the same as 24/7 surveillance of your home. This is a necessity, not a mere precaution. Depending on the manufacturer of the security equipment installed on your car, the degree of security of the vehicle also depends.
When choosing, it is calculated how functional the security system is during operation, what additional options it has, and how useful they are. A Sheriff car alarm selected taking into account the characteristics of the car and possible risks is a guarantee of reliable protection.
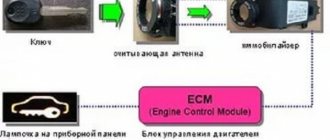
Immobilizer Sheriff T-34 ATF
This immobilizer has two radio tags that are read by an active transponder made in the form of a short-wave antenna on a ferrite core. The figure below shows the connection diagram of the immobilizer central unit:
The installation of the Sheriff T34 central unit should be as secretive as possible. The immobilizer has two built-in blocking relays. One of them can be used, for example, to break the power supply circuit of the fuel pump, the second - to turn off the power supply to the injection computer.
To increase the service life of the built-in relays, choose the lowest-current circuits possible: for example, by embedding a block in the crankshaft position sensor circuit, you will significantly reduce the wear of the relay contacts compared to using it in the ignition or fuel pump circuit.
The Sheriff immobilizer uses two analog inputs for activation: from the door switches and from the ignition switch. After the door is opened and the ignition is turned on, a search for marks occurs - if the answer is positive, the interlock circuits are closed.
Additional control circuits (shock sensor, volume sensor) are not provided, as well as notifying the user of unauthorized access - the immobilizer cannot be considered as a full-fledged replacement for the alarm system.
The ferrite antenna should be installed close to the driver's seat: under the steering column trim, at the bottom of the dashboard or in the center console. Professional installers recommend connecting the immobilizer as discreetly as possible; in this case, the control LED either does not connect or is embedded in the least visible place.
Sheriff ZX-1095 is one of the most modern models in the Sheriff line, equipped with two-way communication and an auto-start function. The car alarm uses a modern dialogue code; it is possible to connect to the CAN bus via an external module, including using the CAN bus to bypass the standard immobilizer.
The flexibility of this car alarm allows the use of various connection schemes. The main connections are made on the 20-pin connector of the Sheriff alarm central unit. Additional 6-pin connectors are the outputs of the built-in central locking and auto start control relays. The alarm uses an external shock sensor included in the kit. If necessary (for example, in a large minivan), when one shock sensor cannot be adequately configured to respond when the glass in the rear of the car breaks, you can connect an additional shock sensor to the corresponding connector.
The power connector for the auto-start alarm Sheriff ZX-1095 is connected in parallel to the corresponding contacts of the ignition switch. The connection diagram is based on the following pin operation:
- When autostart is activated, the IGN1, ACC and IGN3 circuits are turned on; if the lock has one ignition output, IGN3 is not connected. The shock sensor is also disabled.
- After a few seconds, the starter circuit is turned on, and ACC is turned off to reduce the load on the battery.
- After receiving a signal that the engine has started successfully, the starter is turned off and power to the accessories is restored. The shock sensor remains disabled. For autostart to work, additional control circuits are required, which are usually not used by car alarms without autostart:
- The handbrake input (gray wire) activates the program neutral mode: when the handbrake is tightened while the engine is running, the alarm closes the contacts of the built-in ignition duplication relay, and the engine continues to operate when the ignition key is removed from the lock. You can turn off the car only after closing the doors and arming the alarm, so it becomes impossible to leave it with the gear engaged.
- The engine control input (green/orange) must receive a signal in the form of pulses, the frequency of which is proportional to engine speed. The standard connection diagram for speed control involves the use of an analog tachometer or, in its absence, an injector control signal.
- The output to the immobilizer bypass (dark blue) is activated at the moment the ignition is turned on from the auto start relay, so that the vehicle's immobilizer receives a corresponding signal from the external bypass, in which one of the prescribed chips is installed.
Today there are many different models of car alarm systems. The most popular products are those developed and manufactured by the American company PIT (Progressive Innovative Technology). The equipment of this manufacturer has been sold on the Russian market for more than ten years. The most famous brands of this company are Challenger, Sheriff and EOS. You can purchase products from the above company not only in Russia, but also in Ukraine, as well as in other CIS countries. Wholesale and retail sale of protective equipment is possible. Two-way communication with clients allows us to improve security lines in accordance with consumer requests, using the latest technologies. Currently, car enthusiasts in Russia most often purchase Sheriff car alarms.
A little about choosing an alarm manufacturer
The most popular and effective car security equipment today is considered to be a car alarm from the well-known manufacturer Sheriff. The system is connected by specialists; you can try to install it yourself; the instructions will help you with this. In addition, the millet kit is in operation and maintenance.
The quality of workmanship speaks for itself, but the alarm system of this level also differs in the following parameters:
- window/door locking function;
- the presence of a special satellite module;
- audio wiretapping of the cabin;
- possibility of instant blocking of the engine.
These parameters significantly increase the level of security of the car. The Sheriff car alarm will allow you to detect your car if it is stolen, as well as prevent this fact. The detailed instructions that come with the anti-theft system will tell you in detail about all its features and installation methods.
What you need to know when installing a Sheriff alarm yourself
With a variety of brands, there are also many schemes for installing equipment on a car. This suggests that pins with the same markings and colors may have different functions.
When purchasing a Sheriff alarm system and installing it, the main document you need to refer to is the instructions.
Regarding installing a GSM security kit yourself without the help of experienced craftsmen, you need to understand what it is, know how to program the equipment, which sensors are responsible for certain functions. If everything is in order with this, you can proceed to installing the alarm system.
Possible faults
Despite the reliability of the Sheriff alarm system, its elements can fail.
The following problems are possible:
- sometimes the security system with feedback does not catch the signal from the key fob, or it is possible to catch it only the second, and sometimes even the third time;
- problems arise due to the high sensitivity of the sensors;
- In order for the key fob to work, you have to press the button hard;
- During arming, the windows are not blocked or the locks do not close completely; you have to close them yourself.
If problems with the alarm are identified immediately after purchasing and installing it on the car, you should return it to the seller or exchange it for a working one. In case of serious problems after prolonged use, it is better to contact a specialist.
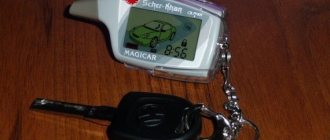
Car control key fob
Tools and materials for DIY installation
Of course, the most important thing is the car and the Sheriff car alarm itself, as well as instructions for its installation and operation. In addition you will need:
- Multimeter and the ability to use it. An electronic device is best suited to easily measure conductivity.
- Additional electrical wires, as those included with the system are very short.
- Dark colored foam to protect the central unit.
- Double-sided tape, reliable electrical tape.
- Tools include a simple screwdriver and a socket wrench for removing doors, panels, and a knife for cutting wires.
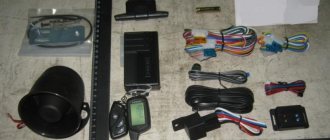
Contents of delivery
Operating and configuration instructions, as well as the user manual (we recommend reading carefully).
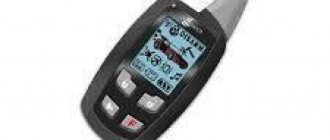
- Key fob with two-way communication channel and TFT screen.
- Set of communication cables.
- Spare keychain.
- Siren (installed optionally).
- Main block.
- Hood or trunk button.
- Antenna module equipped with LED indicator.
- Service key "Valet"
- Dual zone shock sensor.
We determine the installation location of the Sheriff alarm system on the car
There's nothing special about it. The most optimal point for installing the central equipment of the system is the cavities located behind the dashboard. Before starting work, wrap the alarm unit with foam rubber, try on how best to position it, and it should be securely fixed and not interfere with anything.
Sheriff car alarms are installed in accordance with the following rules:
- The sensor is located in a hidden place inside the cabin; it must be hidden as best as possible so that it is difficult for an attacker to penetrate the system and disable it. It is impossible to determine the location using the wires, but getting it out will take time.
- Car alarms, that is, the unit should not be located near moving parts and components, near air conditioners and stoves.
- The sensor should not be located close to the radiation and reception of radio waves: antenna cables, radio stations, telephones.
The kit will be connected to the panel devices, in which case you will need additional wires. Compliance with all precautions and rules will allow the installation to be carried out efficiently. And now let's go directly to it.
Sheriff car alarm: detailed installation instructions
- In the place you choose, the block must be secured with special screws that come with the equipment or using guy wires. Regarding the engine compartment, it is better to install a siren here; you need to choose a place so that nothing is visible from the outside.
- When installing the end hood switch, do not forget that it is mounted on a metal surface that is securely connected to the general “mass” of the vehicle; when closing the hood of the car, the rod must move no less than 6 mm, and when opening, it must rise completely.
- We attach the shock sensor to the joint surface between the passenger compartment and the engine compartment (from the passenger compartment side).
- The LED is mounted in such a way that it performs its functions to the maximum - instantly alerting an intruder to the presence of a security system.
- A detail such as the Valet button requires special attention, which must be hidden from prying eyes and be freely accessible to the driver.
Connecting an alarm to the central locking system with a negative and positive pulse
In this case, when a minus is applied to a pair of lock wires, they close or open. Finding such wires is relatively easy using a probe (lamp). You should alternately close the wiring that comes out of the car doors on the driver’s side. As soon as the right pair of wires is found (the door opens or closes), the problem can be considered solved.
In those cases where it was not possible to find the wires, you will have to “dig” into the central locking unit. You will need to find a special relay in it that is responsible for closing/opening the doors, and then solder the security system wiring into it.
Working with a lock controlled by a “plus” pulse is similar to the scheme described above. Only the required pair of wires in this case, as you yourself understand, will have a plus polarity. In other words, positive wires should come from the alarm.
The connection diagrams for the voiced types of central locking with a built-in relay will therefore be as follows:
- “Negative” pulse: NC (normally closed) contacts are not needed, NR (normally open) contacts are connected to the “minus”, common contacts go to the control wires.
- “Positive” impulse: open contacts are connected to positive, closed contacts are not used, common ones, as in the previous version, are connected to the found control wiring.
Car alarm: connecting individual elements of the system
To connect all the components you will have to do a number of works:
- remove the wire from the ignition switch (which provides +12V voltage, directly when the ignition is turned on);
- stretch the limit switch cables directly from the hood and the siren device located in the cabin;
- make a high-quality diversion from the nearby “mass”.
When installing the equipment, we cut the original wiring responsible for controlling the electrical wiring for controlling the locks located on the doors. Basically, such elements are routed from the main unlocking switch to additional switches and then to the locks. For the full functioning of the security alarm, the element going to the main switch is connected to a green cable, and the element going to the electrical wires is connected to yellow.
The attached connection instructions provide even an amateur with all the necessary information about the places where the cables are connected and their unusual color camouflage. The main thing that we recommend paying special attention to is the protection of the wiring using high-quality insulating tape and corrugated tubes, as well as the quality of their fastening with cable ties.
The final stage is that the antenna is stretched to its maximum size and secured with ties in a place where it is almost impossible to damage it accidentally. It is strictly forbidden to wind the antenna cable around separate wires and harnesses that conduct current. This manual is suitable for all Sheriff models.