Replacing a bumper on a Hyundai Solaris is carried out in two main cases: if it was damaged in an accident or unsuccessful parking, or if the driver intends to make a small tuning.
The sequence of operations when replacing the front and rear bumpers will be almost the same. The car owner will need an equipped garage and the usual set of tools that the master always has. To carry out self-repair of a part, you will also need to prepare consumables.
Bumper and automatic
The cars of the Korean manufacturer are equipped with inexpensive plastic parts, which often suffer from unsuccessful parking, especially since not all cars have parking sensors at their disposal.
An automatic transmission sometimes reduces the incidence of accidental damage to a part, since the braking and stopping process in cars with an automatic transmission is smoother. Bumpers often suffer from poor contacts; their second problem is cracks and weakening of the paint layer. The dismantling and installation process will take a minimum of time.
Repair
Most often, the bumper is removed for repair work. Let's look at some options for fixing the damage. It should be noted that most car enthusiasts can completely independently fix such malfunctions in their garage.
The most common problem is dents. Thanks to high-quality material, the Hyundai Solaris bumper in many cases simply bends inward, but does not break. At the same time, returning plastic to its normal state is extremely difficult. To fix this you will need a hair dryer. With its help, the damaged area is heated. When it warms up enough (no need to wait for it to melt), the dent is removed by hand.
Dents are usually accompanied by scratches and chips. If the paint damage is not too large and deep, then you can get by with a minimum of procedures. To eliminate such scratches, simply sand the surface, coat it with primer, and paint. If there is a deep scratch, you will first have to apply putty, use a special one for plastic. Then it is sanded and the paintwork is restored.
- “How to dilute putty for cars”;
- “Do-it-yourself plastic bumper repair”;
- “How to remove scratches on a bumper.”
The most difficult damage to repair are cracks and damage to the bumper. To restore cracks, you will have to solder them. Before carrying out work, you just need to drill holes at the ends of the crack. This will allow you to avoid spreading it. Sometimes it is necessary to restore a section of the bumper. This can be done using fiberglass and PVA. Don't forget to putty the repaired area.
Where is the best place to dismantle?
The work will need to be carried out in a prepared garage. A slipway or inspection hole will be required. It’s just that on asphalt or ground it’s extremely inconvenient to remove the rivets that hold the part in place. An uncomfortable posture of the technician when working to remove the bumper of a car standing on the asphalt will significantly lengthen the work time.
The car sits very low and removing the mudguards and protection will be extremely inconvenient. Also, the presence of an overpass will allow you to gain access to the screws that are located at the wheels of the car. If necessary, it is also more convenient to remove the trunk trim in an equipped and clean garage.
Execution of work
On a Hyundai Solaris, the front bumper is the most frequently damaged body element. Removal is carried out for its subsequent repair or replacement with a new one.
Dismantling will not take you more than 20 minutes.
It is recommended to wash the front wheel arches before removing them.
Required accessories:
- bedding on which we will later place the bumper;
- screwdrivers figured and slotted;
- 8, 10, 12 mm socket heads and extension.
It will be more convenient to carry out the removal work on an inspection pit or overpass.
Let's start removing.
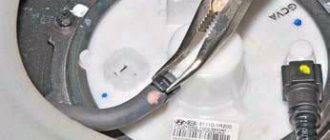
Using a curved screwdriver, unscrew the four plastic clips from the bottom of the bumper, securing it to the engine mudguard.
Unscrew the additional fender liners (if they are installed).
On the sides, the edges of the bumper are attached to the fenders with self-tapping screws. It must be unscrewed with an eight-millimeter socket with an extension.
Unscrew the fender liner mounting clips from below and remove them. We bend the fender liner and disconnect the connector from the fog lamp lamp. We perform the same procedure on the opposite side.
Using a 10 mm socket wrench, unscrew the four bolts of the decorative radiator trim.
We press the fasteners of the two clips that secure the air intake to the trim inward with a thin screwdriver blade. We take them out.
Use a shaped screwdriver to unscrew the plastic pistons from the edges of the lining.
The sides of the Hyundai Solaris bumper are held in mounts on the wings; by carefully pulling the sides, we remove them from the plastic mounts.
Remove the bumper and place it on a backing.
If necessary, remove the amplifier by unscrewing three bolts with a twelve-millimeter socket with an extension on each side.
Install the removed parts in reverse order.
The tool you need
In addition to the equipped space, you will also need a set of tools. Without them, even knowing how to replace a bumper on a Hyundai Solaris, you won’t be able to do the job. Required equipment and tools include:
- screwdrivers, always a Phillips screwdriver, and a 10mm wrench;
- sharp tool for removing rivets;
- a construction hair dryer that will help straighten the plastic of the bumper;
- enamel and brushes, if necessary, then also painting, primer and putty. The parts made from a mixture of polypropylene and polyurethane are very capricious and require careful painting
- drying chamber.
Front buffer
Before removing the front bumper you will need:
- Drive the car to an overpass, inspection hole, or use a jack. The mounting bolts are very inconvenient to unscrew, so the vehicle must be located on a hill.
- Wash work surfaces thoroughly. Clean the bottom from traces of corrosion. Dirt and dust. During operation, dirt and rust will fall on the driver, therefore, it is wise to clean the bottom and lower part from dirt
- Disconnect the battery terminals. Removal is accompanied by the removal of the car's fog lights. This will require intervention in the engine compartment of the car. In order for the operation to be successful, the vehicle is de-energized.
- Use a WD-40 solution to treat the places where the body kit is attached to the car. This removes dirt and rust from the bolts and rivets.
Many motorists begin the process of replacing body kits without completing any preparation. As a result, they face a number of difficulties and inconveniences. Therefore, preparatory work should be carried out, and then removal should begin.
Dismantling
When removing the front bumper of a Hyundai Solaris, perform the following steps:
- Unscrew the rivets along the edges located at the bottom of the bumper. To do this you will need to use a Phillips screwdriver.
- Remove the bolts on each side under the headlights. They are located in the inner niche of the body element. In order to access them, you will need to turn the wheels out.
- Under the headlights and along the edges, the bumper is held on by latches. To disconnect them, you need to use a flat-head screwdriver.
- Disconnect the fog lamp wire from the electrical controller.
- Under the hood, using a 10mm wrench, unscrew four bolts, they secure the body kit to the body. It is important not to lose the nuts from the holders.
- In the central part, where the radiator frame is located, you need to snap off 2 clips.
- In the lower part, dismantle the 8 bumper fastening pistons.
- Gently pull the body kit in your direction. Start pulling from the upper right corner of the body kit.
- In places where the part cannot be dismantled, unscrew the plastic pistons.
- Remove the buffer from the brackets located at the wings of the car.
The piston retainers are made of plastic. When dismantling, you need to carefully remove them so as not to damage them.
Installation
The buffer is installed in the reverse order of removal:
- The object is installed on brackets.
- The pins and clips on which the element is attached are closed.
- Four bolts are tightened under the hood.
- Connect the wire from the fog lights.
- Attach the buffer to the remaining fasteners.
- Tighten the bolts under the wings.
- Rivets are attached to the lower part of the body kit.
Do not make great efforts when dismantling bolts and nuts. This way you can easily break the thread, which will significantly complicate the process of dismantling and installing the body kit on the car.
Cases of dismantling
Replacement is usually required if the part is damaged due to unfortunate contact with a wall, tree or another machine. The result may be a dent or crack. Not everyone can correct these faults on their own; if the geometry of the part is seriously damaged, it will most likely need to be replaced.
In addition to standard situations in which replacement or the need to remove the rear bumper of a Hyundai Solaris hatchback or sedan is required, there are also non-standard ones. Among them:
- restyling;
- installation of an original lighting solution;
- the need to renew peeling enamel if the plastic part has been painted.
Bumper in color
There are quite a lot of companies on the market today that specialize in painting bumpers. BUMPER-NN (Nizhny Novgorod) has normal bumpers. This is the best I've ever worked with. Best doesn't mean perfect. More on this later.
- Bumper Features
- There may be a problem with the radiator grille. A gap is formed. In this case, the bumper will have to be cut.
- Bottom grille. The same thing: it may not latch and you will have to cut the bumper.
- The space for the rubber molding of the bumper needs to be slightly widened so as not to tear it during installation.
- There is always a strong flash on the right side of the bumper that cannot be easily cut off.
- Some colors sometimes lose tone. That is, the bumper may be a little lighter or darker.
- In any case, the paint holds up worse than the factory version.
Points 3, 4 and 6 apply to each bumper. 1, 2 and 5 are not necessarily present.
1) The photo shows possible problem areas. Does not depend on the grille manufacturer. It may not snap into place or may not fit into place. This can happen on both sides. In this case, you will have to trim the bumper in the place where the grille does not fit. This must be done carefully, cutting off little by little. If you overdo it, the grate will not be able to cover this area.
If the grille does not fit from the bottom, then, as a rule, it is enough to simply remove the flash from the bumper.
2) The lower bumper grille may also not latch on either side. It can be corrected in the same way: by cutting off excess plastic and flash. You need to act carefully, because... if you cut off the excess, the edge of the bumper will be visible from under the grille.
The mount does not snap into place
One of the upper fasteners also does not snap into place, but in this case the reason is in the Chinese grille itself, where the slot for the latch is not wide enough.
3) The holes for the molding on the new bumper are slightly smaller. The molding can be torn during installation. Need to expand the seating a bit. Use a 3.6-3.8 drill or a shredder. Proceed with extreme caution. If you overdo it, the molding will be blown away by the oncoming wind.
4) All bumpers have a flash on the right side. It will no longer be possible to remove it.
Dismantling procedure
To start work, the car will need to be driven or towed to an equipped garage. Understanding how to remove the front bumper on a Hyundai Solaris, you need to prepare:
- a place for repairs in which an overpass is installed or there is an inspection hole;
- tools (their set depends on the required types of work);
- parts if it is necessary to replace the bumper or its trim;
- get an assistant who can assist with repairs.
It would be a good idea to watch a video in advance, in which the experts will tell you in detail and show you how to remove the rear bumper of a Hyundai Solaris or change the front one. The sequence of actions must be strictly observed; violation of it may make it difficult to access individual elements.
Why do you need to remove the bumper?
When you have dealt directly with the process of disassembly and dismantling, it is worth deciding why it is still necessary to remove this unit:
Many cars, when operating a vehicle, do not maintain the distance and interval, which damages the bumpers. Thus, dismantling an element may be necessary for repair and restoration operations or painting.
The second option where it may be necessary to remove the front bumper is to repair the components under the part. Thus, many engine operations require additional access, which can be provided by a removed buffer.
Also, in addition to repair and restoration operations on the bumper, it may require replacement when it cannot be repaired.
How to remove and install the front bumper on Solaris?
Removing the bumper is a simple operation; it will not require much time, unlike possible repairs of the part.
Stages of work:
- The rivets holding the bumper do not hold very tightly. They fasten the part from below, two on each side. The presence of an overpass will allow the driver to carry out this operation while standing. A Phillips screwdriver will help you remove the rivets; you can also pry them off with a flat, sharp object;
- Next, you need to find the screws located along the edges of the part on the inside; they hold the headlights. They are located extremely inconveniently - the car will have to turn the front wheels;
- then carefully unfasten the plastic fasteners that hold the element to be replaced on the sides. They are fragile and you will need to be very careful when unfastening them so as not to break them;
- the next step will be to remove the fog lights as carefully as possible;
- After that, the work moves under the hood. There, 4 bolts are unscrewed and two rivets are removed. There is a risk of losing the nuts, so prepare in advance and place a box under them;
- remove the bumper. You will need to install it after repair in the same order.
A separate question will be how to remove the bumper trim on a Hyundai Solaris. This requires virtually no effort: the part can be easily removed with a minimum of tools. It is held on by plastic fasteners that can be easily unfastened by hand.
You just need to press them very gently but firmly with your hands. With the same ease with which the lining is removed, it is put back in place. The whole operation takes no more than 5 minutes.
Remove with your own hands
Most likely, to work on replacing the bumper and subsequent repairs, the driver will need an assistant who will hold the bulky part.
Depending on the complexity and presence of the overpass, the work will take from 30 minutes to several hours, if the driver has no experience in interacting with caps and deeply hidden bolts. Before starting, it is better to study the training video further.
In general, you are ready, you have found a hole, found a tool, rolled up your sleeves - go ahead.
- We start from the bottom, there are 4 rivets on the sides - bolts, two on each side, they are “sharpened” for a Phillips screwdriver, unscrew them.
- Next you need to unscrew the bolts under the headlights, they are hidden almost at the very top. It is inconvenient to unscrew them, so you will need to turn the steering wheel so that the wheels do not interfere. You can also unscrew these bolts using a regular screwdriver.
- Now it’s time for the jewelry work itself. The bumper is attached to plastic fasteners on the sides. You need to pull them out carefully, otherwise there is a chance of damaging them. There are three of them on each side, they are also located next to the headlights, closer to the wing.
- Next, remove the cable from the fog lights. NECESSARILY! Otherwise you can tear it off.
- Now let's move on to the top of the car. There are only 4 bolts and two rivets on the edges. You need to be careful with the fasteners, because they have nuts at the bottom and can be lost. First, let's dismantle them. Then unscrew the 4 bolts.
- Now you can remove the bumper. As we see the radiator right in front of us. Can be washed and cleaned with a high pressure washer!
Here are some of the bolts and plastic pistons that remained after dismantling.
After work, this plastic part is hung in the reverse order; everything can be done without rushing in about 30 - 40 minutes. Even a beginner can handle it.
I’ll finish here, I think my instructions were useful to you. Read our AUTOBLOG.
How to remove and install the rear bumper on Solaris?
The sequence of actions on how to remove the rear bumper of a Hyundai Solaris sedan and install it does not differ from the stages of work with the front one. The operation will take no more than 20-25 minutes. To do this, the machine must also be installed on a slipway. The work is carried out in the following order:
- The trunk trim is removed. This is not necessary for a sedan, but if there is a hatchback in the garage, the trim will have to be removed;
- the negative terminal is disconnected from the battery;
- both rear lights are removed in the same order as the front ones (the process is described above);
- the pistons located under the headlights are removed; for this you need a Phillips screwdriver;
- the wheels cannot be removed or unscrewed, but you should try to remove the mudguards and plastic protection, which is held in place by three bolts;
- remove the screws located under the mudguards;
- There are still two self-tapping screws left in the corner of the bumper; they are removed, and the part is sharply pulled forward.
- The element is installed after repair in the same order.
A task such as removing bumpers from a Hyundai Solaris can be solved easily and quickly, it does not require any special skills and can be easily done independently.
Bumper mount repair
If a fastener was damaged in an accident, it is better to repair the crack in another way. For soldering you will need a hair dryer and a piece of plastic from a broken donor bumper
In this case, you need to pay attention to the markings: the bumper being repaired and the donor must match, otherwise, if the plastic compositions differ, the seam may not work
Two thin strips of plastic are cut from the donor along the length of the seam for the front and back sides; the surface along the crack should be ground down much so that the plastic strips fit into it. After this, the strips are heated with a hairdryer, applied to the crack, and with subsequent heating they are fused into the bumper material.
With this method, the seams are stronger, so it is advisable to repair fastenings this way. It should be noted that this requires a certain skill; it is advisable to first watch the training video.
Bumper articles in color
Using the bumper article number, you can order it in the online store. The number needs to be run through all known online stores, because... the situation is constantly changing. For example, at the time of writing, a bumper in city stores costs from 3500-4900 rubles. In online stores you can find from 3100 rubles.
We add the color code to the main bumper number 865114L000 and get the full bumper part number in color.
For example, black: 865114L000MZH Bumper Articles
| vendor code | Color |
| MZH | Black |
| P.G.U. | White |
| R.H.M. | Silver |
| SAE | Grey |
| TDY | Red |
| PXA | Violet |
| UBS | Violet |
| VEA | Blue |
| W.G.M. | Blue |