A large number of domestic motorists appreciated the characteristics and equipment of the Lada Priora. The national manufacturer literally captured the imagination of potential buyers by adding to the possible configuration options the presence of a standard radio and 4 speakers.
A large number of domestic motorists appreciated the characteristics and equipment of the Lada Priora 2011, the price of which is affordable for everyone. The national manufacturer literally captured the imagination of potential buyers by adding to the possible configuration options for the Lada Priora (and the price did not increase) the presence of a standard radio and 4 speakers. The audio system with the proud name Ural should play any file formats and support connectivity via USB and Bluetooth. The emergence of such opportunities suggests that the domestic automotive industry, or more precisely the part of it that is responsible for packaging, is gradually reaching the global level. If you wish, you can immediately get a Lada Priora station wagon (the price will pleasantly surprise you), equipped with everything you need, get in and drive off. As practice shows, most car owners still prefer to buy speaker systems from well-known world manufacturers for their cars. Most often, a cassette player on a Lada Priora is purchased in a store that sells various car gadgets; here they will help you choose not only a cassette player with acoustics, but also GPS navigators, parking sensors and other useful car accessories. Audio equipment from Sony and Pioneer is extremely popular among our motorists. These brands constantly compete with each other in both the expensive and budget segments. But the main criterion when choosing a radio is your convenience, because your safety when driving a Lada Priora hatchback 2011 (the price of which is simply pleasing) depends on this. Pay attention to equipment that has convenient remote controls, as well as the ability to connect components and a subwoofer. The price of a standard Lada Priora radio is 6,000 rubles
We recommend that you read reviews from Lada Priora owners.
LADA Priora/Lada Priora: Standard audio device (radio tape recorder)
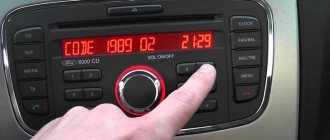
Due to numerous requests, I hasten to tell you about the standard Priora tape recorder Yes, yes, you heard right, such a thing exists
I’ll say right away that this 1Din device with a false panel has the following characteristics: reads CD/MP3, is equipped with USB, two-channel output, has built-in BlueTooth and is equipped with an LCD display
And so, let's turn it on.
By the way, one of the advantages of this device is that it fits well into the overall interior of the car.
First, let's go over the quick buttons: ST - stereo/mono switching. BAND - switching bands. AF—turn on/off the mode for receiving alternative frequencies when receiving RDS stations. TA—turn on the traffic information standby mode. PTY—select the program type when receiving RDS stations. SCN - scanning during playback. RPT - repeat song/disc (folder) SHF - shuffle =) MODE - switch modes. AS/PS - auto scanning and memorization of memorized stations, selection of tracks. SCAN - scanning stations. DISP - options for displaying information on the display. EQ—switch equalizer presets.
Radio.
Well, the radio is like a radio. Ranges FM1-FM3, ORT and MW1-MW2. There is auto and manual tuning, auto scanning with memorization, review of memorized stations, as well as a choice of stereo/mono modes. There is also a mode for receiving RDS stations, searching and waiting for traffic information to be received, searching for stations based on the type of programs being transmitted, as well as searching for alternative frequencies.
CD player.
What we have: Reads Audio, MP3 and WMA CD(R, RW)... Everything is as usual: switching between tracks, rewinding, repeating a track/disc, shuffling, moving 10 tracks forward/backward and scanning the disc. It is also possible to select a track by number or by file name (only for MP3, it seems) + select a folder on an MP3 disk.
USB.
The input for the flash drive is located in our glove compartment.
USB version 1.1 and 2.0. File systems FAT12, FAT16 and FAT 32. The maximum capacity of a flash drive is 120 GB. Listening functions are similar to those of a CD player.
Next we should talk about equalizer presets. We have only 4 of them:
And as a rule, no one uses such presets... so here, this is clearly unnecessary.
The next stage of my story will be the quick settings block. You can dig into them by pressing the central toggle switch once.
As we can see, we were not spoiled with the settings either. They only gave us the opportunity to mock the timbre adjustments for low and high frequencies, as well as the transfer of sound from left to right and from front to back.
Further. If we press the central toggle switch longer, we will find ourselves in a block of settings, which, as a rule, are set once.
INVOL—sets the initial volume level. ADJ - setting the current time. BEEP - turn on/off the sound confirmation mode for pressing buttons. TAVOL — setting the volume level when receiving traffic information.
BTVOL - volume control in Bluetooth mode. EON—turn on the mode for receiving RDS stations with extended service.
LOUD - enable loudness compensation. LOC - enable local/long-distance reception mode.
Next I’ll tell you about BlueTooth. It's a useful thing, I'll tell you. The only annoying thing is that if you are not alone in the car and you receive an incoming call, the contents of which you would like to keep to yourself, then you have to hang up, because all passengers will be able to listen to the interlocutor, because it broadcasts through all the car speakers
By the way, you just need to connect the phone to the device once and then it will connect itself, unless of course the Bluetooth mode is activated on the phone. So, let's call.
After your interlocutor picks up the phone, we see the following inscription
And the call time begins to display on the screen. You can end the conversation with the handset key (the one on the bottom right) When we receive an incoming call, we hear the ringing music of your phone in all speakers, and there is such an inscription on the screen
after a few seconds it changes to the caller's number
Everything would be fine, but the entire number does not fit on the screen, but moves in a creeping line - this is quite inconvenient if you are in a difficult traffic situation at that moment... Well, then we can skip the call by pressing the “handset” button on the bottom right or answer by pressing handset button on the bottom left
By the way, using the same Bluetooth, you can listen to music from your phone
That's probably all, although it would be necessary to show two tulips for the exit, located in the same glove compartment.
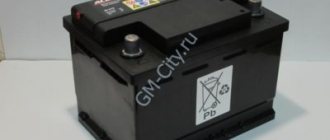
So, let's draw some conclusions. Among the advantages, it is worth noting the following: - fits quite well into the interior of the car. — no need to carry the socket with you. — good ergonomics, you don’t need to reach for it to control it, your hand can easily find all the buttons. — The LCD display displays information clearly, without distortion, everything is perfectly visible in any lighting. — price, with this audio system + 4 speakers and antenna the car becomes more expensive by 6,000 rubles. (declared by AvtoVAZ) Of the minuses: - frequent freezing when listening to a flash drive, on which there is a lot of different information. — an incomprehensible antenna: in the city the reception is worse than outside the city. =) - very limited functionality, small number of settings. — after a conversation via Bluetooth, when listening to USB, for example, not often, but still, the radio starts playing. =( - for building a good car audio, IMHO, it’s still not suitable. Even though people wrote on the forums that they connect amplifiers and subwoofers.
Verdict. People who just listen to the radio or songs from the 70-80s in the car are definitely a must-have. Also suitable for the first time for those who, like me, are financially limited when buying a car, but still want music in the future. is going to install more reputable audio devices.
Something like this.
bluetooth adapter
Designed only for radios that have a Bluetooth function, but do not have a standard adapter installed. It is required to be selected individually for each radio model and is a small unit connected to the audio system. Most models have a USB input, AUX, a memory card slot and built-in memory, which expands its functionality and allows you to use it not only for Bluetooth communications, but also as a storage for data and music.
Bottom line: to connect a smartphone on the Android or iOS operating system to a car audio system, no special knowledge is required - just pair it once, and in the future there will be no problems with the connection.
This will allow you to play music from your phone or use the hands-free system, which will provide additional safety for the driver and passengers.
How to remove the standard radio of the Lada Priora\Grants.
In order to pull it out, we need two keys, which are usually used to pull out music. or something flat and not bendable) some masters pull out music with women's hair bobby pins
Take these keys and insert them between buttons 2,3 and 5,6
move them apart (left key to the left, right key to the right) and at the same time pull them out.
I'll tell you in advance. In order to remove the radio more easily, behind the glove compartment you need to cut off the ties that hold the antenna wire. All I had to do was cut off 1 tie and the wire came free. We take out the radio and see if you have a good configuration, you will already have a blue wire inserted. bright blue without any stripes. if not, then read on. because the equipment of my car is almost luxury, but not luxury, I don’t have this wire, I had to make it myself. We take this “Mother” terminal, the smallest one and solder a wire to it, 10-15 cm is enough. then we pull out the connectors from the radio, we need a connector in which the wires are responsible for the power. Here it is. inserted in the bottom row.
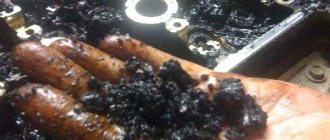
Next, I took a probe and looked at all the contacts in search of the one that turns on when the radio is turned on and turns off when turned off, and I found it.
This contact is located in the first row of the bottom terminal, second from the right, when viewed from behind:
We compare this input with the chip. We find a place where we will have a terminal, estimate - the terminal is too big and will not fit into the connector, trouble, take a sharp knife or blade and cut off the fixing grooves on the bottom side that prevent the terminal from getting through. cut it off - well done. we try, it won’t fit on top again, trouble, we take the wire from the terminal that we soldered earlier and push it inside from the inside of the connector from the radio and insert it all the way. Let's see what you got. The wires should not fall out and should not jump out from the outside. Let's see what I got
Next, I’ll tell you about my choice of an amplifier connection kit.
At first, my amplifier was connected with the most simple, so to speak, set for connecting a 2-channel amplifier. by Mystery
But with the arrival of winter, the contacts on the tulips broke off and channel 1 stopped working. and plus I lost the ground wire 
it was decided to buy a kit for connecting a 4 (!!!) channel amplifier, even though I have a 2-channel amplifier)
and why all? because: 1) there is a ground wire there 2) there are wires with tulips in very good insulation and with a good screen 3) in the braiding of the tulips there is a thin wire in the middle (especially for powering the amplifier)
In the photographs you can see how tough the wires are
And the presence of a black wire in the middle. from one end to the other
So, I already had this braid of wires installed, all I had to do was connect the wire from the radio that I had just inserted into the connector (I have it red, but the stock should be blue if you have it from the factory, whoever connects it yourself - You can choose any color you like)
so I connect my red wire to this black braided wire, isolate it and collect the music.
Next, let's go to the trunk and I'll show you what's going on there.
Previously, when I still didn’t get around to making this control wire, my system worked like this: The green button was manually turned on when there was a need for an amplifier and subwoofer. it was connected like this (marked with red stripes)
and now I removed this button, and the red wire (which is crossed out in green) is connected to the black braided wire and goes into the interior to the radio.
It seems like nothing complicated, whoever knows and fumbles around, but for some it’s a dense forest . If you don’t understand, write and I’ll explain in more detail, although everything seems to be in detail already)))
By the way, the radio is not very easy to put back. Be sure to check if anything is interfering, I still can’t get mine in all the way)))
Thank you all for your attention, what we ended up with is that when we turn on music, our amplifier and everything loaded on it turn on. and when we turn off the music, the amplifier turns off!
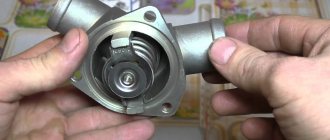
The meaning of refining the MMS
Modification of the radio for Lada models (Vesta, Granta, Kalina or Priora) is similar and consists in:
- replace the standard TDA7388 amplifier chip with a more powerful analogue.
- increase the capacity of the amplifier power capacitor by adding a film capacitor.
Additionally, you can also replace preamplifiers (operational amplifiers) of the “4558” type (which are found on MMC Kalina, Grants and Priora) with the best analogue of OPA 2134 or OPA 2132 (in a small case). This modification will improve the sound quality on the line outputs and filter out a large amount of interference.
Attention! You perform further actions at your own peril and risk; the author of the article does not bear responsibility. In addition, during such modifications to the radio, you lose the warranty!
Using a more powerful ULF may lead to overheating of the board.
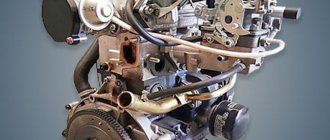
Manual for the Priora head unit
For those who are still trying to approach the discussion of the standard head units of cars produced by AVTOVAZ without bias, we are posting the manual on the radio of the Priora car. And along the way, we would like to note the fairly high quality of the device and great functionality. Of all the complaints against it on all kinds of forums (often completely unfounded, according to the principle - they can’t do anything good here, because everyone can’t!!!), only one can really be presented - the weak power of the built-in amplifier, but everyone is guilty of this manufacturers, except perhaps Pioneer and JVS. But you can't please everyone! If you need it louder, please install an amplifier, since there are linear outputs on the device. Otherwise, it's a great device. There are not enough settings, namely sound settings, so excuse me, it is not tailored for music lovers, but for ordinary users... For now we are posting the instructions in the form of scans.
To enlarge the photo, click on the picture.
J.V.S.
When tuning stations, it is possible to leave 30 FM radio channels and 15 AM channels in the tuner.
Installing stations manually:
- Select a broadcast band by pressing the TUNER BAND key.
- Click on button 4 to set the station.
- Hold down the key with any selected number on the panel to memorize the station in the radio's memory. The selected number will start blinking, after which you will see the station stored under the selected number. For example: To tune to station number 14, press the +10 key, followed by the 4 key for approximately three seconds or more.
- To store other radio stations in the device’s memory, you need to repeat steps one through three. And to change the settings of the entire station, you need to repeat the entire process from the beginning.
Tuning stations in automatic mode:
Stations will be given numbers by increasing the frequency range.
- Select the range by pressing the TUNER BAND key.
- Press and hold the AUTO PRESET button on the panel.
- To set a different range, you need to go through steps one through two again.
To replace selected stations in automatic mode, you must use manual installation.