Re: Aha :)): Then it’s like this: a drive is a drive.
And flood is flood :))
At the beginning there was a question about the hub nut.
Instead of explaining the VAZ markings with dots.
Well, everything has long been clear to everyone :)) Statistics may be a controversial thing, but in some way it is indicative :O)))
The picture shows a drive You should not only take the picture in the FAQ, but also look at the text with this picture: I quote : The drive of each wheel consists of external and internal hinges and a shaft 48.
I repeat that a CV joint is a hinge. Each of the two hinges is a constant velocity joint, i.e. CV joint. Such a hinge allows rotation to be transmitted between intersecting axes. And the drive, thanks to two CV joints, allows you to transmit rotation between two arbitrarily located axes (of course, within the limits of its performance), and the angular speeds of the shafts on these axes will be the same.
By the way, just above there is an answer to your question: Due to the displacement of the front axle gear housing to the left of the longitudinal axis of the car, the left and right front wheel drives differ in size.
This means that the right drive is longer than the left.
Alexei.
Symptoms of a problem
Bearing wear manifests itself as the following symptoms:
- Vibration of the front wheels, which can be reflected in the steering wheel or felt in the cabin.
- Knocking or crackling sounds in the front of the car when driving;
- Heating of the front wheels in the axle area.
If such manifestations occur, you need to check the condition of the wheel bearings. To do this, jack up the car and rock the wheel in different directions. Play and knocking in the bearing area indicates the need for replacement and adjustment. The malfunction may also manifest itself in the form of noise when the wheel rotates.
Separately, it is worth mentioning two problems that arise during the operation of the Chevrolet Niva:
1. The hubs get hot. It is important to understand that when braking, the kinetic energy of the car is converted into thermal energy. As a result, the brake discs and the hubs on which they are attached become very hot. Heating of the part during movement, and not during braking, indicates wear of the bearing or its incorrect adjustment.
The second option is typical for adjustable hubs. The adjusting nut must be tightened with a force of 2 kgf*m. If you tighten it further, the tapered bearings will be too tight.
Their rotation will be difficult. Prolonged operation of the machine in this condition leads to bearing failure and wheel jamming.
2. The adjusting nut is unscrewed while moving. Sometimes this happens literally after 20-50 kilometers. The phenomenon is observed in three cases: the master forgot to tighten the nut, there was a misalignment between the bearing races, or play appeared in the coupling of the CV joint with the hub.
This section is not under development
autodelo. info
autodelo. info Passenger Motorcycles Trucks and Commercial Engines
- For novice drivers
- Code of Administrative Offenses
- Region codes
- Legal issues
- Insurance
- Adviсe
- News
- Test Drive
- Interesting
- Online services
Sorry…
To main
- about the project
- Rules
- Contacts
“Car catalog and all the news from the world of car lovers”
Catalog
ALFA ROMEO AUTO UNION AUDI AUSTIN BEDFORD BMW CHRYSLER CITROËN DAF DAIHATSU DAIMLER DODGE FIAT FORD GMC HONDA INNOCENTI ISUZU IVECO JAGUAR LADA (VAZ) LANCIA MAN MAZDA MERCEDES-BENZ MG MITSUBISHI MORRIS NISSAN NSU OPEL PEUGEOT PORSCHE RENAULT ROVER SA AB SEAT SKODA SUBARU SUZUKI TALBOT TOYOTA TRIUMPH VAUXHALL VOLVO VOLKSWAGEN ZASTAVA AVIA BARKAS BORGWARD CHEVROLET DACIA EBRO GAZ SANTANA SSANGYONG STEYR TATA PIAGGIO HYUNDAI KIA DAEWOO WARTBURG TRABANT AC RENAULT TRUCKS FERRARI LAMBORGHINI ROLLS-ROYCE MASERATI RELIANT PONTIAC FSO FORD USA PROTON BUGATTI AUTOBIANCHI HOLDEN LOTUS MORGAN FORD OTOSAN ALPINE GLAS MOSKVICH BENTLEY BUICK CADILLAC GEO LEXUS MEGA PLYMOUTH PREMIER TVR ALPINA ASIA MOTORS ASTON MARTIN JEEP WESTFIELD SMART ZAZ OLDSMOBILE LINCOLN MAHINDRA ARO LDV AIXAM BERTONE BITTER BRISTOL CALLAWAY CARBODIES CATERHAM CHECKER DALLAS DE LOREAN DE TOMASO GINETTA HINDUSTAN HOBBYCAR ACURA HUMMER INDIGO IRMSCHER ISDERA JENSEN LIGIER MARCOS MCLAREN METROCAB MIDDLEBRIDGE MINELLI MINI INFINITI OLTCIT OSCA PANOZ PANTHER PAYKAN PERODUA RANGER RAYTON FISSORE BOND AUSTIN-HEALEY RILEY WOLSELEY SAO SHELBY SIPANI SPECTRE STANDARD TOFAS UAZ UMM VECTOR WIESMANN YULON PUCH LAND ROVER MAYBACH ASHOK LEYLAND ASKAM (FARGO/DESOTO) AMC LANDWIND (JMC) GEELY SUN BEAM SPYKER KTM HILLMAN YUGO DONGFENG ( DFAC) EUNOS FORD ASIA / OCEANIA FOTON GREAT WALL MITSUOKA PININFARINA LTI IRAN KHODRO (IKCO) FPV MAXUS (SAIC MOTOR) TESLA TAZZARI ARTEGA THINK NOBLE FISKER KING LONG ABARTH MIA DS (CAPSA) STREETSCOOTER RUF MICROCAR DFSK DS ZENOS CARS IZH
autodelo. info
autodelo. info Passenger Motorcycles Trucks and Commercial Engines
- Traffic rules
- Code of Administrative Offenses
- Region codes
- Legal issues
- Adviсe
- News
- Reviews
- Interesting
- Online services
How to change the wheel bearing on a Chevrolet Niva with your own hands?
For repairs you will need:
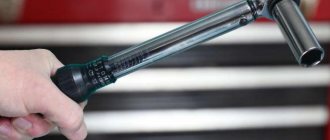
- Powerful socket wrench 30.
- Puller for steering rod pin.
- A mandrel for pressing out a bearing or a piece of pipe of suitable diameter.
- A set of spanners or ratchet sockets.
- Balloon wrench.
- Hammer.
- Round nose pliers.
- Jack.
- Wheel chocks.
- Vise.
- Mount.
- Torque wrench.
- Boards or wooden block.
The replacement process is divided into five stages:
- Disconnecting the assembly (brake disc, hub and steering knuckle) from the CV joint strut.
- Pressing out old bearings.
- Installation of new parts.
- Assembling the unit and installing it in place.
- Tightening the adjusting nut.
Work is carried out on a level area. The presence of an inspection hole is not necessary.
To change bearings, you must perform the following steps:
- Place the car on the site and place wheel chocks under the rear wheels.
- Jack up the wheel.
- Unscrew the wheel rim mounting bolts.
- Build an improvised support under the side member from a wheel with boards or timber laid on it and lower the jack so that the car rests on it.
- Jack up the lower arm, compressing the suspension spring.
- Turn the steering wheel to the right or left (depending on the side from which the replacement is performed).
- Unscrew and remove the caliper, caliper and brake pads.
- Hang the caliper so that it does not put any weight on the brake hose.
- Turn the steering wheel in the opposite direction.
- Remove the ABS sensor.
- Unscrew and unscrew the tie rod nut.
- Remove the pin using a puller.
Attention! Without a puller to remove the rod pin, you can disconnect it in another way. To do this, you will have to dismantle the bipod of the steering mechanism from the steering knuckle.
- Unscrew the hub nut.
- Remove the ball joint mounting bolts.
- Carefully remove the hub along with the steering knuckle, ball joints and brake disc.
- Remove the caliper protective screen.
- Remove the brake disc.
- Unscrew the steering arm.
- Clamp the steering knuckle in a vice.
- Remove the seals with a pry bar or a powerful screwdriver.
- Substituting the mandrel, knock out the outer races of the bearings.
- Wipe and clean the seat.
- Disassemble new bearings.
- Press the outer races into the hub using a mandrel or old parts.
Important: the clips are installed with the wide edge inward. You can make pressing easier by preheating the hub.
- Apply lubricant, filling ⅔ of the space in the cage.
- Install the bearing race and inner race.
- Carefully press in the new oil seal.
- Repeat the installation operation for the bearing on the second side of the hub.
- Place the assembly on the CV joint splines.
- Tighten the hub nut.
- Screw on the ball joints and steering bipod.
- Install the protective cover and caliper bracket.
- Tighten the bolts securing the protective screen and lock.
- Put the caliper and brake pads in place.
- Jack up the car.
- Place and secure the wheel.
- Tighten the hub nut by tapping the wheel in the 6 and 12 o'clock directions.
Extended wheel studs for UAZ
Stud CRP(UAZ)+The diameter of the spline part is 16.7mm. Diameter, thread pitch 14x1.5, thread length 70 mm. Mounted under spacers 40 mm thick.
Hairpin CRP(UAZ)+30. The diameter of the spline part is 16.7 mm. Thread 14x1.5, length of threaded part 60 mm. Fits under 30mm thick spacers.
Hairpin CRP(UAZ)+20. The diameter of the spline part is 16.7 mm. Thread 14x1.5, thread 50 mm. Used to install a 20 mm spacer.
Stud CRP(UAZ). Thread diameter 16.7mm. Thread 14x1.5, thread length 30 mm. Compatible with the installation of a standard wheel.
This is interesting: Removing and installing the front seat of a Chevrolet Niva
Adjusting the wheel bearing
To work, you will need an indicator and a torque wrench.
To prepare for adjusting the wheel bearing, you must perform the following operations:
- Secure the indicator by resting its leg on the hub near the adjusting nut.
- Place spanners on the studs and secure them with nuts.
- Rotate the hub and move it axially. (Screwed spanners are used as handles).
- Measure the amount of axial movement (clearance) of the hub, guided by the indicator readings.
- If the stroke exceeds 0.15 mm, adjust the play.
The adjustment is carried out as follows:
- Straighten the collar of the nut.
- Unscrew it with a spanner.
- Install a new nut and tighten with a force of 2 kgf*m.
Important: when tightening, it is necessary to rotate the hub in different directions.
- Loosen the nut and tighten again with a torque of 0.7 kgf*m.
- Loosen the tension by turning the key 20-25 degrees counterclockwise.
- Check hub play.
- Make sure that the indicator readings correspond to the norm (0.02-0.08 mm).
- Lock the nut by pressing its edge into the groove of the outer CV joint.
You can adjust the hub play without using a torque wrench. To do this you need:
- Tighten the nut tightly.
- Rotate the wheel a few turns.
- Check the play.
- If necessary, loosen or tighten the nut slightly.
- Continue until the free play of the hub is within 0.02-0.08 mm.
- Lock the nut collar.
Video instructions for adjusting the wheel bearing You can install non-adjustable IVECO bearings on the Chevy Niva. To do this, you need to buy the appropriate hubs or remake the old ones. For the rework you will need a jig boring machine. In addition to boring the mounting hole, you will have to make spacer rings. Drawings of parts are provided at the link.
Attention! Rework makes sense only if you have turning skills and free access to the machine. Otherwise, it is easier and cheaper to buy ready-made hubs for non-adjustable bearings.
The design of the rear wheel mounting of the Chevrolet Niva is very different. However, they also use bearings that need periodic replacement. They are replaced either together with the axle shafts or separately. The second option is much cheaper, but requires good metalworking skills and a torch to heat the metal.
To work you will need:
- Jack, wheel wrench, chisel, hammer.
- Standard set of screwdrivers and wrenches.
- Axle puller.
- Gas (gasoline) burner or muffle furnace.
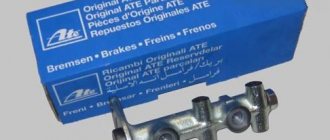
- Repair kit including bearing, oil seal and retaining ring.
- A pipe with a diameter of 40-45 mm, the length of which exceeds the size of the axle shaft.
Replacement of bearings is carried out as follows:
- Place the machine on a level surface.
- Place wheel chocks or bricks under the front wheels.
- Jack up the car.
- Remove the wheel.
- Place a support under the rear axle.
- Unscrew the brake drum mount.
- Dismantle the part.
- Unscrew the nuts holding the bearing.
- Load the rear axle by lowering it onto the stand.
- Pull out the axle shaft using a puller.
- Hang the brake mechanism on a wire.
- Knock down the retaining ring using a chisel, hammer and grinder.
- Crack the bearing races using a chisel.
- Remove rust and dirt from the seating surface.
- Put the new bearing in place.
- Heat the locking ring to 200-250 degrees (dark red color) and hammer it into the seat with a pipe
- Replace the oil seal.
The main purpose of the wheel hub
The main task of the transmission is to transmit torque from the engine to the wheels. A shaft system is used for this. But if the wheel is connected directly to the drive shaft, then it will be structurally impossible to assemble a load-resistant platform.
Difficulties also arise when designing front-wheel drive or all-wheel drive vehicles. The front wheel must have two degrees of freedom, that is, it rotates and turns at the same time. The rear wheels should also rotate easily, giving the vehicle a smooth ride. The intermediate link between the drive shaft and the wheel is the hub.
The hub is made of durable metal and serves to transmit torque from the shaft to the wheel. To ensure rotation of the hub, rolling bearings are used. It has not yet been precisely established whether the hub belongs to a suspension or transmission part.
On the one hand, it ensures wheel rotation and vehicle braking. On the other hand, it participates in the transfer of torque.
Applicability
| Brand | Model | Name according to auto catalog | Drawing |
| VAZ | VAZ-2120 “Nadezhda” | Bolt | Chassis / Wheels |
| VAZ | VAZ-2121 | Bolt | Chassis / Wheels |
| VAZ | VAZ-2131 | Bolt | Chassis / Wheels |
| VAZ | VAZ-2123 | Bolt | Chassis / Front axle |
| VAZ | VAZ-2131 | Bolt | Chassis / Wheels |
| VAZ | VAZ-21213 | Bolt | Chassis / Wheels |
| Chevrolet | Chevrolet Niva 1.7 | Front wheel bolt | Chassis / Rear suspension |
| VAZ | VAZ-21213-214i | Bolt | Chassis / Suspension |
| VAZ | LADA 4×4 M | Bolt | Chassis / Suspension |
| VAZ | Lada 4×4 Urban | Bolt | Chassis / Wheels |
Where else is the spare part used?
The parts data presented on this page is for informational purposes only.
Download price lists
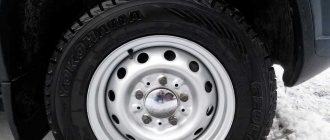
Chevrolet Niva hub
If we consider only one hub of a Chevrolet Niva, it consists of a flange assembled into a single unit for attaching a wheel rim and a guide on which the wheel bearing sits.
But some other functions are superimposed on the wheel hub:
- It connects the wheel to the shaft through bearings, allowing the wheel to rotate;
- The hub is pressed into the steering knuckle, thereby ensuring rotation of the wheel relative to the vertical axis;
- The brake disc is mounted on it, and the brake mechanism is mounted on the steering knuckle.
Pros and cons of secret fasteners
To prevent your Chevrolet Niva from being “taken off” the next night after installing new tires, it is recommended to install 1 secret nut on each wheel. No matter how new technologies develop, more reliable means of stingray theft have not yet been invented. Hence the first and main advantage of the secret: such fasteners will help protect much more expensive property from thieves than it is worth.
Modern secrets are no match for the first ones that appeared in distant Soviet times. They are structurally more perfect and differ in aesthetics, which is important. The part is an elongated nut with an adapter for an individual key. If you choose closed-type decorative fasteners of the same length for it, then the wheel as a whole will look quite aesthetically pleasing.
The secret mount is very useful for the spare wheel of the Chevrolet Niva, which is screwed to the bracket on the rear door with ordinary nuts, and therefore most vulnerable to thieves. To unscrew secrets, the following types of keys are made:
- in the form of an eccentric, where 2 cylinders are offset from each other, as in old garage locks;
- profile of 2-3 holes of different depths and diameters;
- curly keys, whose design resembles an irregularly shaped polygon;
- combined, where there are shaped elements with different holes.
To prevent the nut from being grabbed by a gas wrench or other similar tools, the lock on top is equipped with a rotating bushing (shell), and the place for the wrench is located in a recess. Cheap products and fakes may not have a shell, so you cannot buy such nuts. The disadvantages of secrets are:
- The tightening torque is weak, so the remaining nuts must be held securely;
- any tricky fastener can be unscrewed if the thief has the time and opportunity to do so;
- the need to always have the key with you and not forget it under any circumstances.
The last drawback is a real scourge of forgetful drivers. If the ramp of exits 2 is punctured: go get the key or call a tow truck, otherwise the wheel cannot be removed.
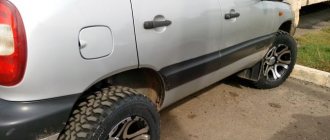
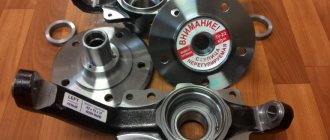
Chevrolet Niva hub malfunctions
Most wheel hub repairs involve replacing the wheel bearing. Less often, the hub itself fails, since the material from which it is made is quite durable. The reason for replacing the wheel bearing is simple wear. It is necessary to understand that there is a huge load on it, because the distributed load from the car itself exerts pressure from above. When driving over uneven surfaces, this load increases. If we also take into account the mobility of the bearing parts, the reason for the wear that appears on the inner and outer race will become clear. A failed wheel bearing begins to emit extraneous noise, which intensifies over time.
Since the condition of the hub directly affects traffic safety, at the first suspicion, the bearing must be replaced.
There are two simple ways to diagnose a bad wheel bearing. The first is that on an empty highway you need to drive along a large radius curve, first in one direction and then in the other. In simple words, when driving, you first need to turn the steering wheel slightly to the right, and then to the left. Typically, bearing noise will increase in one case and then decrease. If the noise increases when you turn the steering wheel to the right, then the reason is in the left bearing and vice versa.
You can finally verify that the bearing is faulty by hanging the wheel. It will make some noise when rotating. When vibrations occur relative to the horizontal axis, play may occur. To detect this play, it is necessary to apply force to the upper and lower points of the wheel.
Hub replacement
For any type of repair work related to the hub, it must be dismantled. This work may include replacing bearings, the hub itself or the brake disc. For all of the listed types there is a general algorithm for dismantling the hub.
- The wheel nuts are unscrewed. The wheel hangs out.
- Unscrew the hub nut with a 30mm wrench.
- The caliper is dismantled. To do this, use a 17mm wrench to unscrew the two bolts on the rear side of the steering knuckle.
- The steering end nut is unscrewed.
- Using a puller, the tip is removed along with the rod.
- Using a 22mm wrench, unscrew the nut of the upper ball joint, then the lower one. You can tighten the ball joint itself without removing it from the steering knuckle.
- The steering knuckle assembly is dismantled. The drive will easily come out of the hub since the hub nut is unscrewed.
- In order to press the hub out of the inner race of the bearing, you will need a suitable frame. The bearing itself remains in the steering knuckle. It is also knocked out with a frame.
Possible improvements
The Chevrolet Niva hub does not require any maintenance work during operation. In this case, the car owner is obliged to constantly monitor the condition of the wheel bearings. By replacing them, improvements are possible. First of all, this is the installation of non-adjustable, reinforced bearings. Instead of two single-row ones, one double-row bearing is installed, and the landing part of the steering knuckle is bored. The landing part of the hub is also bored. Today you can already buy a non-adjustable hub along with a steering knuckle. You just need to pay attention to the number of splines for the drive. Such bearings are more reliable. In addition, there is no need for constant adjustment.
Unregulated
As a rule, the Niva has a standard adjustable hub, which requires periodic adjustment. But in order to get rid of this inconvenience, non-adjustable hubs for the Chevrolet Niva were developed, which have such positive qualities as:
- No maintenance required. They don't need to be adjusted
- The bearing in the device does not rotate
- It is filled with special lubricant from the factory, so there is no need to lubricate it.
- Due to the fact that the work occurs thanks to the ball bearing in the unit, friction is reduced
- There is no wear on the seat in the rotary cam
- Not adjustable as it is tightened from the factory
- No need to change the bearing
- Long service life which is equal to 100-120 thousand kilometers
Therefore, thanks to all the positive characteristics listed above, many car owners change the standard part to a non-adjustable one.
It is also worth noting that the non-adjustable part can be produced as a reinforced Niva Chevrolet hub, which solves the problem of wear of the oil seals on the steering knuckle. It is best to choose companies such as VolgaAvtoprom, IVECO, OmegaInterAuto.
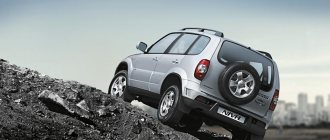
The main disadvantage of this unit is its high price, but by installing this part you can forget about the problems that appear in the standard element. By installing a reinforced version of your SUV, the cross-country ability will increase and reliability will increase, and having a standard set of tools, you can make an independent replacement without any problems.