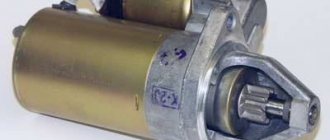
If your starter is faulty, then it is impossible to start the car, so urgent repair of this unit or its replacement is necessary. In this case, it is often quite problematic to deliver it to the nearest service station, so it is best to learn how to do the repairs yourself. Owners of the VAZ-2110 should learn how to restore performance on their own, this will reduce the cost of car maintenance.
Checking starter components
You can detect wear on the graphite brushes only by disassembling the starter housing.
If the car is used for a long time and under heavy loads, then wear will be clearly visible on the brushes, although the factory safety margin allows it to function for a long time and without failure. In some cases, wear on the graphite brushes can block the operation of the solenoid relay, so the characteristic clicking noise will not be heard. Burnt windings can be detected not only by visual inspection, but also by the unpleasant smell of burning. This element cannot be repaired or replaced, so you will have to completely replace the starter.
You can check the functionality of the relay without special equipment. Inside it there are three terminals: an input from the battery, an output to the starter and a small terminal to the control system. You can try to close the contacts of large terminals with a well-insulated screwdriver, without touching the housing elements. If rotation occurs, the problem is with the relay. After such testing, the relay will not work for a long time, so it is better to immediately replace it with a new one.
Sources
- ladaautos.ru/vaz-2110/chto-delat-esli-vaz-2110-ne-zavoditsya-pri-etom-starter-ne-krutit-i-ne-shhelkaet.html
- zen.yandex.ru/media/avtobloger/vtiagivaiuscee-scelkaet-no-starter-ne-krutit-prostoe-reshenie-problemy-za-kopeiki-5ce8ce214bdca600b3cba06b
- vazweb.ru/desyatka/elektrooborudovanie/ne-krutit-starter.html
- drive2.ru/c/2562200/
- remont-inomarki.ru/pochemu-ne-krutit-starter-v-vaz-2110.html
Replacing the unit
Now another question arises - how to disassemble it? There shouldn’t be any particular problems with this matter if you arm yourself with the instruction manual and also read our recommendations.
Arm yourself with a set of keys for 10, 13, 15 and 8 millimeters. Actually, you don’t really need anything else in terms of tools.
Replacement
The sequence of dismantling and repair is as follows:
- Drive the car into the pit or lift it using a lift. You must have access to the underside of the car.
- If you have just arrived, give the engine some time to cool down. It is better to work with a cold engine.
- Remove the negative cables from the battery.
- First remove the protection and then the tin casing that protects your gearbox. To do this, you will need two keys - 8 and 10 millimeters.
- The power wire plug is removed from the starter. You just need to pull it towards yourself a little.
- Now take a 13 mm wrench and use it to unscrew the power wiring located on the solenoid relay.
- Place the loose wire aside and secure it with something temporarily so that it does not interfere with further repairs.
- The starter is attached to the gearbox housing with two nuts. They are easily loosened with a 15mm wrench. If you have problems unwinding, lubricate the fasteners with the almighty WD40.
- Dismantle.
- Now check the condition of the bushings on the gearbox housing.
- Make sure that the armature shaft is in good condition; when moving, there should be no play or jamming. If such defects occur, then it is recommended to immediately replace the bushings with new and high-quality ones.
- There are always two bushings. One is at the bottom of the starter, and the second is on the gearbox housing. The bushing on the starter can be changed without any problems, but difficulties may arise with the second one. To dismantle it, you need a special tool called a rubber. It is better to entrust the work to specialists from a service station.
- If the cause of the starter malfunction is the bendix or the solenoid relay, there is no need to call the experts for help.
- To remove the relay, unscrew the power wire, or rather its fastening, from the starter housing. You will need a key for 13.
- Using a size 8 wrench, remove the two bolts securing the relay to the starter housing. It is important to be careful here, because when removing the bolts, there is a spring in the relay that can spring back. Hold it with your hand when dismantling.
- Remove the relay piston from the rocker arm hook located on the bendix.
- Proceeding in reverse order, install a new relay.
- If you need to replace the bendix, then remove the solenoid relay, unscrew the two bolts with a 10mm wrench at the back of the starter. Now disconnect the starter housing from the front of the starter where the bendix, rotor and fork are located.
- Use a flathead screwdriver to pry up the plastic fork to remove it from the armature, and remove the armature itself and the bendix from the front of the body.
- Remove the retaining ring located on the tip of the armature and remove the desired bendix.
- The structure can be assembled in the reverse order, but the splines must first be lubricated with Litol.
- Test the new starter in place before beginning installation. To do this, connect the power terminals of the battery.
- The nuts responsible for fastening the terminals are tightened with a 13mm wrench. But it is not recommended to apply much force, since the terminals are made of copper. Clamping too hard will damage the threads, causing even more problems.
We figured out how to disassemble the starter on a VAZ 2110 and we can say that this procedure is not particularly simple, but it does not require mandatory execution by a professional auto mechanic.
The starter on the “ten” is somewhat capricious, but if you operate the car correctly, check the condition of the contacts, and also periodically flush the engine on the injection VAZ 2110, it can last a long time and reliably.
How would you rate the difficulty of the job?
- Easily
- Fine
- Difficult
View Results
Loading …
How to remove and install the starter relay
VAZ 2110 starter protection relay
To disassemble the starter you need to follow several simple steps:
- The car should be prepared for further work (washing, placing it in a stationary state).
- The negative terminal from the battery should be removed.
- The air filter housing is dismantled.
- The traction relay wire block is disconnected from the relay.
- Using a key with the number “13”, unscrew the nut securing the tip of the starter power drive.
On a VAZ 2110 the starter relay is located
A wrench with the number “15” is used to unscrew the two nuts that secure the starter.
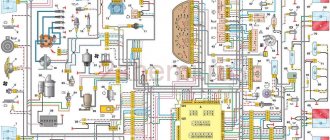
VAZ 2110 starter relay wiring diagram
Assembling the starter and installing it in its original location occurs in the reverse order.
VAZ 2110 installation of an additional relay on the starter
The main malfunctions of the traction relay are several important problems. If one of the reasons is present, then the traction relay should be replaced with a new one.
VAZ 2110 starter relay clicks - needs to be replaced with a new one
If you continue to use a damaged relay in your car, other parts may suffer:
- In the case when the anchor stops rotating. The relay stops working after connecting the starter when starting the car.
- The same armature continues to rotate, but its speed is significantly reduced. This happens after activating the starter and connecting the traction relay.
- The starter works flawlessly, the traction relay is connected, but after a few seconds, the car engine “stalls”.
VAZ 21102 where the starter protection relay is located you need to know
The main reasons for these problems may be:
- Interturn closure of the relay.
- Breaks in the power supply circuit.
- Untimely operation of the armature or its idle operation.
- Oxidation of wires, connections, windings.
- The nuts that secure the wire lugs have loosened and loosened the contact.
To get rid of these problems, you need to do several steps:
- The traction relay is being replaced.
- Check and, if necessary, replace wires.
- The armature rotation must be returned to light operation.
- Clean the bolts and check the nuts for tightness.
Since the traction relay is part of the vehicle's electrical system, its repair or replacement must be carried out with care and special attention. This process can be dangerous to human health
The car can be entrusted to employees of technological service stations and repair shops. If you decide to carry out repairs yourself, you should follow all safety rules when working with electricity.
Repair and replacement of equipment must be carried out on an observation platform or pit. A prerequisite is to remove the mudguard from the car engine.
All the above steps must be carried out in strict order.
After the process of dismantling the starter, you should perform a few more simple steps:
- The lower terminal of the traction relay has a fastening in the form of a nut. It should be unscrewed using a 10 mm wrench.
- The wire is disconnected there.
- Use a wrench with a stroke of 8 millimeters to unscrew the mounting bolts.
- The traction relay is removed.
- The gasket located between the front cover and the relay itself is disconnected.
- The front cover has a spring, an armature and a traction relay. They must be carefully removed from it.
Traction relay
It is imperative to know that you can check the traction relay using standard instruments. To check it, you should use an ohmmeter.
It is necessary to check the presence of a short circuit between the contact bolts and the contact plate. As for the price of relays, they are different.
It’s rare when their cost drops to 750 rubles. Naturally, the cost is indicated depending on the delivery range of the mechanisms and the markup of the sales representative.
Video and photo materials will help you do your own work. The main thing is to do everything as required by the instructions.
Sources
Bendix and planetary gearbox
By design, the electric motor rotor is separated from the starter by a planetary device consisting of a sun gear, which has the shape of a circle with teeth inside. There are also three more small gears that connect to the internal teeth, as well as the electric motor pulley. However, devices with this design have been installed on cars with VAZ 2110 injectors not so long ago.
Bendix starter mechanism
Older types of mechanisms are made without a planetary element and are characterized by a lower number of revolutions. This parameter can be regarded as the main drawback, although they are more reliable by design.
Bendix is a device consisting of two parts - an overrunning clutch, as well as a gear, which is located directly on it. It should be noted that the overrunning clutch is directly connected to the starter pulley thanks to splines installed in a spiral. The mechanism moves along these slots when the driver tries to start the engine.
If the starter does not click and does not work or works slowly even when hot, the problem may lie in the bendix. In addition, there is another fork on the device, consisting of two metal plates mounted directly on the overrunning clutch. This fork is attached to two opposite points of the element. One of the edges of the plates is made in the form of a rectangle. When the driver turns the key in the ignition, the retractor relay acts on these plates. Next, the gear moves along the pulley using splines until the element engages with the flywheel rim.
Checking spark plugs and sparks
If the engine does not start within five seconds, there is no use turning the starter. You can try to start it again, but it’s unlikely to help. Moreover, operating the starter for too long can lead to overheating and even fire.
If you try to start a carburetor engine for a long time, gasoline will flood the spark plugs and make further starting attempts impossible in principle. The injectors have a purge mode, so the spark plugs can be dried without removing them from the car - you just need to press the gas pedal to the floor and turn the starter.
Clean working spark plugs VAZ 2110
But these are half measures. First of all, you should unscrew at least one spark plug, put the wire back on it and position the spark plug on the engine so that there is a distance of about three millimeters between the metal part of the spark plug and the metal of the engine. Turn on the starter and make sure that there is a uniform spark between the spark plug contacts.
Checking the spark in the spark plugs of the VAZ 2110
Do this check for each candle. If there is no spark on any spark plug, then there are global problems in the ignition system.
Chemistry
ASIDOL - cleans coins, but is also perfect for wires and their chips. No need to clean copper with WD-40 - after that everything will only get worse. Special equipment needed:
- Ammonia;
- ASIDOL (Lenbytkhim LLC) - excellent, by the way, also polishes glass;
- Molykote S-1002;
- Kontakt 60 or 100 (acid) and WL (wash);
- CRAMOLIN ContaClean (acid).
CRAMOLIN requires a remover. It's easier to take an eraser and ammonia.
[custom_ads_shortcode3]
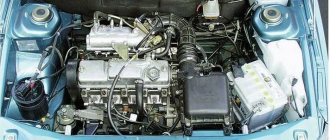
The process of removing the starter and installing a new element
Initially, you need to turn off the power to the car by disconnecting the terminals from the battery.
Starter removal process:
- Place the car on the inspection pit. If this is not possible, use an overpass or just a good jack.
- Lift one side, remove the wheel, remove the boot or crankcase guard (if equipped).
- The next step is to unscrew the top nut that secures the starter. This can be done both from the engine compartment and from under the car - whatever is convenient. Additionally, unscrew the nut that secures the terminal to the solenoid relay. Remove it so it doesn't interfere.
- Disconnect the nearby wire going to the starter.
- The final step is to unscrew the nut, which secures the part from below.
- Now you can pull the element out of the clutch housing.
Checking starter malfunction:
- Take a flathead screwdriver and try to move the coupling forward/backward along the shaft. It should spin easily and not hit anything.
- Use a screwdriver to turn the gear. If everything is spinning in the same direction, everything is fine. If the scrolling goes in the opposite direction, the part will need repair.
- Checking the retractor relay is carried out using two wires with “crocodiles” for convenience. Place the red one on the positive terminal of the battery, and place the other end on the control terminal of the relay. Use the negative conductor to connect the negative battery and the starter housing. After such actions, a click will appear and the clutch will come forward. After disconnecting the wires, the coupling will return.
- The final stage of the test is to disconnect the wire from the control terminal of the traction relay. Connect the crocodile clips in exactly the same way. When voltage is applied, the starter armature should spin at a frequency of more than 5 thousand revolutions per minute. If everything is so, the element is working.
Installing a new starter is carried out in the reverse order of removal. If you do not want to completely change the part in question, but want to repair it, then we recommend that you familiarize yourself with the relevant information. We do not recommend that you do everything yourself without knowledge of the entire process. In this case, it is better to contact a service station.
To summarize, we note that the starter on the VAZ-2110, as on other cars, is a very important unit, the failure of which is a rather unpleasant situation. In the article we examined the main points for dismantling the old part and installing a new element. Carrying out the work should not cause any difficulties. It is enough to use the recommendations from the article to successfully repair your car.
How much does it cost to replace a starter?
Beginning car enthusiasts often have questions after visiting a parts store. Most often they are interested in why relays have very different prices. First of all, it is worth remembering that spare parts for the VAZ-2110 are manufactured not only by domestic factories, so you can find relays under brands such as BOSCH or Tomahawk. They are more expensive than those produced in Russia. At the same time, domestic ones have a better price-quality ratio. Brands such as VIS or Torgmash will cost you much less.
If you prefer to install original components from AvtoVAZ (often in stores they are labeled “made in Tolyatti”), then the relay will cost you about 1,000 rubles, and the entire starter – 5,000. Domestic manufacturers of spare parts can offer you more budget options. The price may be half as low, but the quality is not always worthy. Imported analogues, on the contrary, are twice as expensive, so a starter from BOSCH can be found for 10 thousand rubles, a relay will cost about 2,000.
What to do if the starter does not turn, repair on a VAZ 2110
Hello, dear motorists! We are sure that it is no secret to you: to start a car engine, you need to turn the crankshaft.
This rotation occurs with the help of a starter, which is essentially a DC electric motor. Its power is determined by the moment of resistance to turning the crankshaft and its minimum rotation speed.
It is difficult to overestimate the importance of the work performed by the starter - despite its small dimensions, it has to perform actions that ensure the rotation of the flywheel and, subsequently, the movement of the piston group of the engine
A situation has arisen when the VAZ 2110 starter does not work
Starters are fairly reliable mechanisms and often do not have problems in operation for a long time, but after five to six years of operation, some problems are still possible. So, for example, the most common situations when the VAZ 2110 starter does not work for the first time:
- the appearance of any defect in the power circuit (the starter does not have enough electrical power to turn the necessary elements)
- heating of the windings, which occurs due to prolonged cranking of the starter and contributes to rapid deterioration of the insulation
- The VAZ 2110 starter does not work even if the bushings fail, which prevents the normal rotation of the armature shaft.
Why doesn't the VAZ2110 starter turn?
The VAZ 2110 starter does not turn if the tips are loose or oxidized. The first aid in such a situation is to first clean and tighten all the terminals.
Disassembly and repair of the VAZ 2110 starter are provided if the relay is faulty (displaced, stuck or broken). In order for your “ten” to work again, it will be enough to eliminate the malfunction by replacing the failed parts.
A short circuit in any place of the starter winding also leads to its complete failure to work.
The absence of a full contact in the ignition switch requires checking the switch (lock) and, possibly, replacing its contact part.
The starter of the VAZ 2110 turns poorly - diagnostics of the condition and troubleshooting
If, when turned on, the VAZ 2110 starter turns poorly, cranking the crankshaft very slowly - first of all, pay attention to the oil - maybe it simply does not correspond to the season. Starter operation will be restored after replacing the oil with a more suitable one for the given time of year.
If the battery is discharged or its terminals and tips are oxidized, then immediately after eliminating these faults (charging the battery and maintaining the contact group), normal operation of the starter will be restored.
Poor starter performance is often caused by poor contact between the starter brushes and loose wire ends. In this case, you will have to remove and disassemble the starter, clean the commutator, change the brushes and adjust the spring tension.
If, after disassembling the starter, you find that the freewheel is slipping, the only correct solution is to replace the starter drive.
It is easy to correct the situation when the starter drive is difficult to follow the screw thread - you just need to first wash the shaft thread and then lubricate it with oil.
The nicks that appear in the teeth of the flywheel crown make themselves known by a characteristic grinding noise, which can only be eliminated by removing the nicks. A similar grinding noise is heard when the buffer spring is weakened. In this case, it will have to be replaced.
But a loud noise that accompanies the operation of the starter may indicate a loosening of the pole (when the armature seems to “catch” the pole) or the starter itself. In the first case, it is enough to strengthen the pole fastening by tightening the screw, and in the second, securely fasten the starter.
Even if you have a new car, you should not neglect monitoring the condition of the starter, because timely prevention and diagnosis of its malfunctions can significantly extend the life of the main starting device of your “ten” - the starter.
During the operation of vehicles, regardless of the type of engine installed, a common malfunction is starter failure, as a result of which it is not possible to start the engine after turning on the ignition. In other words, the car starter does not respond to turning the key in the ignition switch. In such situations, after turning the key, instead of cranking the engine crankshaft, the starter is completely silent, buzzes or makes clicks, but does not turn the engine. Next, we will look at the main malfunctions when the starter does not respond in any way to turning the key in the ignition, as well as other reasons that may cause the starter to not work.
Read in this article
Messages 17
1 Topic by amakasoff 2016-05-14 19:58:27 (2016-05-14 19:58:53 edited by amakasoff)
- amakasoff
- New member
- Inactive
- Registration: 2015-07-08
- Messages: 9 Thanks : 2
- Car: VAZ-21104
Topic: Resolved: Key won't start, starter won't turn. Error P1602
Hello. I encountered the following problem. The car (VAZ-21104, 1.6 l. 16 cl. engine 21124, ECU January 7.2) does not start with the key, the starter does not turn. I started it for a couple of days by bridging the contacts on the retractor. In this case, error p1602 hangs, loss of power to the controller. I thought the heels on the retractor were sticking, I took it apart, polished the heels, reassembled, the result was zero. I reset the controller, no effect. What else could it be? Ignition switch contact group? Signaling?
Final check before replacing the starter
We turn the key to position II, and nothing happens... In this case, open the hood and remove the air filter by unscrewing the screw on the body and loosening the clamp on the pipe. The starter is located under the filter housing. In the photo we see the following: someone disconnected the solenoid relay cord.
What we found under the filter, we check with a needle probe that when you turn the key, “+12” appears. Then, after checking, we wrap the cord with electrical tape.
- The copper is polished to a shine;
- The wire (see photo) is supplied with “plus”;
- The starter doesn't even click.
The first thing you need to check is the battery contacts. We remove the terminals (key “10”) and look at what is under them. There is no point in measuring the voltage with a probe - it will show “12 Volts”.
Main causes of malfunction
Problems
Minor or partial repairs will not always save the situation. But before removing the starter from the VAZ 2110, we recommend that you familiarize yourself with the main reasons for its failure, which serve as a reason for replacement.
- When turning the ignition key, a grinding noise occurs in the engine compartment. This is the cause of a faulty bendix or flywheel.
- Clicking noises are heard when turning the key. The reason is the solenoid relay, which needs to be replaced.
- The engine turns over with a friend. This indicates that the starter brushes are worn out.
The VAZ 2110 starter buzzes, but does not turn the engine.
Indicates that the electrical circuit is being closed and power is being supplied to the motor brushes. The electric motor is in working condition. The holding coil of the solenoid relay does not operate and the bendix does not move. Bendix gear does not engage with flywheel gear. The electric motor runs in idle mode. The cause may be either mechanical or electrical in nature.
Mechanical part. The force from the relay retracting element is transmitted to the bendix through a plastic lever shaped like a grip. If there is high resistance to the movement of the bendix along the rotor shaft, this plastic part breaks. The Bendix does not move to the working position, and the starter rotates without transmitting torque to the flywheel.
Another mechanical reason for the starter idling is the destruction of the teeth on the engine flywheel. The malfunction refers to a motor failure and is not directly related to the operation of the drive. The likelihood of such a malfunction may be indicated by the activation of all working elements of the starter, the spin-up of the electric motor and the transfer of the bendix to the working position, which is detected by a characteristic click when turning the ignition key.
When the solenoid relay is at fault
You got behind the wheel, turned the key, the instrument panel turned on, and the fuel pump started working. You turn further, but the panel turns off and the starter is silent. You release the key, the panel lights up again and the fuel pump starts working.
First of all, check if there is voltage going to the solenoid relay. Is it coming? Try closing the starter. Refuses to turn? Disconnect the alarm system, it may also be the cause, just like the ignition switch of the VAZ 2110 itself.
Have you discovered that everything works in “independent mode”, but together it fails? This means that the solenoid relay is faulty and should be replaced.
Where is the VAZ 2110 starter relay located?
The solenoid relay is built inside the main body along with the starter itself. To dismantle, you need to follow the following algorithm:
- Determine the location of the starter itself. It is located to the left, just below the battery. You need to look for it in the immediate vicinity of the checkpoint.
- Disconnect the negative contact from the battery. This will help avoid troubles during dismantling (electric shock).
- Dismantle the air filter to free up the “passage” for further actions.
- Disconnect all wires that go to the relay.
- Dismantle the nut that serves as a fastener for the end of the wire. For this procedure you need a key of 13.
- Unscrew the nuts that focus the starter itself. To unscrew them, you need to use a 15mm wrench. The top one can be unscrewed without any noticeable problems, but to remove the bottom one, you will need to apply a noticeable force (it is located in an inconvenient place).
- Completely remove the starter.
- Remove the nut that secures the output of the relay that performs the retracting functions, and disconnect the wiring.
- Unscrew the bolts securing the relay (you need to use a wrench and remove it.
Assembly is carried out in reverse order.
Communication connections
Worn wires and oxidation of contacts can also cause the starter to not work correctly. Long-term operation contributes to wear of the wires, and moisture ingress leads to oxidation of the connections.
Periodically replacing the wiring of the appropriate cross-section and regularly checking the contacts and cleaning them will help avoid problems with starting the engine.
These are the most common reasons why the starter clicks but does not turn. And even if you have a VVAZ 2112, or a Nexia or another brand, or a different design of the device, you will have the same problems with a discharged battery, worn parts and wiring.
Regular maintenance with diagnostics will help to identify problems in a timely manner and avoid unpleasant surprises.
Why does the starter spin but the car won't start?
For a successful start, a fuel supply with operating pressure, air and a timely spark are required.
It is also extremely important to prepare the correct fuel-air mixture. These conditions need to be checked first when the engine refuses to start.
Burnt contact of the starter solenoid relay VAZ 2110
Difficulties with starting or its impossibility can arise for a variety of reasons. The culprits should be looked for in the following devices:
- Fuel system malfunctions for all types of engines;
- Problems in the electrical equipment of the machine.
It should also be taken into account that starting the engine in cold weather is significantly different from carrying out this operation at above-zero temperatures. We will not touch upon problems with the battery and starter; we will assume that everything is in order with them, so we will focus only on the problems of the power unit.
The overrunning clutch has failed
A cold engine starts without the slightest problem. You are driving quietly, stopping somewhere - to go to the store or for other matters. You return a few minutes later and are faced with a problem: the starter clicks, but refuses to work. And only after the engine has cooled down the car starts.
The first culprit in this situation is the overrunning clutch (popularly called Bendix, from the name of the well-known manufacturer of this part). It is better to replace it with a gearbox.
But you check and there is no malfunction? The next line is the wires going to the battery. Examine them carefully. It is quite possible that replacing the wire will solve all the issues.
There may be another situation: while on the road, the radio starts to turn off spontaneously, despite your attempts to turn it on. Having stopped to look and turned off your VAZ 2110, you soon discover that you cannot get the starter to crank. We checked the battery, everything is fine, but the car, which previously started normally, suddenly struggles.
You start pushing, and it works, everything works again. Almost certainly the problem is in the Bendix.
Causes of frequent problems with the starter
As practice shows, the most common problems with the starter appear in the electrical part.
When your car won't start, the first thing you need to do is check the battery. The starter is powered only from the battery. If the battery is discharged and does not produce the required voltage, then even clicks will not be heard. If your car has a tester, you can check if the battery charge is correct. Simply turning on the headlights will help replace it; an experienced driver can understand the degree of dilution of the battery based on the lighting power. You can also twist the fasteners on the battery terminals if you suspect low voltage.
Typical starter faults
So, if the VAZ 2110 starter does not click, runs slowly when hot, turns when you turn the key, but the engine does not start, this may indicate certain malfunctions. As you already understand, you can diagnose a breakdown in one attempt. The ignition key of the VAZ 2110 engine must be turned all the way, listen carefully to how the mechanism works, to see if there are any changes. If the motor is spinning, then the relay is operational, and the breakdown most likely lies in the operation of the gearbox or clutch.
It is in the clutch that breakdowns often occur, to eliminate which it will be necessary to change the bendix itself. If you determine that the fault lies in the planetary gears, then it will be necessary to dismantle and disassemble the starter to replace the gears. There is also an option when when you turn the key hot, the device does not click. If the mechanism does not click, then most likely the problem lies in the lack of voltage on the relay or its inoperability. To diagnose a VAZ 2110, you need to put the handbrake in neutral, then disconnect the wiring from the relay and transfer the wire from the positive output of the battery to it.
If the relay works, then the reason is most likely in the ignition switch, electrical circuit or fuses. If there are no clicks, the problem must be looked for in the relay, but it will be more convenient and quick to replace it. It often happens that when you turn the key, the device turns slowly or does not turn at all, but in any case the engine does not start.
In this case, the fault can be diagnosed as follows:
- If there is voltage, then the breakdown should be looked for in the windings or brush mechanism.
- If there is no voltage, then most likely the problem is dirty relay contacts. To get rid of the malfunction, you need to disassemble the element and clean its contacts with sandpaper. But since you will still have to solder later, the problem can be solved faster and more conveniently by replacing the relay.